Facebook Does It Again, Silently Sending GPS Coordinates with Every Message

Tags: , ,

Yes, they’ve done it again.

The most-recent update of the Facebook mobile application (Android and iPhone) reverses and resets the default settings for “Location Services”, so that every single Facebook message you send, also sends your exact GPS coordinates to the recipient (and to Facebook’s own messaging servers), even if you have your GPS disabled on your phone. When the GPS is disabled, they fall back to AGPS to determine your coordinates with incredible accuracy.

Yes, even if you’ve had it disabled before, a recent update of the mobile app resets these preferences to expose your location when you’re using their Messenger app to send or receive messages through the app.

This is so specific, it actually revealed that I was in my kitchen (in the rear of my house), and not just my approximate street address on my road. Zooming into the map they helpfully provide, shows where inside my house my phone is when I sent the test messages that revealed this issue.

To prevent your phone from exposing your location with every message, go into your Facebook mobile application settings, and disable “Messenger Location Services”, as below. When you disable it here, your messages will just show “Sent from Messenger” or “Sent from Web” inside the app, instead of showing a map and GPS coordinates.

Click on the images below to see them full-size.

Facebook Mobile Messaging PrivacyFacebook Mobile Messaging Privacy GPS Maps

They may still be sending GPS coordinates with each message to their messaging servers, but not exposing it to the recipients when you disable this feature, but there’s no confirmed way to tell.

I don’t use the native Facebook mobile app to send or receive messages, opting instead to use Trillian Mobile for Android, which does not pass the GPS coordinates with each message. In addition, I can use all of my IM and chat services at once, in one interface, including Facebook, seamlessly. They have desktop apps and a web interface also, for those who wish to use those natively on any platform. Highly recommended.

Facebook, I’m not impressed with your complete lack of understanding of core security and privacy issues. This is 2013, and no application should be sending GPS coordinates to message or email recipients. Imagine what would happen if a random, unknown person were to message me, and I replied back to them. I’ve now exposed my personal location, which could include my home address, to a level of accuracy that includes where inside my home I am when I’ve responded.

In a word: Disgusting.

HOWTO: Search and Destroy “Unlabeled” mail in Google Gmail

Tags: , ,

I have over 14 years of email stored in Google Gmail now, all sorted, organized and tagged. It’s a huge archive going back through several jobs, plenty of experiences personal and professional. Some day it might make a good bit of data mining for an autobiography, but I digress..

One thing about Google Gmail has been bugging me for years! Google “folds” mail away in your Inbox, out of view, hidden, but not in any folder (what Google calls “Labels”, but they’re really individual IMAP folders).

There doesn’t seem to be any sort of reason for this, no algorithm and no obvious method to why they decide to take email out of your Inbox and hide it away from you. A bug? A feature? Who knows, but it’s annoying.

Here’s an example of what this looks like:

Searching Gmail Hidden mail

Notice that my search for “pinbot@pinterest.com” (Pinterest‘s mail robot) returns several hits, but only one of which is in my “Inbox”. Those others appear nowhere. They’re not in any folder anywhere in my entire IMAP or Gmail heirarchy.

They’re completely hidden, invisible, and only show up when you do a specific search for those terms. In other words, you can’t clean that junk out, delete it, unless you search for it first. Chicken-and-Egg problem, because you can’t search for what you don’t know exists.

There have been hundreds and hundreds of posts trying to come up with solutions to this problem, including using the “-label:” syntax to exclude labels from the search, leaving only “unlabeled” email.

That works great, if you have a handful of labels, maybe a dozen or two, but I have hundreds of IMAP folders (erm, “labels”), and they’re nested pretty deep in some cases. Trying to append all of my labels into one big long search string, does not work, because of a string limit in the search field. Fail.

So then I tried the somewhat magical “-label:*” search, but it returns mail with labels too, for some randomly odd reason. Another fail.

Then I tripped on someone who has a more elegant solution to the problem, rolled up into a Greasemonkey extension. Enter “gmailUnlabelled“!

Once you install the extension, you’ll find a new “Unlabelled” link on the left side, in your labels group. Clicking that will reveal email with no labels, the “hidden” email that Gmail ferrets away from you, away from your searches, away from your folders.

gmailUnlabelled installed

Find it, label it, or as in my case, kill it off. I have 10,543 emails in my “All Mail” folder, and I’m sure a few hundred to a few thousand are going to fall into the Unlabeled category.

big Gmail All-Mail folder

Now I can begin the process of pruning that out and cleaning out my mail even further. I hope this helps others who may be facing the same problems.

AT&T Locks Horns with Hurricane Sandy and my data-only MiFi

Tags: ,

AT&T DeathstarWe were hit pretty hard by Hurricane Sandy out here in New London, CT. Lots of property was damaged, wiped out boats tossed onto shore and crashed into other property.

We also lost power, thousands of homes without power for days, as trees came crashing through wires, telephone poles were pulled to the ground by falling branches and lots of other damage knocked out power transformers and substations.

Where I live, we lost power for 7 days, and that power loss means no Internet, no micro-cell, no DSL. Darkness.

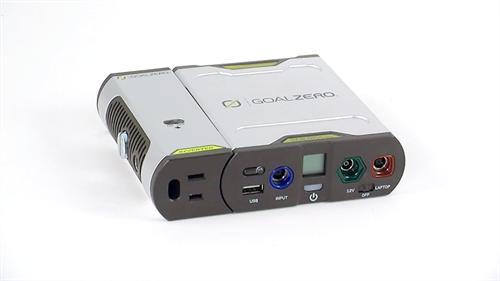
I use a Novatel 2372 MiFi device when I’m on the road to get onto the live Internet, over 3G speeds. This is the only way I could get Internet access when the power went out. Unfortunately, this device also only has 1-3 hours of battery life, depending on how much I’m pulling across it. To keep it charged, I had to plug it into the inverter in my truck, and hope that it would stay online long enough to get through my work day.

Since I don’t do “streaming” or “downloads” across this device, I never came close to hitting any data usage limitations. My data plan on this specific device (data-only SIM provisioning) was “Unlimited” from AT&T. I’ve been using this since ~2008 as an “Unlimited” data device.

5 days into my use of the MiFi as my only Internet gateway, I received an email from AT&T stating:

As a valued customer, we are sending you this email to assist you in avoiding possible service interruption and minimizing your bill. Our systems have detected that you are using a substantial amount of data.

Your May 2012 bill contained a notice that your DataConnect plan has expired and that you will be billed $10/GB for any usage that exceeds 5GB in any billing period.

If you use 5GB in a billing period, we will temporarily suspend your service. This is to give you an opportunity to contact us to discuss your options, including changing your plan to one that is $50 per month plus $10/GB for any usage that exceeds 5 GB. You also have the option to terminate service without penalty.

To avoid a possible suspension of service, please contact us now at 800-331-0500 or 611 from your wireless phone, so that we may assist you in selecting a plan which meets your needs.

I called them to inquire why I received this email, obviously an error on their part, since my plan was “Unlimited”.

The woman I spoke with on the phone claimed that these “Unlimited” plans had been phased out in 2008; 4+ years ago, and I should have received an automated email in 2010 alerting me to this fact. Since I’d never reached the 3.5GB “soft cap” before, I never received the warning email.

While on the phone, I asked her if she could make sure my plan was truly “Unlimited” and remove any blocks, email alerts or other things preventing me from using the device as originally purchased and intended.

She proceeded to tell me that AT&T no longer offers any unlimited plans, and that my only option is to “bump up” to a 5GB (5 gigabyte/month) plan. I’m already paying $59/month for the (pseudo)-Unlimited plan I thought I already had.

It turns out that when you reach the 5GB limit, email-alerted or otherwise, your service is suspended, but AT&T will continue to bill you at the full rate even though you are unable to use the service any longer. You cannot “un-suspend” your service, you can only stop using the current plan, and subscribe to a new/different plan. This is to “encourage” you to call them and subscribe to one of their other plans, the only plan available; the 5GB/month plan.

There are no 10GB plans, no 20GB plans, no Unlimited plans. You get 5GB/month, and every 1GB over that capacity, you pay $10/GB for that.

Then I asked her if I could simply terminate the “data only” SIM account, and add the “Tethering” package to one of my BlackBerry phones (I have two activated, both with truly “Unlimited” data), and avoid the need for a dedicated SIM/device for data. She said “No, we cannot do that, because Tethering isn’t permitted on Unlimited data plans.” AT&T closed this hole about a year ago, when you could use tethering, for no charge.

So I had her “fix” the problem, by subscribing to the proper 2012 “data only” 5GB/month plan, terminating my older plan, which would have locked me out, should I have reached that 5GB/month limit, intentionally or otherwise.

The operator helpfully re-provisioned my MiFi device with the correct “data” plan, and said I should see no other issues with the service or plans, other than the charge was now $10/month cheaper than my original plan from 2008.

What frustrates me, is that they never said they were cutting off the older plans, nor was there any warning or grace period before you’re shut off, and shut off for good.

Good going, AT&T. I was just trying to use the hardware I have, under the terms I’ve been paying for since 2008, so I can get my day-job work done.

The other oddity, is that my data-only MiFi device is subject to the E-911 Surcharge, even though the device can’t possibly allow me to dial 9-1-1 from it, in the case of an emergency. In fact, even if I were to pop the SIM out and put it into a phone, I still cannot dial 9-1-1. So why the charge? I asked, and received this as a response:

“The Federal Government passes this charge onto us, so we in-turn pass it directly onto you.”

Yes, that’s right, I pay monthly, for the “right” to dial 9-1-1 from a device that literally cannot dial 9-1-1 at all, ever. Neat!

Sprint and Verizon’s data plans and options are sure looking attractive these days, when weighed against the heavy hand of AT&T.

tl;dr: AT&T silently caps, then retires my “Unlimited” MiFi data plan 4 years ago, replaces it with a 5GB plan with no other alternative choices; 5GB or no GB.

HOWTO: Block “SongPop” game updates and events on Facebook

Tags: , ,

Facebook logoI’m a big fan of keeping my Facebook feed, news and wall clean and filtered, no junk and no noise that I don’t need or want to read.

On Google Chrome, I use the “Social Fixer” extension to block ads, drop columns and other unnecessary items from the pages, but this doesn’t work on Firefox Nightly builds because of a Javascript Sandbox change that the Social Fixer author hasn’t been able to find and fix yet.

But “Social Fixer” can only block some of the noise that Facebook renders, not all of it. Firefox is my preferred browser, so I needed to find a better solution here. Even SongPop’s own Support Page misunderstands the need of hundreds (nigh, thousands?) of Facebook users.

Most-recently, some of my friends have been playing a game called “Song Pop” on Facebook, and their status updates fill up my news feed on the right side. Last year it was Farmville, and this year it’s SongPop.

Here’s how to stop the noise from taking over your Facebook feed.

  1. First, search for “SongPop”, no spaces, in the Facebook search box at the top. Make sure you pick the Game page, not the App page. If you search for “Song Pop” with the space, you’ll get the wrong page.
    Search for SongPop on Facebook
  2. Now you should see the SongPop page, which looks like this:
    Facebook SongPop page
  3. Down on the lower-right side of that page, is a link labeled “Block”, and looks like this:
    Facebook block SongPop link
  4. Click that link, and you’ll get a popup to confirm your choice:
    Facebook block SongPop confirm
  5. Click “Confirm” on that link, and you’ll see the following success dialog:
    Facebook block SongPop successful
  6. Now to confirm this, go to your “Privacy Settings” in the upper-right corner, scroll down to “Blocked People and Apps” and click “Manage Blocking”. Scroll down again to the bottom and you’ll see:
    Facebook BlockApps SongPop

That’s it. Now if you go back and reload your Facebook Feed, you’ll see that the SongPop posts that were there moments ago, are now gone, stripped from your feed. If you want them back, just go back into the “Blocked People and Apps” and click the “Unblock” link shown in the image above.

Good luck!

HOWTO: Travel Like a Ninja, Tricks and Tips to Make it Enjoyable

Tags: , , , , ,

For those of us who travel very frequently, there are dozens of useful tricks and tips you can adopt to make your travel experience smooth, seamless and very enjoyable, whether you’re traveling via air, rail or automotive; domestic or abroad. I’ve traveled with lots of people over the years. I’ve seen seasoned travelers who end up at their destination exhausted, frustrated or missing items because they’re disorganized, under-prepared or just plain scattered.

If you follow even some of the tips below (100% of these culled from my own personal experiences), you’ll feel much safer, happier and land with more energy than most of your fellow travelers.

Here’s a short list of my personal tips for the three most popular modes of travel:

Airline Travel

traveling via airplane

  • Prepare your Passes: Order your tickets and print your boarding passes before you reach the airport. If you have the ability to use an Electronic Boarding Pass, do that. There are several apps out there for that. Search your respective App Store for the right app for your device; [Android] [iOS] [BlackBerry]. If you come to the front counter unprepared, you’ll slow down other travelers, and lengthen the process. If you’re not familiar with using the kiosk, ask the attendant to help you, or proceed directly to the counter and have them process your itinerary from there, freeing up the kiosk for others who do know how to use it. Seriously, don’t hold up the line if you don’t need to.
  • One Bag to Rule them All: While not always possible for some travelers, avoid checking any bags at all. No, seriously! If you can, just travel with one bag, you will reap the many benefits of that stress-free travel environment. No more lengthy lines, no more paying growing fees for checked bags, no more standing in the airport exhausted after your flight waiting for your luggage to appear on the baggage carousel. Simply de-plane, walk outside to your taxi and go. No stress, and everything is kept in one bag that you can carry with you. I’ve been traveling with just one bag for trips ranging from 1 day up to 14 days in distant foreign countries without any sacrifices in gear or convenience and you can too! If you’re flying to a fun destination, you can just taxi to the center of town and start walking around, without worrying about where your luggage is, checking into your room or anything else. Just de-plane and start enjoying your destination.
  • Boarding Documents: When you’re standing in line waiting to have your boarding pass and ID checked, make sure you have those two documents readily available, in an accessible pocket of your bag, coat or purse. It’s generally not a good idea to just hold them out in the open in your hand, where they can be seen/read by other standers-by looking over your shoulder, or accidentally dropped, fluttering out of your reach behind the line barriers where you have to get out of line to fetch them. Nothing is more annoying than to be behind the person who is standing in the boarding line, reaches the agent and says “Oh yeah, my boarding pass, hold on, I think I have it in here somewhere…” and proceeds to fish around through their bags, pockets and luggage to find their pass, while they could have done that in the 20 minutes they sat there in line talking on their phone instead.
  • Security Lanes: When you reach the TSA scanner line, be efficient and fleet about organizing your articles into the plastic bins and on your own person. I will normally step up, grab three bins from the top and put them on the rollers, put my bag into the first bin at the front, and remove articles out of the bag (computer, liquids), putting them into the second bin in the middle. The third bin, I leave for my personal items (jacket, wallet, belt, watch, change, cellphones, and so on). Once I’ve unloaded my bag and items I’m wearing, I’ll remove my shoes and place them into that third bin and push the three of them towards the baggage scanner tunnel. The whole process takes less than 30 seconds for me. I’ve sat there and watched people fumble with their bags, coat and shoes for 3 minutes or more, again holding up the lines.
  • Opt Out of Backscatter: Opt out of the TSA “backscatter” X-Ray imaging line. If you value your health and longevity in this world, not to mention your personal and public privacy, don’t even step into that line. Not only is it faster if you opt out of backscatter scanning, but you won’t have to deal with the potential lingering health issues from using it. There is at least two different styles of scanners, one is “less” dangerous than the other, but you can’t reliably tell which technology is used (and don’t trust the TSA agents to tell you, I had one agent tell me that these “were not x-ray devices”, a flat-out lie). Just avoid them altogether, and opt for a pat-down search instead. It’s faster, and you’ll be thankful you did.
  • Straight to the Gate: When you get past TSA security, go straight to the plane departure monitors along the hallway to your gate, and find your gate of departure. Don’t stop on the walk to your gate and get a coffee or beverage or newspaper. Find your gate first, check to make sure your flight has not been delayed or moved to a different gate, and then fetch your coffee or snacks. The reason you want to do this, is so you know how far it is from where you are, to where you need to be. Also, you can check to make sure the gate’s seating isn’t filled, or other complications that could slow you down. I’ve seen too many people miss their flights because they assumed there would be a gate, seat and flight where it was printed on their tickets, and found out at the last minute as they come huffing and puffing out of breath to the gate, that their gate was moved to the complete opposite side of the pavilion.
  • Ornery Outlet Use: When you need to use one of the power outlets at the gate, be respectful of others who may be using the same outlet to charge their devices. Don’t unplug their device so you can plug yours in, and don’t ever, EVER touch their device, move it or play with it in any way. To make sure I’m not unnecessarily hogging or blocking the outlet, I use a “power strip liberator” pigtail, which lets me plug my charger/device/adapter several inches away from the outlet, so I don’t block the other plugs that may be in use. I’m being a good travel citizen by doing this, and not making it hard for someone else to share the same outlet. There are definitely people who hog the whole outlet with the “I got here first!” mentality, but asking them nicely to share the outlet with you can go a long way. I also carry a travel power strip with me, to help add more outlets where there may only be one. I plug one wire to the wall, and have 4 open outlets available to me for use. I’ve even offered those unused outlets in my strip to other travelers who need to use the power outlet, but can’t because someone else has used up all the spots.
  • Gate Crowds: Please don’t stack up and linger around your outbound flight’s gate, waiting for your “zone” to be called. Not only does it create crowding and confusion, blocking others from passing through, but the plane isn’t going to leave any faster if you get there 1st, or 5th or 25th. The gate agents don’t appreciate the crowding, nor do the other passengers. Also, only queue up when your zone is called, don’t try to be coy and “zone hop”, going in when Zone 1 is called, when your ticket clearly says Zone 4 on it. Seriously. Don’t be that person.
  • That Bag Won’t Fit: Airlines are becoming more and more strict about what they will and will not allow onboard, especially for your carry-on luggage. Although your cloth, soft-sided backpack may be the right physical dimensions to fit in the carry-on allotments, the tendency is to over-pack it with a jacket, cables, a laptop, the sandwich and juice you just bought, or other gear. This ends up making your 9″ thick bag more like 13″, larger than can be accommodated in the overheads or under the seats. If you reach the gate and they find that your bag is too large, they will demand that you check it. If you check a soft-sided pack, you put your belongings at much greater risk by having it checked at the gate, than having it checked at the ticketing counter when you first arrived. Don’t over-stuff your stuff, or check it at the ticketing counter.
  • Don’t Stuff your Overheads: If your bag is one of those steamer trunk sized bags you call a “rollaboard”, check it at the counter before you reach your gate. One of the worst, most obscene things, is the traveler who has a bag too large, and takes up all of the overhead space and doesn’t even open or use any items from within that bag for the full length of the trip. That bag could have been checked, leaving more space for travelers who do need to use that space while they’re on the plane. I’ve seen this abused time and time again, and it perturbs me every single time. The same goes for having two large pieces of roller luggage, and trying to take up two overheads to hold it all. Also, don’t put your jacket, coat, purse, umbrella or other items up there until the luggage from others has been stowed first. Wait for everyone else to get their bags up there, and then put your jacket or other items in the space left over. This also includes taking up overheads that don’t belong to your seat row. Just because you brought too many bags onboard, doesn’t mean you can take up someone else’s allocated space. I’ve been on flights where 10 rows boarded the plan and the entire overheads were already filled up, because people brought too much luggage onboard. Just don’t.
  • Stow and Sit: Once you’ve reached your seat, put your bag on your seat, remove the items you need for the flight, and then quickly stow the bag overhead or under your seat, so others can pass you and use the remaining overhead space for their own luggage. Don’t block the aisle, don’t drop your bag on someone else’s head, and above all, don’t remove someone else’s luggage from the overhead just so you can fit yours in there.
  • Turn off ALL Electronics: When the flight attendants tell you to turn off all electronic devices, please do it. Don’t try to sneak out that one last phone call or text message, or pretend that your Kindle is really off. Really turn it off, phone and all. When the flight attendants have to reprimand you for not listening to their requests, it slows everything down, and flights don’t leave on time. For phones, you should enable “Airplane Mode”; here’s how to do that for Apple devices, Android devices and BlackBerry devices.
  • Leave your shoes on!: You can loosen the laces if you need some more comfort, or to wiggle your toes, but please leave your shoes on. We’re all on the plane to reach our destination, and having to breath the same air for the entire flight, including the evaporating sweat from your feet. Nobody wants that. It’s also not permitted by almost all airlines. There are plenty of articles on the quality of air in the planes, and the results aren’t good. Keep your shoes on, and help keep the air cleaner.
  • De-planing: When the plane lands, arrange your bags or items at your seat, in preparation for disembarking the plane. Gather up your trash and take it with you. Pack your bags, making sure to check that pocket in the seat back in front of you for your headphones, magazines or other items you may have stashed there. This makes it a simple process of standing up, and walking off the plane. You don’t need to fuss with the baggage in the overheads, fiddle with various bags, zippers or other items or hold up other passengers.
  • Thanking the Flight Staff: As you walk off of the plane and head to the front, don’t forget to thank the flight attendants and the pilot/copilot for a smooth, safe landing. It’s a small gesture, but it means the world to them. You put your trust in them and they delivered you to your destination safely. Thank them for it. You’ll both feel much better, and it will give them the support they don’t always get from their passengers.
  • Luggage Lunacy: If you do have luggage to wait for, find your baggage carousel quickly and stand by it, but don’t stand at it. There is this tendency to have everyone with their knees up to the edge of the carousel, waiting for luggage to pass by that looks like theirs. The problem here, is when there’s a crowd of people blocking the carousel, people behind them can’t see through to find their bags. If your bag isn’t seen, step back and let others find their bags. If you must stand right at the front, you should be prepared to help straighten the crooked/wedged bags, or help others grab their bags off of the conveyor quickly. Don’t just stand there blocking others, waiting for your bag to come across.
  • Taxi/Shuttle Lanes: As you leave the airport, find your taxi or shuttle line quickly and efficiently, and don’t block the doors for others who may be trying to come out to catch their own taxi or ride away from the airport. Many times there is a precedence to how you queue up in line and wait for your turn. Use the available airport employees for help. If you need it, ask them. That’s what they’re there for.

Rail Travel

traveling by train

  • Order Tickets Online: Order your train tickets online before you reach the station. Not 10 minutes before your schedule departure, but days before. In some cases, this can save you quite a bit of money. If you’re an AAA member for example, you can get a 10% discount on Amtrak tickets bought at least 3 days in advance. Travel times matter also; there are some trains that are 2-3x the cost of others, within an hour one way or the other from your travel time. You can save quite a bit if you choose a train that leaves an hour earlier or later. One of the benefits of buying your tickets online is that you’re not stuck waiting in line at the station to purchase your tickets, print them and wait for your train. I’ve seen people miss their train, because they thought they’d get to the station and buy their tickets and board, but when they got there the line for tickets was 15 people deep. Order your tickets online, print them ahead of time if you can, or use the kiosk at the station to print them for you, using the trip ID you received from your online ticket purchase.
  • Board, don’t Hoard: When you board the train, keep your bag behind you in the aisle, on your back or rolling behind you. If you try to sling it around to the front, or sway it back and forth, you’ll bump all the seats, other passengers, and slow your progress and irritate everyone. Find a seat, stow your bag overhead, and sit comfortably. If you need something from your bag, wait until the train is underway, when everyone else has already come down the aisle and found their seat, before fetching your items. Too many people block the progress or egress, by trying to get items from their bags, standing out in the aisle, while others are blocked from finding their own seats.
  • Tickets please, Tickets: When the conductor comes by to collect or scan your train ticket, make sure you have those items already at the ready, not stowed deep within your bag under your laptop or inside your purse. You don’t need to wave them around in the air or signal the conductor, they’ll find you and collect them. Let the conductor scan your tickets and give you your seat check tickets, then stow your tickets away in your bag.
  • Seats, then Eats: Don’t go to the café car first to try to get a beverage or snack, you’ll only irritate the conductors who are trying to check the tickets of each passenger who has found their seat. If you find your seat first, have your ticket checked by the conductor, then advance to the café car for your drink or snack, you’ll be much happier, and the train staff will appreciate you for it. Make sure you take your seat check with you if you leave your seat, so you can confirm that you’re supposed to be on the train to any conductor asking where you may be sitting.
  • Be Respectful: Other passengers are traveling with you, so please be respectful of their quiet time, seating space and their need to move about. If they’re being loud or rude, you can certainly call them out on it. Anyone blocking the aisle with their feet or bags, can be asked to move them so you can pass. If you’re in the “Quiet Car” or a quiet environment, don’t use your telephone and make loud calls. If you need to make a call, do it in the vestibule, not in the general seating quarters. Also don’t make those loud phone calls in the café car. That’s just downright rude, and nobody wants to hear one side of your conversation at twice the volume of a natural conversation.

Automotive Travel

traveling by car

  • Snacks, Fuel, Tires First: Do some quick research around your local area of departure to find the cheapest fuel for your vehicle. I use an application called “Poynt” on my BlackBerry to do this, but you can use whatever source you want for your particular device. With the prices of gas growing fast, finding the cheapest gas before you depart, will make all the difference. The important thing is to gas up first, before you leave for your destination. Nobody wants to run out of gas, or realize that they have 17 miles until the next gas station, and only 10 miles left in the tank, or that gas is $0.70 more per-gallon near their destination than where they started. While you’re at the gas station, walk around your vehicle and check the tires inflation to make sure there are no “soft tires”. The gas station will have a tire inflator for you, and you can knock both items out in one location. If you want, grab some snacks, drinks or other items from the gas station while you’re there, to help keep you nourished on the drive.
  • Pack Wisely: This may seem redundant, but when you’re traveling in your car, especially if you’re traveling alone, make sure the items you need while driving are within arm’s reach of your driver’s seat. If you realize as you turn into the setting sun that the sunglasses you need are in the 3rd pocket down in the bag that is directly behind your seat, you’re going to have a bad time. Pack a separate bag for your glasses/sunglasses, snacks, tissues or anything else you need at the ready, on your passenger seat, or in an easy-to-reach location. You should be able to reach into this bag without looking and find what you need, one-handed. If you’re traveling with a passenger, enlist them to help you find, open/unwrap the items you need while you drive, so you can keep both eyes on the road, and both hands on the wheel.
  • Terminate the Texting: Please, for your own safety and the safety of others traveling on the road with you, do not text message while driving! I know it’s difficult, especially if someone contacts you with an urgent text or email, but nothing is worth drifting off the road because you looked at your phone to reply to a text, and hitting a tree or oncoming car. If you want to “read” those texts, or respond back, use DriveSafe.ly or Vlingo. Both of these apps allow incoming texts/emails to be read to you verbally. Vlingo allows you to speak your outgoing message and Vlingo will translate your voice into text, and send that instead. You don’t need to look at your phone’s screen or tap on a phone keyboard to send the message. Better yet, just don’t do it at all. If it’s that important, find a safe place, pull over, put on your hazard lights (if appropriate), and send your message from there, or call the person on the other end, then continue driving on.
  • Charge your Gear: Make sure before you leave, that your phone, GPS and other devices are fully charged. If possible, carry a secondary battery or battery pack for your devices to make sure that they remain charged, even if they run out. For in-vehicle charging, there are plenty of cigarette-lighter-to-USB alternatives to choose from. Nothing sucks more than having your GPS run out of battery en-route to your destination, and being lost in a foreign country with no map and nobody speaking your language.
  • Multiple Maps: Better than an electronic GPS are printed maps. I know, it’s “old school”, but maps don’t require power or batteries, you can write on them, fold them up and keep them in your pocket and more. If you have a GPS device, you can use the paper maps as a backup. You can print your mapped route from Google Maps, Bing or other service. If you’re a AAA member, you can order a “Trip Ticket” booklet for your journey, as a perk of being a member. These can save you in tight situations where you may need them.

Accommodations Happiness

hotels while traveling

  • Keys, keys, keys!: When you check in, let the staff know what you need right away; non-smoking room, ground floor, two room keys, 7am wake-up call, shuttle or taxi or anything else you need. The job of the hotel staff and concierge is to provide these for you. If you ordered your room online prior to arrival, you can still make room changes or service swaps when you arrive, before checking in. Many hotels will also have dozens of spare chargers, should you find yourself without one, or missing the one you thought you packed. Lots of travelers forget their chargers in the room and hotels collect these by the hundreds per-year.
  • Check ALL THE THINGS: When you reach your hotel or accommodations, check everything! Turn on all the lights; in the bathroom, the main room and any lamps on tables that you may use. Also check that the A/C or heater works, and there aren’t any obvious smells emanating from it or other things preventing comfort in your room. Close all of the blinds and shut the door to make sure there are no obvious things wrong with their function, and that the room has sufficient “darkness” to let you sleep thoroughly. Check that the shower and sink have running water, pressure, and more-importantly, hot water. Check all of this before you spend your first night in the hotel. The last thing you want to do, is go down to the hotel lobby at 6am and ask for a room change because your shower is not working, or because you have no hot water, making you late for that 8am meeting downtown. If you have anything that needs to be refrigerated, make sure the fridge is turned on, and gets cold. I’ve had at least two trips where I put items into the fridge and went out for the day, only to find them drenched in water and melted because the fridge was off, thawing out the icebox onto my items. Also, don’t forget to check that the room safe also works, so you can store your passport, valuables or other items in it.
  • Power to the Peripherals: Once you’ve verified everything in the room is in working order, find the convenient power outlets and charge your items. When you’ve been on the plane or train, your items were probably still powered on, still searching for cell towers or signal, still trying to associate with the local wireless. Plug them in, and charge them while you acclimate yourself to the room, wash your face and hands, unpack your luggage, lock your bags or whatever routine is appropriate. These extra minutes of juice will help keep your devices from running out of power when you need them most. When you retire to your room for the night, do the same thing; plug your devices in and let them charge overnight. This includes your phone, laptop, bluetooth headsets or anything else you might bring with you. I use a Callpod Chargepod device to charge my gear, which you can see here, as I use my layover time wisely to charge my gear while waiting for my next flight. I’ll do an exposé of my carry-on bag at some point, to show how I efficiently travel with all of this gear.
  • Reuse Those Towels: If you want to help the hotel, avoid interruptions and save on water, reuse your towels. Treat it like your own home bathroom. Do you use a single towel once and then throw it in the laundry? I know I don’t, so don’t do that in the hotel. When you leave your room to check out, put all of the towels and facecloths in the tub. Don’t leave them scattered around the room or on the floor.
  • Do Not Disturb: If you want peace and quiet, ask for it. Put the “Do Not Disturb” sign on your door, or if necessary, ask for a room switch to a quieter floor or side of the hotel building. Sometimes you’ll find yourself in a hotel with a loud set of patrons, or on the busy highway side of the building. Switch out if you need to.
  • Lock It Up: I can’t stress this enough. If you’re traveling with anything valuable, including your cash, travelers checks, passport, photo ID, small camera, phones or other items, lock them up! The room safe is a relatively safe place for these things, and you should use it. As mentioned before, make sure the room safe actually works before putting your items into it and closing the door. Check that when you arrive in the room, not the next day. I also use a Pac-Safe eXomesh around my backpack/bag when I travel (especially overseas), and it has always served me well. I tend to lock it up in the closet, or against an immovable object that can’t be easily shimmied around or removed from the room (as I’ve done here on my trip to Singapore). Don’t lock it to the leg of the chair or table or bed, where it can be slipped around and removed. Also, when using something like the Pac-Safe, remember to lock the zippers of your bag to the mesh! If you just wrap the bag in the mesh and leave the zippers alone, you run the risk of someone sliding the zippers open under the mesh, slipping their hands in and removing your items; wallet, keys, money, id. Lock both zippers to the same mesh cross-section with a solid padlock (I use TSA cable locks). If your bag doesn’t have good, solid, lockable zippers, get a new bag.
  • Car Safety: If you drove to the hotel, park your car in a reasonably safe place under the parking lot lamps, or within visual range of your hotel room. After you check in and sight out what view your room has, you may be able to relocate your car so you can see it from the room. If you can’t, put it into a place that is visible, well-lit, and safe.

Other Things

  • Analog Digits: Print the phone numbers of everything you need; hotel, contacts, airline help number, mobile numbers of friends that you need to call, “mom”, rental car office and any other numbers you may need. If your phone gets lost, stolen or the battery dies for any reason (such as leaving it on while the plane is in the air). You’ll be happy you had a hard-copy of your phone numbers if anything odd should arise, preventing you from accessing them digitally.
  • Call the Concerned: If you have friends, family or a loved one waiting to hear that you’ve arrived safe and sound, call them. Let them know you’re in your hotel, or landed safely at your destination, so they know not to worry about you. If you’ve had delays or any cancellations, let them know that too. When you arrive at your hotel, make sure to let your partner or loved one know the phone number of the hotel and the room you’re staying in, so they can call you if necessary. It’s such a little thing, but it means so much to those who care about you.

Hopefully you will find these tips and tricks useful, and they will help others. If you’ve got more tips of your own, share them in the comments section and pass this link on to your friends, family or colleagues.

Good luck and safe travels!

HOWTO create an Outlook rule to filter email you’ve been Bcc’d on

Tags: , , ,

Yes, you can create an Outlook rule to filter off emails to another folder (or delete them) if you’ve been a Bcc recipient of an email.

These are commonly found on internal work network emails that are sent from an automated process to every employee in the company. You’l recognize them because the “To:” and “Cc:” lines are usually empty, blank, with no apparent recipients.

There are a lot of people on the Internet looking for a solution to this, and plenty of third-party add-ins that claim to handle this, but all they’re doing, is creating the same rule I’m about to show you how to create to achieve the same result.

Here’s how:

First, open up (by double-clicking) the bulk email you’re trying to include in this “Bulk Email” filter/rule you’re creating. While open, click on the little chevron on the bottom-right of the ‘Tags’ section of the email.

Outlook email tags header detail

In the window that opens, at the bottom, you’ll see “Internet Headers”. Scroll to the bottom of that list of headers until you find something you know you can key on.

In my case, it was the string “Undisclosed recipients”, as shown below. Yours may be the same as well.

Outlook email Internet headers

Now go into Outlook’s rules (Rules -> Create New Rule -> Advanced) and select the following criteria:

  • Apply this rule after the message arrives
  • where my name is not in the To box
  •   and with “Undisclosed recipients” in the message header
  • move it to the Bulk Emails folder

Choose whatever folder is appropriate for your own configuration. In my case, I created a folder called “Bulk Emails”, and routed the emails there.

It should look something like this:

Outlook email bulk email rule conditions

That’s it. Now you can run the rule, or wait for email to come in and get routed to your Bulk Email folder.

Keep in mind too, that this should not be treated like the “Junk Email” folder in Outlook. You will want to go into here at least once a week or more frequently, read the emails, possibly respond, and delete them. Don’t let this folder accumulate emails or you will be overwhelmed if you do wish to clean it out at some point.

Good luck!

PocketMac: The Little App that Couldn’t

I recently installed Outlook 2011 on my MacBook and I use a BlackBerry Bold 9700 devices (two of them; work and personal) as my primary handheld/phone device, and also my main data device.

I searched around and found lots of hacks, tweaks and scripts that attempted to try to get the two sides to talk together, including lots of backup, export, import, use Google, etc. solutions.

All hacks. All worthless.

Since Apple no longer supports iSync in OS X 10.7 (Lion), and iSync does not recognize a BlackBerry device, that option was out too.

I like clean solution, not hacks and workarounds, so I kept searching and came across a tool called “PocketMac for BlackBerry“…

PocketMac About screen

Read the rest of this entry »

SOLVED: Correctly working pinch/zoom and multitouch gestures in Firefox on Mac OS X

Firefox for MacI’ve recently been moving the bulk of my personal and professional productivity needs (software, analog, digital) over to my OS X machine. Linux is my main OS and will be for awhile, but there is a distinct lack of efficient, well-written, intuitive software for Linux, so I’m bridging the gap right now by using OS X on the Mac.

One of the tools I use every day happens to be very cross-platform compatible; Firefox.

I need a working browser to get the bulk of my work done on a day-to-day basis and I prefer Firefox over any other, because of the speed, power and flexibility through the use of extensions. Nothing beats Firefox for this; not Chrome, not Safari, not Opera and certainly not MSIE.

The Mac has some interesting UI optimizations, one of which is “pinch zoom”. This basically means you can take two fingers, put them on the Touchpad or Magic Mouse (if you have one), and pull them together (pinch) or slide them apart (zoom) to zoom in or out on an app or a window. This comes in quite handy for webpages, Flash images and other things.

However, Firefox for Mac, doesn’t support these out of the box. It took a little bit of searching, but I found the solution! Enter about:config to the rescue!

Read the rest of this entry »

SOLVED: Resetting your Apple ID with cut-and-paste enabled

Apple LogoIf you’re like me, you have lots of passwords. More than you can keep in your head. So, you use an app like KeePassX to hold and secure them all.

I keep all of my passwords securely stored in Dropbox so they are accessible via my computers and my BlackBerry device (via the FileScout Dropbox plugin), and it works well. I also sync that data into SpiderOak as an additional, very secure backup of my backup.

My passwords tend to be very complex and lengthy, on purpose. Here are some example passwords that are similar to those I use every day (no, these are not my actual passwords, but these are real, valid passwords I would use, generated by KeePassX’s generator):

1.) {>"L-).df_7jGWGeK9fy,agF
2.) UY}\.YX_zG#mP2KSo%nHM-t!
3.) axA-O=Af6nAMW_Og%H2WkC/
4.) -A&Xh0ag^6(uMNlt+WyF_K"S
5.) =C\;NPk4Cz5Hyte-a,_nUhpx
6.) Dn-99kMeNF]jr_#7"<3]#dBY

These are 158-bit (24-character) passwords that KeePassX generated for me for this article. It may look like random keyboard hammering noise, but those are real passwords. And there’s no way I’m going to remember those.

My Apple ID contains a similarly complex password, and I recently had to reset it because Apple “forgot” my password, but Apple’s site refuses to let me paste those complex passwords into their web form entry dialog because of the heavy-handed JavaScript on the page.

What this does, is encourage people to pick “simpler”, less secure passwords. Shame on you Apple, shame on you!

Here’s how I figured out how to fix it:

Read the rest of this entry »

SOLVED: Permanently setting “Hide Join/Part Messages” off in XChat

XChat logo
I’ve been using XChat since early year 2000 (loooong time BitchX user before that), and have found it somewhat annoying to have to manually and interactively disable the “Join/Part” messages in each IRC channel I am lurking on.

To do that, you normally have to right-click each channel’s tab, go to Settings → Hide Join/Part Messages” and check the little box. For each channel.

XChat hide join/part messages

If your client is reset or reconnects to the IRC server (due to a server HUP or upstream network rest), you have to do it all over again. It’s a pain.

Since I leave XChat running for months on end with dozens of joined channels, it becomes a lot of visual clutter for very busy, high-traffic channels.

Here’s how to fix that, so you don’t have to set it again for any of the channels you’re joined to. Simply type these two commands into your XChat IRC window:

/set irc_conf_mode on
/gui apply

That’s it! Now all of your channels’ Join/Part messages will be muted and you won’t have to manually check each box again for any new channels you join.

If you want to unset this so they are visible again, just reverse the actions:

/set irc_conf_mode off
/gui apply

P.S.: For Windows users, the best XChat IRC client is the one provided by SilverX. You can download that on their website.

Bad Behavior has blocked 2461 access attempts in the last 7 days.