
Archive for December, 2014
SOLVED: Installing VMware Tools in Ubuntu 5.04 under ESXi
It may seem odd, that it’s almost 2015, and I’m writing a post describing how to install VMware Tools inside Ubuntu 5.04, a Linux distribution that was released on April 8th, 2005 and went End of Life on October 31, 2006.
I run a home lab here with a number of test machines (all VMs now), which includes every single major Linux distribution and version. Yes, really. I’ve been going back trying to update all of them to current tools, VMHW versions, NIC drivers and tweaking other things. Among these, were a number of very old Linux distributions who did not support VMware drivers natively (eg: open-vm-tools didn’t exist at that time).
If you run the standard configuration (I run it non-interactive as below)…
# ./vmware-install.pl --clobber-kernel-modules=vmci     \
                      --clobber-kernel-modules=vmxnet3  \
                      --clobber-kernel-modules=pvscsi   \
                      --clobber-kernel-modules=vmmemctl \
                      --clobber-kernel-modules=vsock    \
                      -d
At some point after the X11 configuration, you’ll see this error displayed:
Creating a new initrd boot image for the kernel.

$Id: mkinitrd,v 1.201 2004/05/16 22:00:48 herbert Exp $

Usage: /usr/sbin/mkinitrd [OPTION]... <-o outfile> [version]

Options:
  -d confdir  Specify an alternative configuration directory.
  -k          Keep temporary directory used to make the image.
  -m command  Set the command to make an initrd image.
  -o outfile  Write to outfile.
  -r root     Override ROOT setting in mkinitrd.conf.

See mkinitrd(8) for further details.
ERROR: "/usr/sbin/mkinitrd" exited with non-zero status.

Your system currently may not have a functioning init image and may not boot
properly.  DO NOT REBOOT!  Please ensure that you have enough free space
available in your /boot directory and run this configuration script again.

Execution aborted.

Found VMware Tools CDROM mounted at /media/cdrom0. Ejecting device /dev/hdc ...
But there’s a one-line fix! Open up “vmware-tools-distrib/bin/vmware-config-tools.pl” in an editor and go down to line 7692, and you’ll see something that looks like this:
      $initmodfile = '/etc/sysconfig/kernel';
      if ($gSystem{'distribution'} eq 'suse') {
          $syscmd = join(' ', $binary, $kernelList, $initrdList);
      } else {
          $syscmd = $binary;
      }
You’ll want to modify that last “$syscmd” line to look as follows:
      $initmodfile = '/etc/sysconfig/kernel';
      if ($gSystem{'distribution'} eq 'suse') {
          $syscmd = join(' ', $binary, $kernelList, $initrdList);
      } else {
          $syscmd = join(' ', $binary, '-o', "/boot/initrd-$kernRel.img", $kernRel);
      }
That will now result in the following successful output:
Creating a new initrd boot image for the kernel.
   Checking acpi hot plug                                              done
Starting VMware Tools services in the virtual machine:
   Switching to guest configuration:                                   done
   Guest operating system daemon:                                      done
The configuration of VMware Tools 9.0.5 build-1065307 for Linux for this
running kernel completed successfully.

You must restart your X session before any mouse or graphics changes take
effect.

You can now run VMware Tools by invoking "/usr/bin/vmware-toolbox-cmd" from the
command line.

To enable advanced X features (e.g., guest resolution fit, drag and drop, and
file and text copy/paste), you will need to do one (or more) of the following:
1. Manually start /usr/bin/vmware-user
2. Log out and log back into your desktop session; and,
3. Restart your X session.

Enjoy,

--the VMware team
Voila! Now you have a successful build of the native VMware modules and can switch your ethernet module to VMXNET3 from E1000 to save a little memory on the ESXi side.
HOWTO: Remove the “Year in Review” Posts from your Facebook Wall
It’s annoying. It’s Facebook. We all learn to either love or hate it, but there are ways to make the annoying parts of it go away.
The most-recent annoyance is Facebook’s compulsion to add the “Year in Review” posts from people to your Facebook wall.
Thankfully I’ve never been asked to fill mine out, but I do see hundreds of these from other “Friends” of mine. It looks like this:

Here’s how to get rid of them:
-
Log into Facebook and go to this page:
-
Once you get there, you’ll see a section near the bottom labeled “Block Pages”. Put “YearInReview” into that form and hit Enter.
-
If you’ve done it right, you should see something like this:
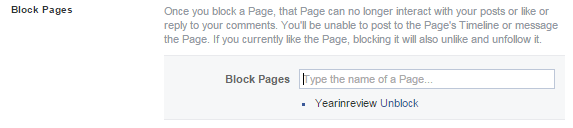
That’s it, you’re done!
If you want to get rid of more Facebook garbage, ads and other annoyances, you can install the “Social Fixer” browser extension in your browser of choice. There are versions for Safari, Chrome, Firefox and Microsoft Internet Explorer. Works great!
Quick tip for Users Hosting TurnKey Linux Images for Public Consumption
I host lots of internal infrastructure for friends, colleagues, the Open Source community, my LUG and others and much of the recent need I’ve seen has been with easy-to-contain images like those provided by the TurnKey Linux project.
These are very small, light, lean VMs and app containers you can deploy on your servers, baremetal, VHW or other environments such as Hyper-V, VMware, VirtualBox and more.
But they tend to advertise a bit too much inside each application they host, and for some people/clients, that’s not desirable. But there’s a quick and easy fix!
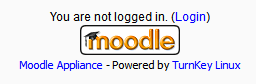
If your app, like Moodle for example, has a web interface, you’ll see a footer that advertises TurnKey Linux and will look like this:
The easy way to remove this, is to SSH into your TurnKey Linux image (you did change that SSH port to something other than port 22, right?), and run the following commands:
$ sudo a2dismod substitute
Module substitute disabled.
To activate the new configuration, you need to run:
  service apache2 restart
$ sudo service apache2 restart
[....] Restarting web server: apache2apache2:
 ... waiting apache2: ok
Once you’ve disabled the “substitute” apache module with a2dismod and restarted, you should now see something that looks like this:

If you want to modify that footer so it refers to something unique to your group, team, organization or otherwise, just re-enable the module as follows:
$ sudo a2enmod substitute
Enabling module substitute.
To activate the new configuration, you need to run:
  service apache2 restart
Now you’ll need to edit a small configuration file with a text editor before restarting Apache to make it visible. That file is “/etc/apache2/mods-enabled/substitute.conf”. Make your changes there, save and restart Apache as follows:
$ sudo service apache2 restart
[....] Restarting web server: apache2apache2:
 ... waiting apache2: ok
That’s it, you’re done!
HOWTO: Quick 7-Zip Trick to Encrypt Your Files with Non-Interactive Mode
I have a lot of data that I archive away on a regular basis, both on my “PC” machines and my mobile devices OTA. I needed a secure, reproducible way to secure those data with a very strong, complex password using extremely tight compression.
Unfortunately, p7zip on Linux and 7-Zip for Windows don’t permit a non-interactive way to pass in a password. So I came up with a quick-and-dirty workaround!
- First, generate a complex password and put this in a file with one line. Make sure there are no leading or trailing characters in this file, including a trailing newline. There should be one and only one line in this file. Here’s are some examples of a password generated with the level of complexity you’ll want for secured archives (42 characters in length, 15 minutes of generated entropy from a hardware dongle):
{Kt8}m.Gs7:g}=%-nfX[F_E(tKs[X,}GrN$mz^?m7^ +S/>>@7DzKafmLkSkS:-"4-*@k)#u@mQ>"=7j_vvu,! <prX9WG#h,t-Ka`poA9rhJWc]H9M}`NA(8_93tD\hR - Now with that password in a file, run the following loop to compress the data and pass in the password inline.
You’ll notice that on Windows, I use Cygwin here, because I can create scripts and retain previous commandline history to reproduce this on a regular basis.
I’m also using lzma2 here because it gives me slightly tighter compression for minimally more CPU time to generate the archives.
On Linux
cat your-pw-file | for i in *.xml; do 7z u -t7z -m0=lzma2 -mx=9 -mfb=64 -md=64m -ms=on $i.7z $i -p --; done;
On Windows (using Cygwin)
cat your-pw-file | for i in *.xml; do do /cygdrive/c/Program\ Files/7-Zip/7z.exe u -t7z -m0=lzma2 -mx=9 -mfb=64 -md=64m -ms=on $i.7z $i -p --; done;
- To verify that the files are properly encrypted and the right password works as expected, test as follows:
On Linux
cat your-pw-file | for i in *.7z; do 7z t $i -p --; done;
On Windows (using Cygwin)
cat your-pw-file | for i in *.7z; do do /cygdrive/c/Program\ Files/7-Zip/7z.exe t $i -p --; done;
- Now you can delete that password file from disk. I can’t stress this enough. Once you’ve used the password, and secured it in a managed password container, you’ll want to delete all traces of it that you do not need in plain sight on disk.
That’s it. Now when you want to decompress those archives, you’ll need to supply the password you generated before. Make sure you keep this password secured in a managed location. A password is only as secure as your ability to manage it.
Good luck!