
Archive for the 'Microsoft' Category
HOWTO: Correct and avoid clock skew on Windows and OS X platforms
 This has come up a lot recently in the context of Zwift rides and races, becasue many rider’s PC and Mac gaming rigs are suffering clock skew. In short, it can be defined as:
“Clock skew is when the clock arrives at different points of the circuit at different times due to the distance, capacitance etc which may cause it to malfunction.”
If you want more detailed set of diagrams and explanations describing clock skew, there’s a great discussion on the StackExchange electronics forum about it.
When your machine is suffering from clock skew, you can inadvertently enter a ride or race earlier or later than you meant to do, and your overall finish time can be later than you expect. For races where the winner is separated from the other podium places by mere seconds or less, having an accurate clock matters!
Here’s how to fix it for both Microsoft Windows and Mac OS X platforms!
Read the rest of this entry »
Tuesday Tip: rsync Command to Include Only Specific Files
 I find myself using rsync a lot, both for moving data around, for creating backups using rsnapshot (yes, even on Windows!) and for mirroring public Open Source projects and repositories.
I used to create all sorts of filters and scripts to make sure I was getting only the files I wanted and needed, but I found a better way, and it wasn’t exactly intuitive.
--include="*/" --include="*.iso" --exclude="*"
In order for this to work as intended, the “include” patterns have to come before the “excludes”. This is because the very first pattern that matches is the one that gets evaluated. If your intended filename matches the specified exclude pattern first, it gets excluded from the scope.
When dealing with a very large, possibly unknown remote directory structure, you either have to include all of the remote subdirectories individually like this:
--include="/opt" --include="/var" --include="/home"
Or you can use the following syntax to include all directories (not files) in the scope:
--include="*/"
Once you’ve included every directory below your target scope, you can pass the filespec you’re interested in (in this case, I wanted every bootable ISO file from a remote CentOS mirror), and then you exclude everything else that doesn’t match that filespec. It looks like this:
1.) Include every directory:
--include="*/"
2.) Include *.iso as your intended matching scope
--include="*.iso"
3.) Exclude everything else
--exclude="*"
That’s the magic sauce.
Some of these options and the order they appear in may seem very non-intuitive, so please read the rsync documentation carefully paying specific attention to the “EXCLUDE PATTERNS” section of the docs.
When in doubt, always use “–dry-run –stats” to check your work before copying or modifying any data.
Measure twice, cut once.
HOWTO: How to Fix a Forgotten Windows Administrator or User Password with Sticky Keys
I pulled some of my very old Windows VMs out of my backup NAS recently with the intent to pull them into ESXi 5.0.1, and manage them there.
But they hadn’t been booted or updated in 4+ years. I thought I remembered the password for the users of these VMs, but none of my obvious choices worked.
I tried getting into it by booting an ISO loaded with chntpw to blank the Administrator password, but that didn’t work. I tried enabling the Guest account and setting a password there (also with chntpw), but that failed as well.
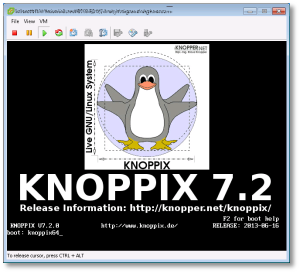
So the next option was to boot up a KNOPPIX DVD in my VM, and follow these steps to reset the password using the “Sticky Keys” trick:
Click image to open full size
- Boot from the KNOPPIX DVD (or Windows PE, Windows RE) in your Windows machine or VM. When you get to the boot prompt, type the following to get a 64-bit environment:
- Let the OS load (graphical or otherwise) and open a shell session (Linux “command prompt”). You’re going to manually mount the Windows drive here, and copy some files around.

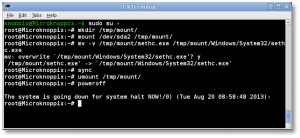
- sudo to root
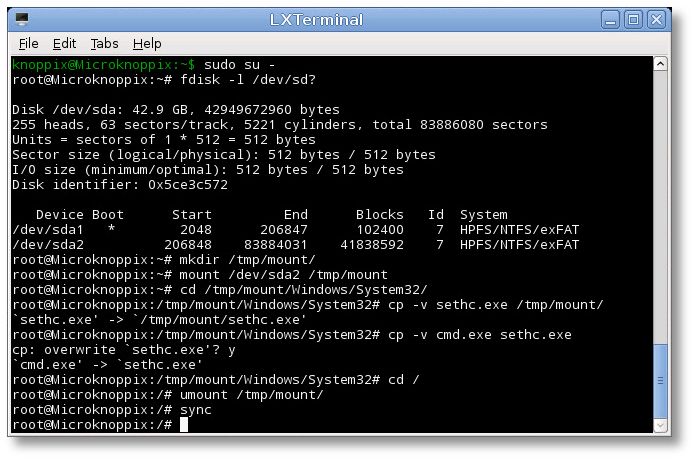
$ sudo su -
- At the shell, find your Windows drive. It will typically be something like /dev/sda1, as seen from KNOPPIX. The following fdisk(1) command will help you find it:
# fdisk -l /dev/sd?
- Now you’ll need to mount that drive to access it:
# mkdir /tmp/mount
# mount /dev/sda1 /tmp/mount
# cd /tmp/mount
- Change to the System32 directory under the Windows directory in your temporary mountpoint. Note that depending on your OS version, this may have a different case sensitivity. It may be “Windows”, “WINDOWS”, or “WinNT”.
# cd /tmp/mount/WINDOWS/System32
- Now we can preserve and copy files that will help us get into the machine. In this next step, we’re going to back up a copy of “sethc.exe” to the root of the C:\ drive. This is a backup copy we’ll use to restore later, once we’re able to log into the machine.
# cp -v sethc.exe /tmp/mount/
# cp -v cmd.exe sethc.exe
- Now you can unmount the drive, shut down your machine, disconnect the KNOPPIX DVD and boot back up to the drive natively, back to the point where you forgot the Administrator or user’s password.
# cd /
# umount /tmp/mount/
# sync
# poweroff
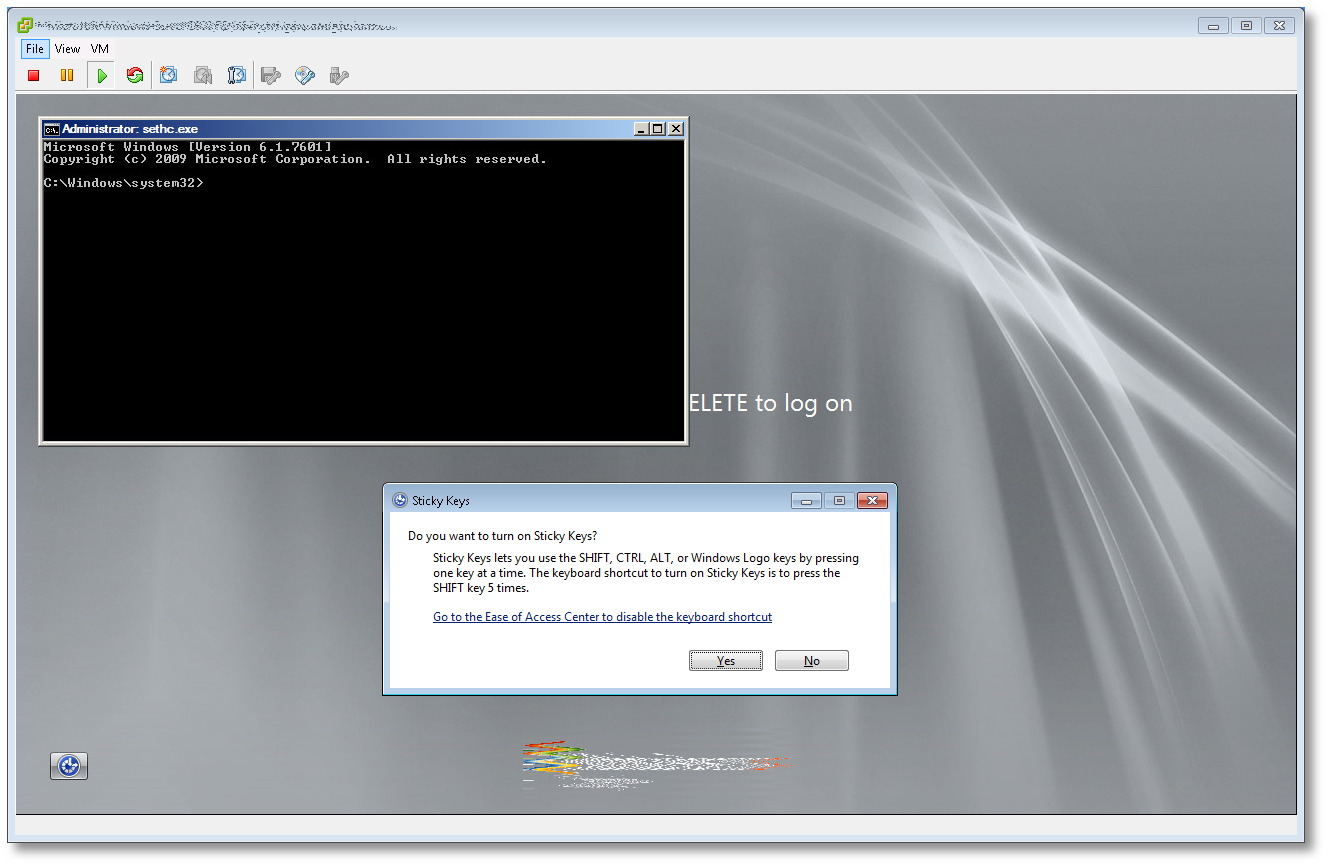
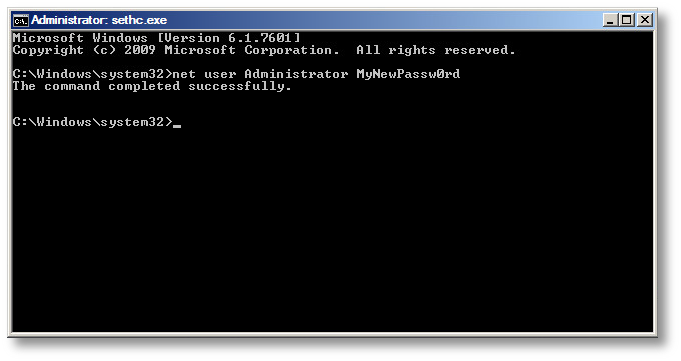
- Once your machine has fully booted, after you see the logon screen, press the SHIFT key five times. Do not hit Ctrl-Alt-Del here, just hit [shift] 5 times in a row. If you’ve done it right, you should see a Windows command prompt where you can enter the following command to reset the Windows password.


C:\Windows\System32\net user Administrator MyNewPassw0rd
Or if you need to just reset a non-Administrator account password, replace ‘Administrator’ in the above command with the appropriate username. If you don’t know your user name, just type the following to get list the available user names:
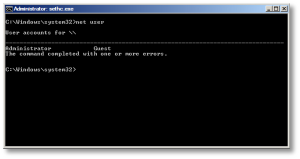
C:\Windows\System32\net user
- You should now be able to log on with the new password you just created.
- Don’t forget to restore C:\seth.exe to C:\Windows\System32\seth.exe, or anyone with access to your machine will be able to use the same trick to reset your password and breach your account! To do that, follow the same steps above (boot to KNOPPIX, mount drive, copy files) to replace the backed-up copy of the original file. You won’t be able to do this while the machine is booted, as those files are locked and will not be replaceable.


That’s it! Now you’ve got your password recovered, and you can log in without issues.
Note: If you want to prevent someone from using this same trick, or using Kon-Boot against your server, you need to install and configure full-disk encryption with a tool like TrueCrypt. Do not use Microsoft’s “Bitlocker” product, as it is easily cracked.