
Archive for October, 2022
HOWTO: Run multiple copies of Signal Messenger on your desktop/laptop
Tags: Privacy, security, SignalThis question has been asked many dozens of times for the last several years, and to-date, has not been solved in the core project itself. There were many attempts, hacks and workarounds, but nothing really supportable.
Let’s say you have two devices, a Personal phone and a Work phone, each running Signal. You want to be able to load one app and have conversations that span both devices. That is, converse with work colleagues and also converse with personal colleagues, from one desktop.
Today, you can’t. Well, not without some additional setup to do so.
To make this work, you’ll need to create a separate data directory for each “profile” you intend to use, and then configure Signal to refer to it when launching them. You can then tie these to a launcher or icon if you wish, in your favorite OS of choice (Linux and macOS are mine, macOS and Windows for others).
Your normal Signal data resides in a directory under your $HOME named ~/.config/Signal by default. Let’s make another to use for testing with your second device. Intuitively, you can name them by the device they are used with, so ~/.config/Signal-iPhone and ~/.config/Signal-Android for example on a POSIX based OS like Linux or macOS. On Windows, this will be stored in C:\Users\You\AppData\Roaming\Signal.
If you’re already using Signal on your desktop, your profile data will just be in the ~/.config/Signal directory, and you don’t need to change it. In fact, renaming it will likely break things until we create these additional profiles. Create a second directory at the same level as the existing one, for use with that second profile.
Now we need to launch Signal from the shell (Terminal in macOS, Command Prompt in Windows), and run it as follows:
/Applications/Signal.app/Contents/MacOS/Signal --user-data-dir=$HOME/.config/Signal-iPhone
This should prompt you to scan a QR code with your phone, to link the two devices, similar to the following:
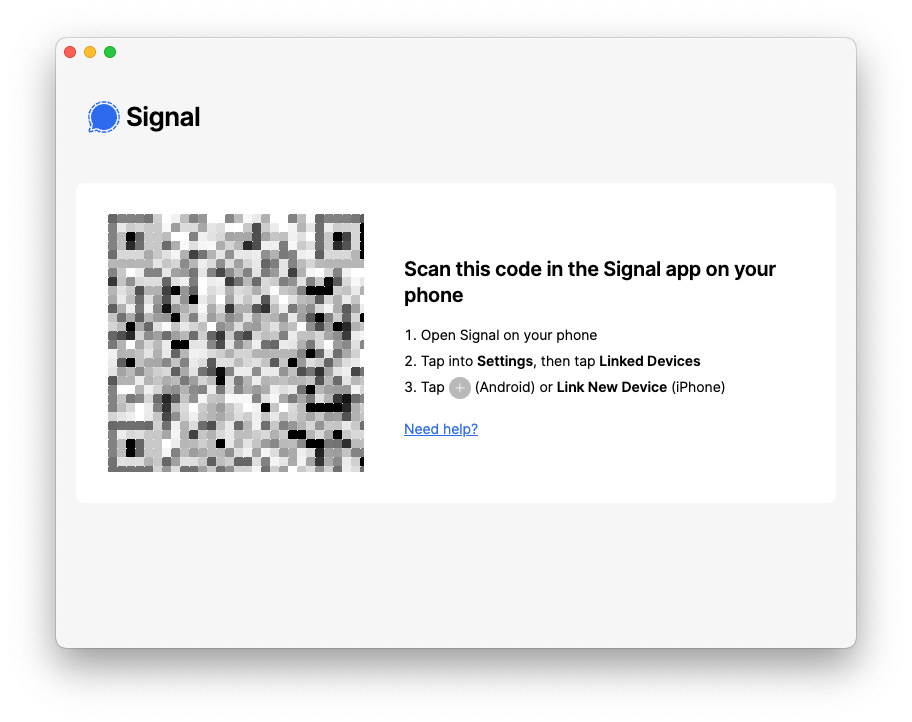
On your mobile device, go to Settings ? Linked Devices, and scan that QR code. It will now pair your phone with this instance of Signal Desktop.
So far, so good. Now while that is synchronizing your data, launch the other instance of Signal with the standard launcher. You should now get two instances of Signal Desktop running, one linked with your original mobile device, and this new instance linked with your second mobile device.
Ta-da! You did it.
Now let’s codify these changes into their own respective launchers/icons, so you don’t have to use the shell/Terminal/Command Prompt to do this each time.
On Linux, just create a launcher using your window manager that sets those commandline args as the default.
On macOS, you can create a new launcher for Signal with Automator, by choosing “Run Shell Script” from the Workflow menu. Double-click that, and a window will open to the right, allowing you to type in your shell commands. Mine is as follows, just like we ran from Terminal:
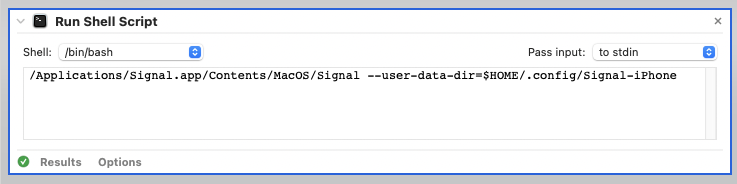
Click “Run” in the upper-right, to ensure it does indeed run Signal Desktop with your second (new) profile correctly. If it does, you can save it as a “Workflow” or an “Application”. I chose the latter, which looks like this:
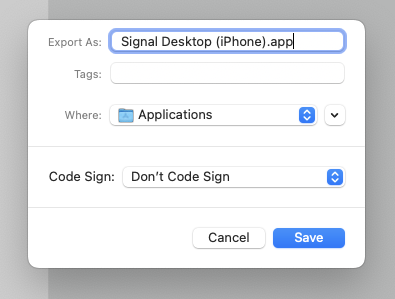
Now you have your intended commands tied to an application launcher, which can be put into your Dock or other launcher location.
On Windows, you’ll need to create a new desktop shortcut by going to Preferences, and change the target to: C:\Users\You\AppData\Local\Programs\signal-desktop\Signal.exe --user-data-dir=C:\Users\You\AppData\Roaming\Signal-iPhone. You can choose any icon you wish to adorn this shortcut with.
That’s it! You now have a multi-Signal Desktop solution (that is, until the upstream project adds profile support to a newer release).
Have fun, and keep those messages secure!