Using an Elgato Stream Deck XL for Desktop and Livestream Productivity
I recently rebooted my home office to support a lot more professional, studio-quality AV.
This included moving away from the onboard laptop webcam to a dedicated USB webcam for better quality. I chose the Logitech BRIO Ultra HD because it could do 1080p as well as 4k, if needed, and had a very wide FOV. I also moved from a USB microphone to an XLR microphone. I originally started with an Audio -Technica AT2020USB (Cardioid Condenser) USB mic, but moved over to the XLR version of the same mic, the Audio-Technica AT2041SP (Condenser) mic.
At the same time, I added an audio mixer, a Mackie ProFx6 v3. I originally bought the Focusrite Scarlett 18i8 (3rd Gen), but I could never get it to do anything at all, and even with a TRiTON FedHead attached, the audio was so low, and full of hissing background noise, it was unacceptable.
So that covered audio and video, but I needed a better way to present these into my meetings, work and personal, using Zoom, Teams, Google Meet and other tools.
Enter OBS, the Open Broadcaster Software. Since I use Linux, a lot of the free and commercial Windows alternatives were off the list, so I had to use OBS. With OBS, I can connect my cam to my Linux laptop and then create a ‘virtual’ camera that would be shared out via OBS, that I can configure in each video app I need. This allows me to add ‘scenes’ (more on this in another blog post) as well as overlays and other features to my video feed.
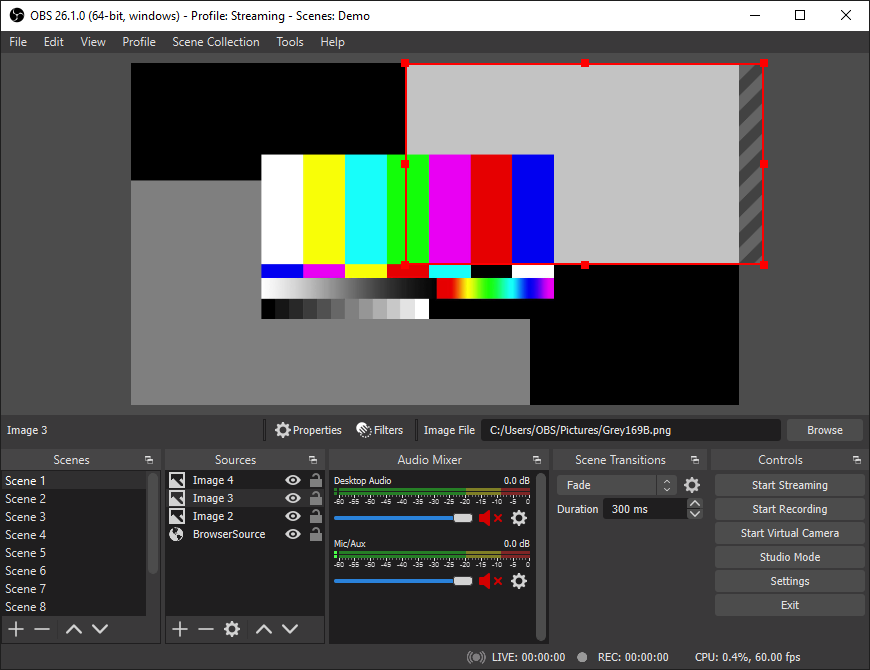
Currently, I have several cams set up, and can switch between them with a single keystroke, mouse click, or (as I’ll explain shortly), with a button-press on my Elgato Stream Deck XL. I have these set up with captions, an active clock (ticking each second visibly on my camera) and some other features.
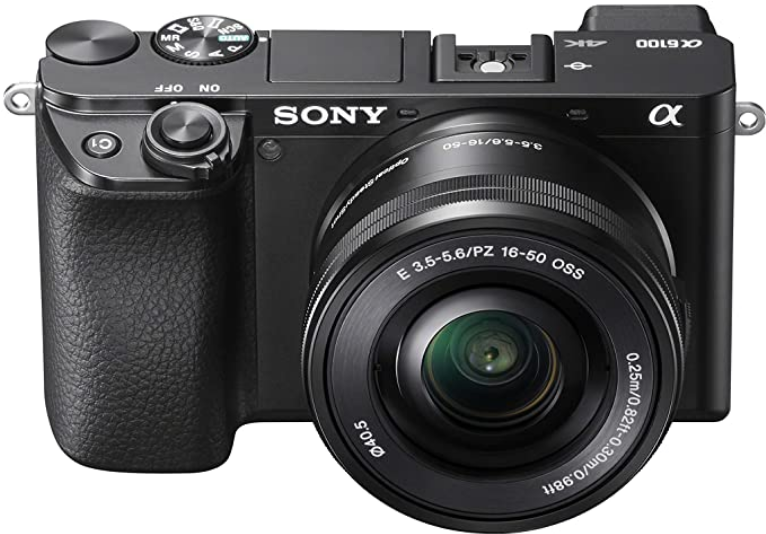
I still use the Logitech Brio camera, but it’s now a secondary cam, replaced by a new primary cam, the Sony A6100.
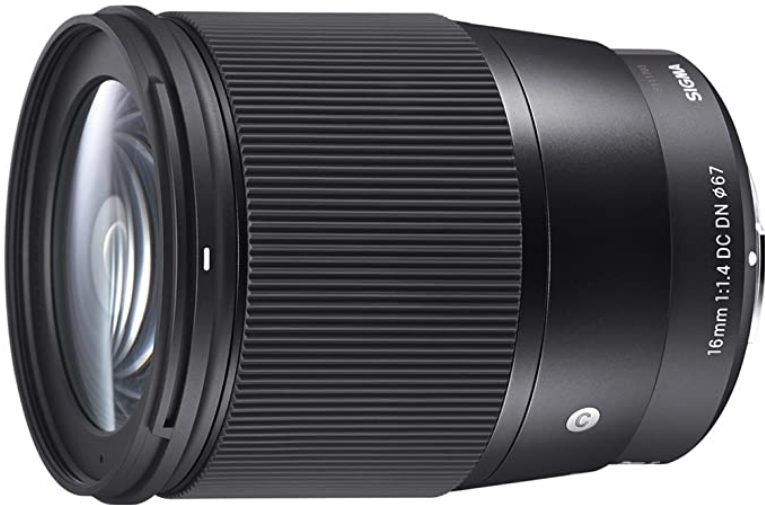
I bought this camera with the kit lens, and quickly realized I needed a better f-stop than the kit lens had. I wanted to go down to f/1.4 or f/1.2, from the f/3.5-5.6 that the kit lens had. I upgraded that lens to a Sigma 16mm f/1.4 about a week later, and I couldn’t be happier with the results. It’s shockingly crisp and the AF (AutoFocus) is the fastest I’ve seen on a lens in this class.
There’s much more to my environment I’ll talk about later, but this is the main pillars of my tools and studio.
I don’t have the mic going through OBS at the moment, but that’s coming soon. Once I do that, I can do some pre-processing of the audio and clean up background noise, increase gain and make the sound quality MUCH better.
That’s the high level change: Upgraded cams, mic, added a mixer, routed it all through OBS and manage it there. There’s so much that can be done with OBS, and I’ll do a whole series on that later.
Now let’s talk about how I’ve incorporated the Stream Deck XL into my workflow. This is normally a Windows/Mac only device, with dedicated software for those platforms. That won’t work for me, since I use Linux for everything. I found Timothy Crosley‘s project ‘streamdeck-ui‘, a Python project, does almost exactly what the Elgato native software does, with some additional features that Elgato doesn’t have. It was drop-in simple to get it up and running.
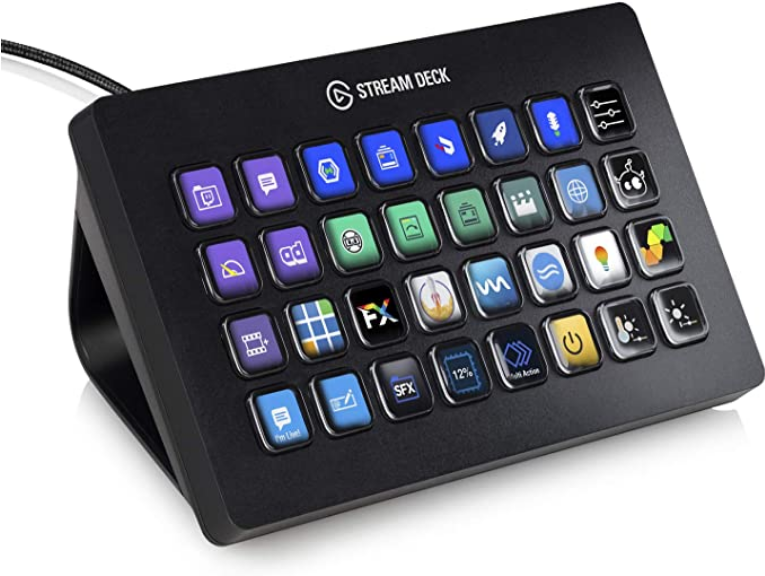
The XL has 32 buttons on its face, and with streamdeck-ui, I can have up to 10 pages of actions for those buttons, giving me a total of a whopping 320 possible buttons/actions to choose from.
I started configuring the first page for the most-used actions I would need with OBS, including:
- Launch OBS itself
- Open my normal work/desktop productivity apps, including Mattermost, Slack, Telegram, IRCCloud, Discord
- Open media apps I need; Google docs/sheets/drive, Spotify, Pandora, Dropbox and others
Then the other fun began. I wanted a way to target specific applications and stuff keystrokes into those apps. The first need was to be able to DM any of my teammates with a single button press.
I needed to find a way to “find” the Mattermost (or Slack) window on the desktop, target that window, raise it, then send keystrokes to that window, for example /msg SuperManager Good morning! I have a question...
To do this, I needed to create a shell script as a wrapper around wmctrl, xwininfo, and xdotool to do what I needed. I had to create a second script, similar to the first, to target specific public channels in Mattermost. Each of these is subtly different; one uses /msg and the other uses /join ~$channel before stuffing in keystrokes for actions.
Here’s an example:
#!/bin/bash

dm=$1
wmctrl -xa Mattermost
mm=$(xwininfo -root -tree | awk '/Mattermost/ {print $1}');
xdotool windowfocus ${mm} type "/msg $dm";
xdotool windowfocus ${mm} key KP_Enter
I can then call that from a streamdeck-ui button action with: mm-dm @SuperManager and it will find and open Mattermost, target that private conversation window, and I can start typing away.
The next extension of this of course, was to create custom buttons on the Stream Deck itself, for each member of my team. I have a separate page (32 buttons) with photos from our internal corporate directory, one photo per-button, for each member of my team, cross-teams, management and so on. A single press on their photo, will find Mattermost, target that window, and begin a DM with them.
It’s the Stream Deck equivalent of a visual phone directory.
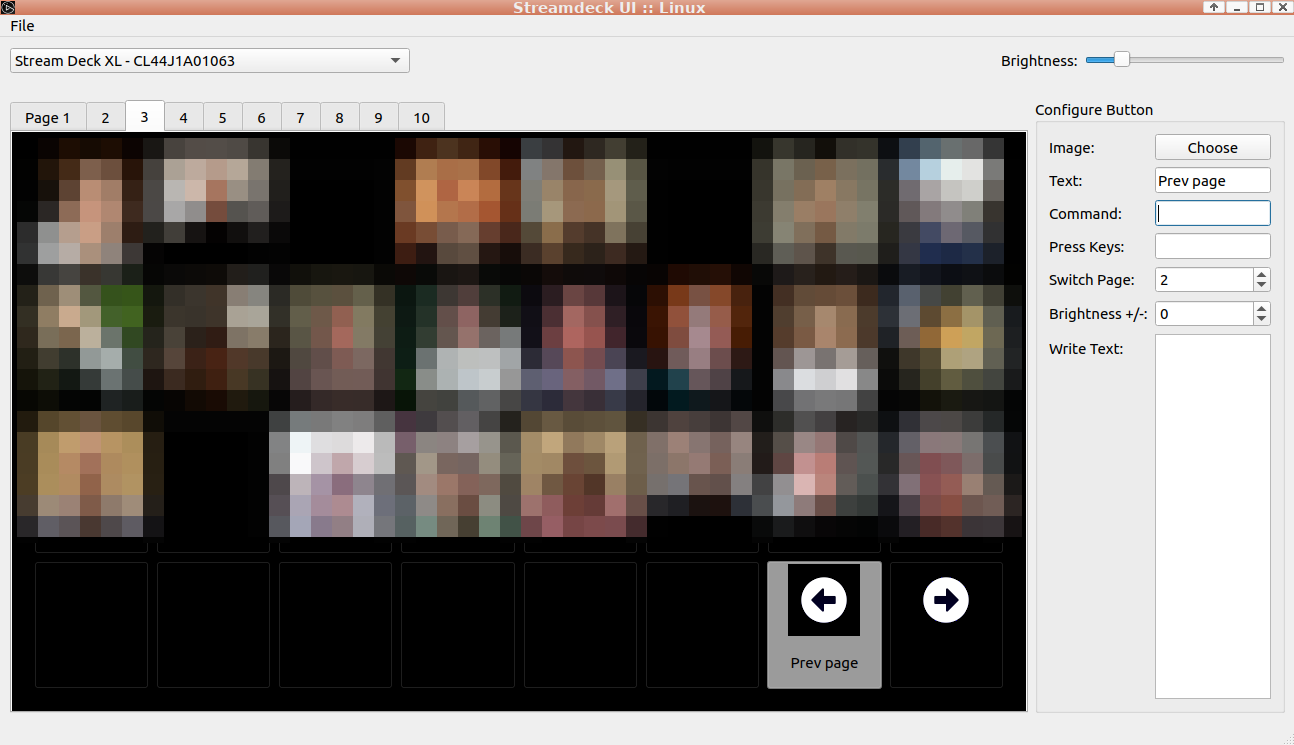
I also created forward/back buttons for switching between pages on the XL, which you can see here in the screenshot below. I have the ‘Switch Page’ action configured to switch to the previous or next pages, as needed. On Page 1, there’s only one button there, ‘Next Page’, which switches to Page 2. On all other pages, it goes forward or back, and page 10 wraps back to Page 1.
I also have the XL set up for my streaming environment, Govee Lyra and Govee Aura lights that live behind me on camera, uxplay for using my iPad Mini as a ‘lightboard’ during meetings. Here’s an example of how this looks with an actual glass lightboard.
I figured out how to do this without any of the complexities of actual glass, markers or extra hardware. Just Linux, OBS, my iPad, Stream Deck and uxplay. Works fantastic! I’ll do a whole post on that later.
The most-recent addition I figured out, literally this afternoon after fumbling to find my active Meet window and mute my mic, was how to use a single button on the Stream Deck XL, to mute and unmute my Google Meet calls. It’s similar to the way I’m targeting my Mattermost (Slack, Telegram, IRCCloud, etc.) windows, but instead, I’m targeting the top-most Google Chrome window that has Meet running in it. The script, tied to a ‘mute/unmute’ button, looks like this:
wmctrl -xa Chrome
chrome=$(xwininfo -root -tree | awk '/Meet .* Google Chrome/ {print $1}')
xdotool windowfocus ${chrome} key "ctrl+d";
That’s it. I configured streamdeck-ui with a single button press to toggle that on and off.
So that’s it for now, some great ideas to use a Stream Deck XL along with your regular desktop apps and productivity tools, to enhance even more productivity out of your environment.


 The Top 4 dating sites out there; Match.com, Plenty of Fish, Tinder and OkCupid are so completely overrun with fraud now, it’s appalling.