
HOWTO: Run multiple Zwift sessions on the same PC (Windows only)
 Many people have asked me to write this up and I’m happy to be the first person to push Zwift this far with multiple, simultaneous sessions.
I can say with confidence that up to this point, I’m actually the only person who has this working correctly without overwriting or clobbering critical logs and data files. Others have tried some hacky methods, but they all result in instability and data loss (see “What does NOT work, and why” below).
I started this quest because I am working on a product design (“Secret Sauce” to be withheld in this HOWTO) that involves running multiple Zwift sessions on a single, 100% wireless PC, with the only wire being the single power cable to the wall. No USB cables, no video cables, no HDMI cables, no network cables.
Let’s get some general housekeeping out of the way first…
What does NOT work, and why
-
Cloning the Zwift app directory and running additional sessions from the clones
When you run a second copy, you’re still calling the main ZwiftLauncher.exe process that is in memory, and it only ever knows to reference %HOMEPATH\Documents\Zwift as its location to write, store and upload the data it creates.
A second instance of Zwift, run from a second directory will still target this directory. This means it will clobber, overwrite and truncate your data files. Even if you don’t run ZwiftLauncher and run ZwiftApp directly from here, you’re going to overwrite your data. Likewise if you simply rename the executables as many have tried, and run those renamed executables, your data is going to get stomped on.
If you don’t care at all about your data, and will never upload your data to Zwift (or Strava), then this method may work fine for you. Most people care about their ride data, achievements and track that data on sites like Strava or TrainingPeaks, so this will not work for them.
-
Running the second/additional session(s) as “Administrator”
This is going to have the same problem as the (1) above, except now your data will be written to the %HOMEPATH%\Documents\Zwift directory with both a normal user as owner and the Administrator as owner.
This causes any additional writes by the normal user to fail silently with “Access Denied” (normal user can’t modify files owned by “Administrator”)
-
Using the “RunAs” command to run a second session as another user
Running the first instance as a normal user and using the Windows “RunAs” command to run the second instance as another user will not work since you’re not actively logged in as that second user.
You can’t access their %HOMEPATH%\Documents\Zwift directory to write files (with or without the /env switch to “runas”), and you’re back to the same problem in (1) above, clobbering data files.
-
Running each Zwift session inside virtual machines (VMs)
I’ve tested this extensively before moving on to the solution that actually worked for me.
I tried running Zwift inside Oracle VirtualBox (on Windows), VMware Workstation Pro (on Windows), VMware Fusion (on Mac), Parallels (on Mac) and Xen (on Windows and Linux), all with zero success. In each case, I reached out to the vendor and/or project team for clarity, but every instance dead-ended because the VMs themselves do not support the level of OpenGL that Zwift requires.
I contacted VMware and asked that they begin supporting a newer version of OpenGL, but they weren’t cooperative. I also filed a Request for Enhancement (RFE) with Zwift to support this, but it’s low on their priority list.
More than four (4) simultaneous Zwift sessions
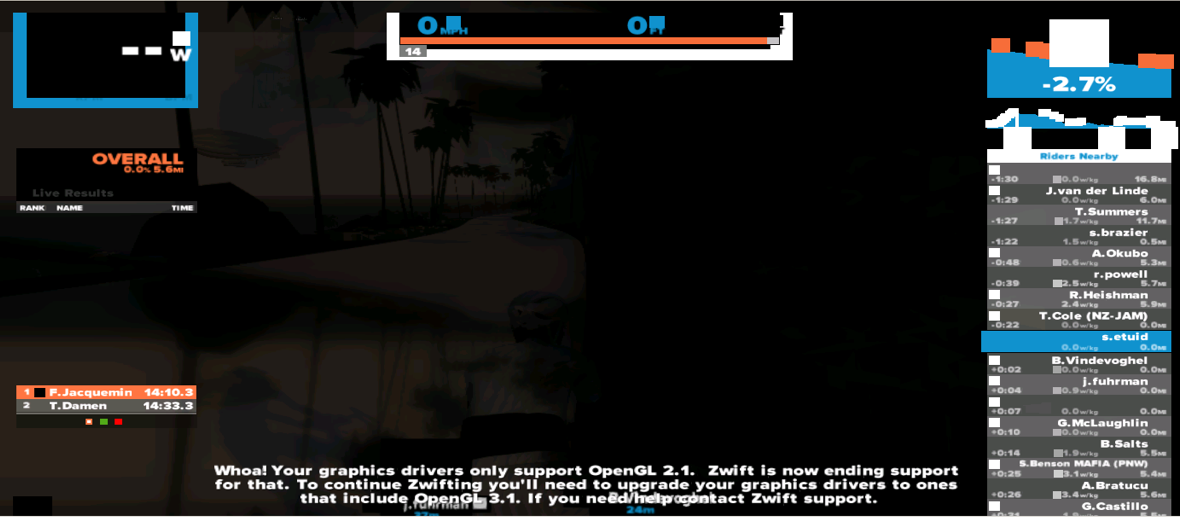
More than four (4) sessions are not going to work, and are completely unsupported by Zwift. The application itself won’t see any of your ANT+ adapters beyond the first 4.
I have 7 ANT+ adapters and have successfully made them all work, but not in any officially-supported way (see “Secret Sauce” at the top of this HOWTO).

You can run 4 active “Ride” sessions and as many “Fan View” sessions as you want, but only 4 profiles can actually communicate using ANT+ to bike and sensors. I’ve personally pushed this all the way up to 16 on a single machine, with every profile in “Ultra” mode. Here’s what 6 simultaneous profiles looks like:
What you’ll need
- Separate Zwift accounts for each session you intend to run. To run multiple sessions on the same PC, you need separate Zwift accounts to use within each session.
You absolutely cannot log into Zwift with the same account more than once. I’ve tried, it’s a mess. Once you log in a second time, the first session comes to a grinding halt (less than 1 frame per second), while the second session happily continues onward.
Get additional accounts (and register them) if you intend to run with more than one session on a single PC. It’s worth it.
- A working PC that can already run Zwift in any level of quality and resolution (Ultra preferred, but Medium or Low will do as well).
- An ANT+ adapter for each profile you intend to use on this single PC. If you want to run two (2) simultaneous sessions, you need two separate ANT+ adapters.
- Powered USB ports, or a USB hub that is powered.
A non-powered USB hub will fail you with disconnects and dropouts, as hundreds of riders in the Zwift community have shown before. The common solution to the dropout problem is to get a USB extender, but that’s really just masking the problem; lack of enough power to drive the ANT+ signal to read the bike’s sensors and talk to the PC.
- A fast, modern GPU with enough spare frames-per-second (FPS) to drive two simultaneous sessions.
If the max FPS your video card can do is 30fps, adding a second session will halve that FPS (~15 fps per session). When the Zwift course gets complicated or there are many riders in view at the same time, this could degrade your experience even further, leading to lag and possible lost placement in the pack (a common “Drafting Bug” symptom).
Make sure your GPU is powerful enough, or lower the quality from Ultra to Medium or Medium to Low to get the right balance of quality and performance.
- A strong understanding of Windows and how to install, configure and manage software installed on Windows. You don’t need to be a Windows Administrator, but you do need to be able to follow along and understand how things are installed and configured, and be comfortable running commands at a shell/command prompt.
- Sandboxing software to segregate the profiles on the same machine. This will not work when run inside virtual machines (VMs, see Step 4 above). I am currently testing this successfully with “Sandboxie” with great results.
Let’s get started with what does work!
- First, install and configure Zwift on your machine. Log in with your normal user account (see my other HOWTO on configuring Windows to remember passwords if you want to permanently save your Zwift login credentials), set up your profile and preferences and make sure your Zwift settings specify “windowed” and not “full-screen” in the Settings panel:

Once everything is working and configured correctly, exit Zwift, returning to the Windows desktop.
- Now you’ll want to right-click on the Zwift icon in the System Tray to close ZwiftLauncher. You’ll never need to use it again.

The only reason to ever launch Zwift via ZwiftLauncher, is to check for and download new application updates. Updates happen very infrequently, you’ll almost never want to use it. In fact, using it will break this process anyway, so don’t.
If you want, launch a single Zwift session every once in awhile via the normal icon to force it to check for updates, but don’t use the icon or ZwiftLauncher when you run multiple sessions.
- Clone the Zwift application directory to another location by running the following commands one-at-a-time inside an elevated command prompt (right-click Command Prompt → Run as Administrator).
I run these under Cygwin because it’s easier/faster, but that requires more setup than most people are ready to handle, so let’s take the native Windows route. Enter these commands exactly as shown. Every quote, space and character is significant.
I’ve included the actual command prompt output in screenshots below to guide you:
cd "C:\Program Files (x86)\Zwift"

robocopy /s "C:\Program Files (x86)\Zwift" "C:\Program Files (x86)\Zwift\01" /xd 01 assets data *Driver*

mklink /j 01\data data

mklink /j 01\assets assets

mklink 01\"Windows ANT Dongle Driver" "Windows ANT Dongle Driver"

move 01\ZwiftApp.exe 01\ZwiftApp-01.exe

Why use the “move” command here and not “rename”? Because rename on Windows is so basic, it can’t handle relative paths. The “move” works fine here, so keeping it simple.
- Let’s recap before moving on: At this point you have one (1) working Zwift install that resides in “C:\Program Files (x86)\Zwift”, which you’ve logged into and configured correctly.
We then cloned this directory into a subdirectory of the main directory, called “01”, creating “C:\Program Files (x86)\Zwift\01”.
To save space (and make it easier to facilitate upgrades) we used Windows Junctions where possible on the ‘data’, ‘assets’ and ‘Windows ANT Dongle Driver’ directories. The final result at this point, should look like this:

We also renamed the main Zwift application executable to a new name (ZwiftApp.exe → ZwiftApp-01.exe), so it can run within its own segregated namespace in memory, alongside the others that we’ll run at the same time.
This now gives you two separate Zwift application trees from which to work with. We can’t run the second copy yet, you still need to set up a sandbox to run the second copy of Zwift within it.
- Download and install Sandboxie and when installed, launch it. You’ll need to create a separate sandbox for your second profile, so you can use it to contain the data that Zwift will create within that sandbox. Go to “Sandbox → Create New Sandbox” to create one:

- When you create a new sandbox, you’ll want to give it a unique name.
Since we cloned the Zwift application directory (Step 3 above) into a directory called “01”, let’s call our Zwift sandbox by the same name, so we can keep them together and they’ll be easy to remember:
We also want to model our new sandbox after the “DefaultBox” profile, so we start with some sane defaults, so select that from the dropdown as shown.

Sandboxie is very, very powerful, and there are a lot of settings within to play with, especially if you register and pay for the software (as I did).

I won’t go into them here, but you may want to play around with the various options within each sandbox to see if anything might be applicable to your specific needs.
For example, I have a dozen separate sandboxes for Zwift alone, and each of them is tied to a specific, unique user per-sandbox and are tightly restricted as to what environment is exposed to them and which executables can run within those sandoxes.
That may be a bit extreme for what you need to use it for, so play around and see what works best for you.
- Once you have your sandbox set up, close out of the Sandboxie setup dialog. Go over to your Zwift application directory and run ZwiftApp.exe by double-clicking on it. Do not run ZwiftLauncher.exe and do not launch Zwift via the normal application icon that the installer created for you.
You must launch ZwiftApp.exe directly. Create an icon shortcut on your desktop for it if you must. I’ve hard-coded these into my Sandboxie profile so I don’t have to remember.
- Log into your first Zwift session using your normal, working profile that we created and tested in Step 1 of this HOWTO. Just log in and pair your primary bike + sensors to this profile and let the application idle with you sitting by the side of the road on your bike. We’re not going to ride it yet.
- Now in Windows Explorer, go over to your “C:\Program Files (x86)\Zwift\01\” directory (the one we cloned earlier in Step 4), right-click on ZwiftApp-01.exe and choose “Run Sandboxed”, as shown here:

When you choose to run this sandboxed, a Sandboxie dialog will come up, asking you to choose which sandbox to run this within. You want to choose the one you created in Step 6 above from the list (the one called “Zwift01” in the screenshot in Step 6).
- Now when Zwift launches, log into that second session as your second Zwift account (not your “main” Zwift account), and set the settings for that second session to also run “Windowed”, as we did in Step 1 above.
The important bit about this second session is that you pair the second Zwift account and session to your second set of ANT+ sensors and your bike. Make sure you don’t pair the second session with the first session’s bike sensors, or things will get confusing and your data will be inaccurate for your second rider.
- Resize, scale and move your two sessions around on the screen or projector until you have them scaled and displayed how you prefer on the screen (tiled, above/below, side-by-side, quadrants or whatever you wish).
I prefer to have my sessions side by side, with a full-width chat window below my sessions, so I can see and read the chat log scroll back for messages I may have missed.
- At this stage, you should now have two bikes + their paired sensors tied to two simultaneous profiles on the same PC. But you’re not done yet, because there’s data within those sessions that is being created and must be preserved in order to upload it to Zwift (and Strava, if you connected your profile(s) to that).
When you exit Zwift in the first session (the “normal” session), you can simply “Save + Upload” as you normally would at the end of a ride, and your .fit file data created in “%HOMEPATH%\Documents\Zwift\data\” will be uploaded to Zwift to preserve your ride.
When you exit the second session (the “cloned” session we created in Step 3 above), you need to be very careful that you do not move that data back out of the sandbox into your normal working directory, or you’ll overwrite your first session’s .fit files and logs.
As long as you didn’t change any of the default settings, you should be fine and it shouldn’t prompt you.
That’s basically it, in a nutshell. There are a few additional steps and processes I’ve been working on to refine this process a bit more (“Secret Sauce”) as I turn this into a real product.
I may come back here and update this HOWTO to reflect those changes as I vet them, but this should get you started with your own multi-user Zwift setup in a fairly straightforward way.
Comments, feedback, criticisms, Zwift schwag, items from my Amazon Wish List and anything else you feel are worthy of throwing my direction, are always welcome.
#RideOn!