
HOWTO: Browsing securely, using i2p with Firefox and FoxyProxy
Tags: Eric Jung, http, i2p network, i2p networks, local Internet providers, online research, web browser
![]() I’ve been using i2p for a few things, including browsing and keeping my online research for new business ventures out of the prying eyes of my local Internet providers.
I’ve been using i2p for a few things, including browsing and keeping my online research for new business ventures out of the prying eyes of my local Internet providers.
Typically this means using a web browser of some sort to access content on the i2p networks (information that certain restrictive governments would prefer not be made available to the public at large), but it could also mean using an IM client, irc, or other tools to get to resources across the Internet in a secure fashion as well.
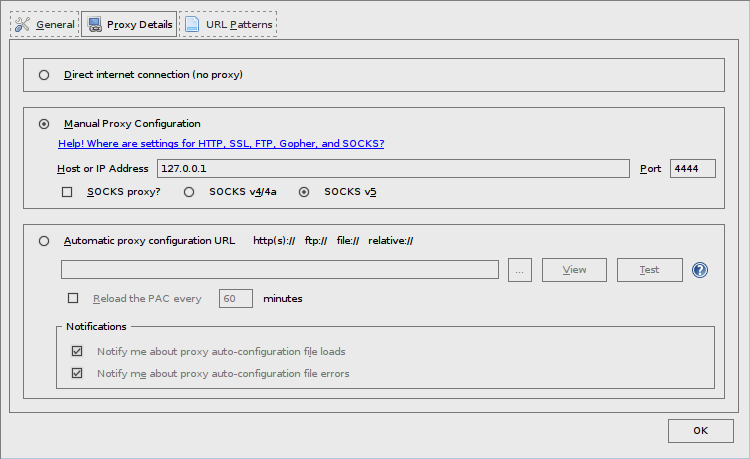
You can configure your browser manually to use the i2p proxy settings (127.0.0.1:4444 by default), or if you’re using FireFox, you can use an add-on by Eric Jung called FoxyProxy to configure those URLs for you.
Here’s how! (click the images below for full-size versions)
- Download and install FoxyProxy. Firefox needs to be restarted after you add this.
- When Firefox comes back up, you’ll see a new item in your status bar that looks like this:
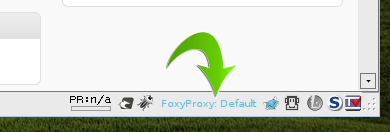
- Left-click the word “
FoxyProxy” in your status bar to bring up the FoxyProxy configuration dialog, which should look something like this:
- Click on “
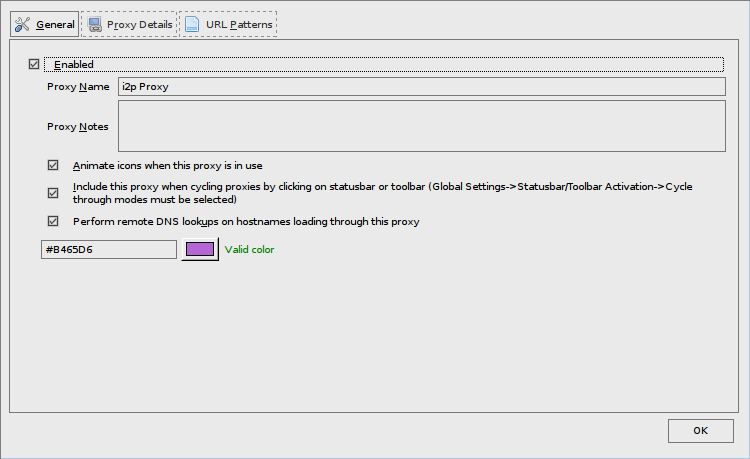
Add New Proxy” on the left side. I called mine “i2p Proxy” (how imaginative!), and set it up like this:
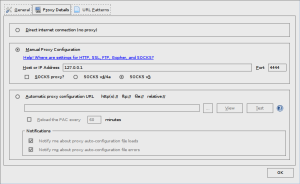

- The important items are to make sure that your “
Host or IP Address” does not have ‘http://‘ in it, and that you do not enable the “SOCKS proxy?” boxes. Save that configuration and exit back to your browser. - Right-click on “
FoxyProxy: Default” in the status bar. You should see a menu similar to this: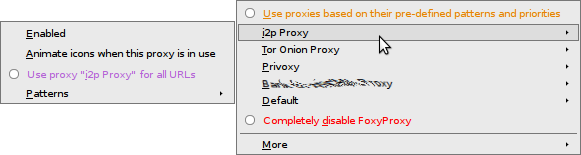
- If you wanted to use i2p for ALL urls, you could select it from the
i2p Proxy -> Use proxy "i2p Proxy" for all URLs"option, but we’re not going to do that right now. - Choose the “
Use proxies based on their pre-defined patterns and priorities” option at the top of this menu (the orange part in the image above).


Now when you’re browsing “normally”, you’ll fall through to the “Default” proxy (none). When you reach an i2p UR such as sponge.i2p, it will pass into the i2p proxy we’ve set up. it should be seamless. In the screenshots above, I also have Tor and Privoxy configured. If I was browsing and reached an “onion” URL, it would pass through to the Tor proxy.
You CAN use i2p for all browsing, if you wish, it’ll just be a lot slower, as it crawls through the i2p network to service your request first. Likewise for using Tor, but security and true anonymity comes at a cost. In this case, the cost is a little bit of latency and performance.
Stay secure!
HOWTO: Browsing securely, using i2p with Firefox and FoxyProxy … | Firefox News on Twitter said on November 2nd, 2010 at 11:06 pm quote
[…] Read more: HOWTO: Browsing securely, using i2p with Firefox and FoxyProxy … […]
HOWTO: Browsing securely, using i2p with Firefox and FoxyProxy … « Cache said on November 3rd, 2010 at 5:52 am quote
[…] Here is the original post:Â HOWTO: Browsing securely, using i2p with Firefox and FoxyProxy … […]
saica said on October 6th, 2011 at 1:31 am quote
Are the url patterns for https wildcard or regexp?
Anon said on July 4th, 2012 at 4:58 pm quote
Be aware that if you stumble into a malicious eepsite , it could have invisible pixels or images that route you through normal internet thus catching your IP and even browser info.