
Archive for the 'Technology' Category
My first week with Obsidian, and I built a Habit Tracker
Tags: Habits, ObsidianI’ve been a long-time subscriber of Evernote, 15+ years, with hundreds of notebooks, thousands of notes. When they went off the deep end and increased their subscription pricing by 217%, I ended my long history with them.
I moved all of my Evernote notes and notebooks into Joplin, and used that for the last couple of years as a generalized, hierarchical capture system. Many of my friends in the productivity space recommended I consider Obsidian, but until very recently it wasn’t free, and carried a $50/year subscription fee (yes, for everyone who used it for more than just personal use). It was, and continues to be, commercial software.
I had no problems with Joplin, but it was ‘plain’, and wasn’t very extensible in the rich ways I needed to link my notes together, much like I use Xmind for mind mapping.
So I jumped over to Obsidian, and imported all of my Joplin notes. Well, “imported” is the wrong word here, since it was just a tree of Markdown files, I exported from Joplin and moved that tree into the Obsidian data directory.
The next challenge was finding the right plugins to extend the capability of Obsidian to help me with my day-to-day workflow. I found a dozen useful plugins that I’m now using, including the Kikijiki Habit Tracker plugin I’m using for the habit tracker I built tonight. There are plugins for JIRA, Github, Amazon Kindle book highlights, Calendar, Kanban, Mermaid Charts, Tasks and many more.
I started using Dataview and Templater to build a custom Daily Journal page, with some dynamic elements, and soon realized the power of Dataview, so had a play with its visualizations, and built this little Habit Progress tracker around Kikijiki’s plugin:
The resulting rendering of this progress tracker looks like this:
The code is quite simple, just add this to your page of choice:
``` dataviewjs
const folder = "Daily Journal";
const today = new Date();
const daysInMonth = new Date(today.getFullYear(), today.getMonth() + 1, 0).getDate();

const notes = [...dv.pages(`"${folder}"`)]
    .filter(p => p.file.tags && p.file.tags.some(t => t.startsWith("#habit/")));

const habits = {};

notes.forEach(p => {
    p.file.tags
        .filter(t => t.startsWith("#habit/"))
        .forEach(tag => {
            habits[tag] = (habits[tag] || 0) + 1;
        });
});

const habitKeys = Object.keys(habits);
const totalPossible = daysInMonth * habitKeys.length;
const totalCompleted = Object.values(habits).reduce((sum, count) => sum + count, 0);
const overallPercent = totalPossible > 0 ?
      ((totalCompleted / totalPossible) * 100).toFixed(1) : "0.0";

dv.paragraph(`**? Overall Completion:**
      ${totalCompleted}/${totalPossible} (${overallPercent}%)`);

const table = habitKeys.map(tag => {
    const count = habits[tag];
    const percent = ((count / daysInMonth) * 100).toFixed(1);
    const barCount = Math.round(percent / 10);
    const bar = "?".repeat(barCount) + "?".repeat(10 - barCount);
    return [tag.replace("#habit/", ""),
           `${count}/${daysInMonth}`, `${percent}%`, bar];
});

dv.table(["Habit", "Days Completed", "Completion %", "Progress"], table);
```
That’s it!
It will build a dynamic inventory of your defined habits, using the ‘#habit/Thing’ structure provided by Kikijiki as tags on each day’s Daily Journal page. My pages are titled with the format ‘YYYY-MM-DD’, and it parses those inside the ‘Daily Journal’ folder. You may need to alter the code if your pages are in a different place or have a different name.
Suggestions, comments, fixes or anything else you think would improve this are welcome!
Pinterest changed their interface, they broke it, and I fixed it
Tags: Technology, web browserIf anyone uses Pinterest on a regular basis, you might noticed they recently changed their interface for the first time in just about a decade.
Previously, when you clicked on any image, it would highlight the image and allow you to “Visit Site” if it was linked from that image. Hitting [Esc] would then bring you back to the previous page, the page you came from before you clicked on the image.
Now they’ve update the UI and made it so you need to mouse over the image, and click a back arrow button to go back to the previous page. This is unnecessary and annoying, and breaks common web paradigms.
So I fixed it, with a simple ViolentMonkey/Greasemonkey browser add-on:
// ==UserScript==
// @name         Pinterest: Escape ? Back
// @namespace    https://pinterest.com/
// @version      1.4
// @description  Press Esc on Pinterest to go back in history
// @match        https://*.pinterest.com/*
// @grant        none
// @run-at       document-end
// ==/UserScript==

(function() {
    'use strict';

    document.addEventListener('keydown', function(event) {
        if (event.key === 'Escape' && !event.defaultPrevented) {
            var backButton = document.querySelector('button[data-test-id="back-icon-button"]');
            if (backButton) {
                backButton.click();
            } else {
                history.back();
            }
        }
    });
})();
This now works as expected, and you don’t need to have your hand on the mouse or mouse around to find that back button.
Sometimes the simplest of solutions is all that’s required.
Running Apache Directory Studio on Apple M1.. cleanly!
Tags: Apache, Apple, Java, LDAP, MacBookThere have been dozens and dozens of posts attempting plenty of weird, unsupportable hacks and workarounds to get ADS working under the ARM cores used by the Apple M1/M2 chipsets. You need a few dependencies installed and configured to get this working, and Rosetta2 does not work in this situation.
Simply installing Apache Directory Studio from their download page or brew, will result in the following error message when you try to launch it:
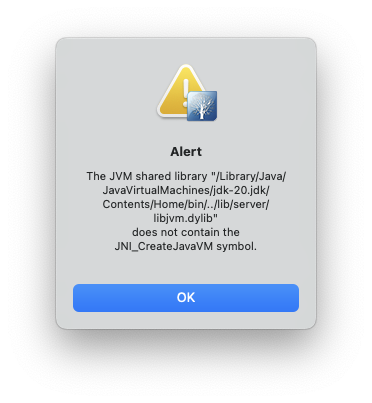
This is because the version of Java installed via the OS or from Oracle’s own download page, will not work when it’s the native ARM or aarch64 version.
There are many posts that include installing the version of Java from temurin but that too, will give you the wrong version of the JDK to make this work.
brew install --cask temurin
You need at least Java version 11 in order to run Apache Directory Studio, but version 20 will also work, with the steps here.
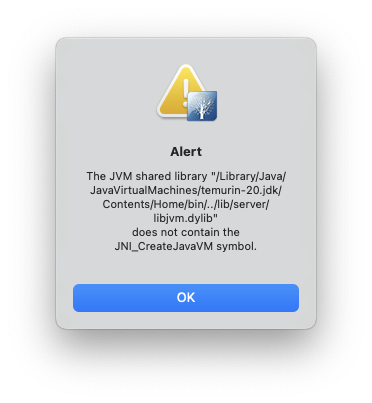
Also, editing the path in the Info.plist in /Applications/ApacheDirectoryStudio.app/Contents/Info.plist to point to the temurin JDK, will also fail.
There’s an XML block at the bottom of the file that implies you can just point to a different java version you have installed and it will use that. It does, but then crashes with the following dialog, even with the temurin version installed:
<!-- to use a specific Java version (instead of the platform's default) uncomment one of the following options, or add a VM found via $/usr/libexec/java_home -V
    <string>-vm</string><string>/System/Library/Java/JavaVirtualMachines/1.6.0.jdk/Contents/Commands/java</string>
    <string>-vm</string><string>/Library/Java/JavaVirtualMachines/1.8.0.jdk/Contents/Home/bin/java</string>
-->
To see the versions of Java you may have installed, you can run:
$ /usr/libexec/java_home -V
Matching Java Virtual Machines (3):
    20 (arm64) "Oracle Corporation" - "Java SE 20" /Library/Java/JavaVirtualMachines/jdk-20.jdk/Contents/Home
    20 (x86_64) "Eclipse Adoptium" - "OpenJDK 20" /Library/Java/JavaVirtualMachines/temurin-20.jdk/Contents/Home
    17.0.6 (arm64) "Oracle Corporation" - "Java SE 17.0.6" /Library/Java/JavaVirtualMachines/jdk-17.jdk/Contents/Home
/Library/Java/JavaVirtualMachines/jdk-20.jdk/Contents/Home
Ok, enough of the context of the failures… let’s get on to fixing this. You can leave the line you edited into your Contents/Info.plist and let’s get the right version of the JDK installed. The version we install will just replace the version in that same directory, and you won’t need to change it (unless you get a different version of Java in these steps).
Even the Oracle installer refuses to continue when using the x86_64 version:
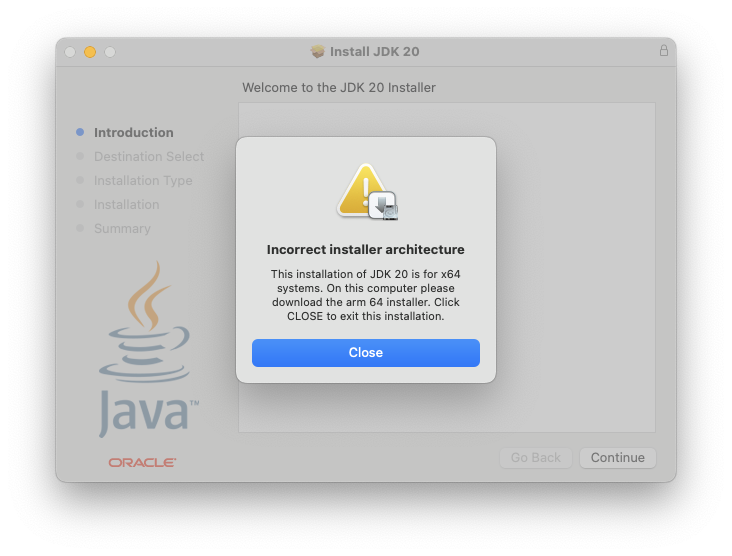
Instead of installing temurn using brew reinstall --cask temurin, you’ll want to visit the Adoptium Temurin download page and grab the version for x86_64, not aarch64, as you normally would get with brew or the Oracle downloads.
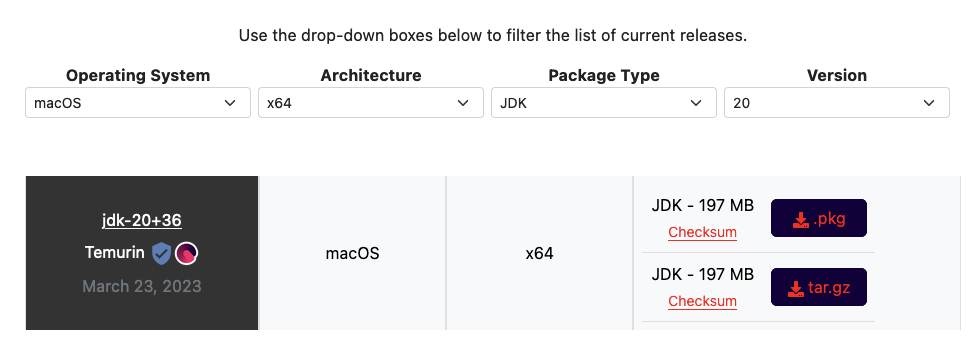
Once you download the x86_64 version of Temurin, it will install cleanly.
Now you can run ApacheDirectoryStudio directly from /Applications or your Terminal, and it will work!
HOWTO: Run multiple copies of Signal Messenger on your desktop/laptop
Tags: Privacy, security, SignalThis question has been asked many dozens of times for the last several years, and to-date, has not been solved in the core project itself. There were many attempts, hacks and workarounds, but nothing really supportable.
Let’s say you have two devices, a Personal phone and a Work phone, each running Signal. You want to be able to load one app and have conversations that span both devices. That is, converse with work colleagues and also converse with personal colleagues, from one desktop.
Today, you can’t. Well, not without some additional setup to do so.
To make this work, you’ll need to create a separate data directory for each “profile” you intend to use, and then configure Signal to refer to it when launching them. You can then tie these to a launcher or icon if you wish, in your favorite OS of choice (Linux and macOS are mine, macOS and Windows for others).
Your normal Signal data resides in a directory under your $HOME named ~/.config/Signal by default. Let’s make another to use for testing with your second device. Intuitively, you can name them by the device they are used with, so ~/.config/Signal-iPhone and ~/.config/Signal-Android for example on a POSIX based OS like Linux or macOS. On Windows, this will be stored in C:\Users\You\AppData\Roaming\Signal.
If you’re already using Signal on your desktop, your profile data will just be in the ~/.config/Signal directory, and you don’t need to change it. In fact, renaming it will likely break things until we create these additional profiles. Create a second directory at the same level as the existing one, for use with that second profile.
Now we need to launch Signal from the shell (Terminal in macOS, Command Prompt in Windows), and run it as follows:
/Applications/Signal.app/Contents/MacOS/Signal --user-data-dir=$HOME/.config/Signal-iPhone
This should prompt you to scan a QR code with your phone, to link the two devices, similar to the following:
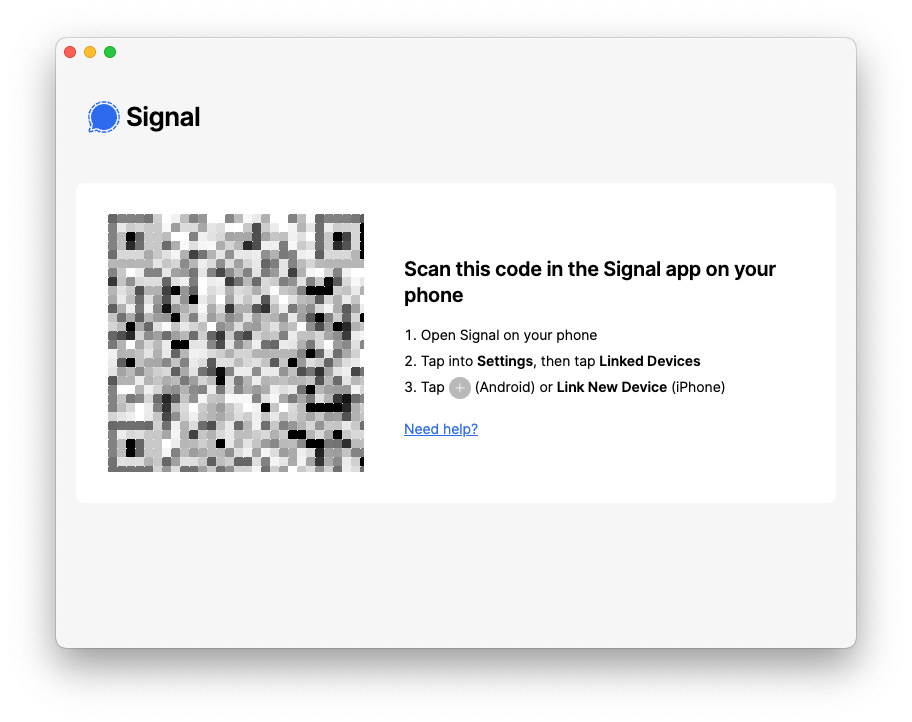
On your mobile device, go to Settings ? Linked Devices, and scan that QR code. It will now pair your phone with this instance of Signal Desktop.
So far, so good. Now while that is synchronizing your data, launch the other instance of Signal with the standard launcher. You should now get two instances of Signal Desktop running, one linked with your original mobile device, and this new instance linked with your second mobile device.
Ta-da! You did it.
Now let’s codify these changes into their own respective launchers/icons, so you don’t have to use the shell/Terminal/Command Prompt to do this each time.
On Linux, just create a launcher using your window manager that sets those commandline args as the default.
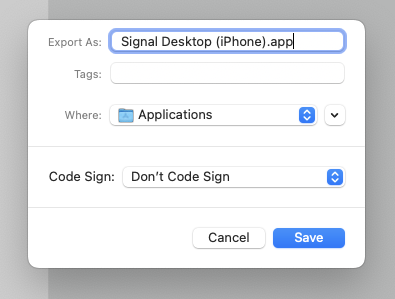
On macOS, you can create a new launcher for Signal with Automator, by choosing “Run Shell Script” from the Workflow menu. Double-click that, and a window will open to the right, allowing you to type in your shell commands. Mine is as follows, just like we ran from Terminal:
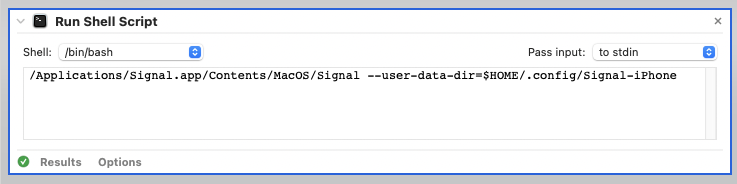
Click “Run” in the upper-right, to ensure it does indeed run Signal Desktop with your second (new) profile correctly. If it does, you can save it as a “Workflow” or an “Application”. I chose the latter, which looks like this:
Now you have your intended commands tied to an application launcher, which can be put into your Dock or other launcher location.
On Windows, you’ll need to create a new desktop shortcut by going to Preferences, and change the target to: C:\Users\You\AppData\Local\Programs\signal-desktop\Signal.exe --user-data-dir=C:\Users\You\AppData\Roaming\Signal-iPhone. You can choose any icon you wish to adorn this shortcut with.
That’s it! You now have a multi-Signal Desktop solution (that is, until the upstream project adds profile support to a newer release).
Have fun, and keep those messages secure!
HOWTO: Rebuild Tasmota firmware with Prometheus support
This project was a fun one. I run a lot of devices here, currently 80 according to my network reports, and many of those devices are configured to export their data, status, metrics to a /metrics endpoint that I pull with Prometheus (via prometheus-node-exporter) and then push to Grafana, so I can see fun, pretty graphs of the metrics.
These metrics range from the fan speed, thermal sensors on my laptop, to the ingress/egress packets across my network switch ports to the number of activations per-minute of my basement sump pump plugged into a smart plug, and dozens of other datpoints.
The smart plugs I’m currently using are Sonoff S31 smart plugs (specifically those in this link, because the ZigBee versions do not work with Tasmota firmware). Make sure you get the right version! You can use any plug or device that is already running the Tasmota firmware.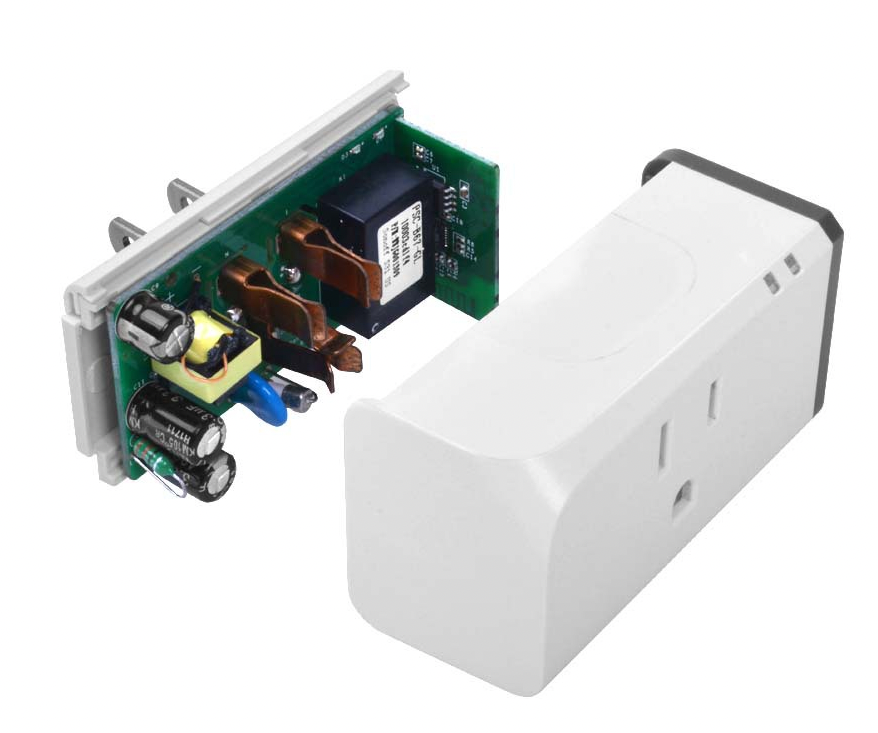
This HOWTO does not go into detail about how to dismantle your plug and reflash it with Tasmota. The S31 plugs make this trivially easy, solder-free, compared to many other plugs on the market that require much more dismantling or re-soldering pins.
These plugs by default, can measure current coming across the terminals, and give me a lot more data about what’s plugged into them. This data can be exported and made visible in Grafana, but not by default. This HOWTO will show you how to rebuild the Tasmota firmware (very easily), and add that capability.
There’s a few quick pre-requisites:
- Download Visual Studio Code. You can download the version directly from Microsoft, or you can use the VSCodium version, which is exactly the same bytes, but compiled without the “phone-home” telemetry and monitoring that Microsoft is known for building into their products. I chose the latter. Functionally, they’re identical.
- Download the Platform IO extension for VSCode. Other tutorials describe searching for this from within vscode, but that no longer works. You’ll want to go straight to the Version History tab and click the “Download” link next to the latest version on the right side.
- Download the Microsoft CPP Tools package in the same way you did for Platform IO in the previous step (choose “Version History” and click “Download” on the right side). The difference here, is you’ll need to be sure you choose the one specific to the platform you’re building Tasmota on. In my case, I’ll be building it on an Apple Silicon M1 MacBook, so I chose that version:

- Clone the Tasmota firmware repository from Github, using using
git clone https://github.com/arendst/Tasmotato some local project directory.
Once you have those 3 pieces downloaded, you can start configuring the build environment and building out Tasmota. Here’s how!
- Launch vscode (on whichever platform you’re using, it supports all of them).
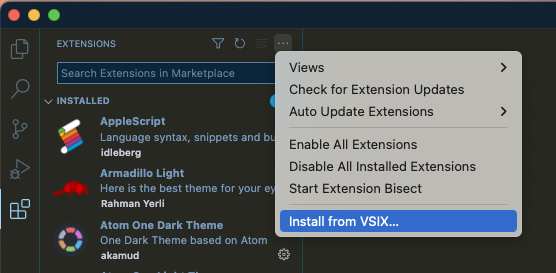
- Bring up your “Extensions” side-panel. On macOS for example, this is done with Shift+Cmd+X. On other environments, the shortcut may be different.
- In the upper-right corner of the extensions side-panel, click the 3-dot menu, and choose “Install from VSIX” at the bottom, as shown here:
- Choose the location where you downloaded the
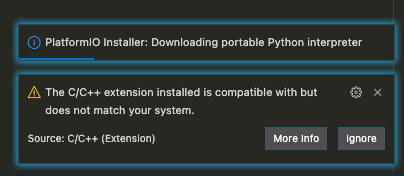
platformio.platformio-ide-2.4.3.vsixfile, and install that. Do the same for thems-vscode.cpptools-1.9.6@darwin-arm64.vsixpackage you downloaded. - After installing, you may be asked to restart vscodium. Go ahead and do that anyway, even if you’re not asked. When you do, you’ll probably notice several other, supplementary packages being installed to support this package.
When I did, I got a weird message that my chosen version of the CPP tools was not correct for my platform (it was correct), so just ignore that if you’re on Apple Silicon, and proceed anyway.
- We now need to open up the project directory of the git clone you pulled in Step 4 of the Pre-requisites section above, so it appears as your current project in the File Browser hierarchy:
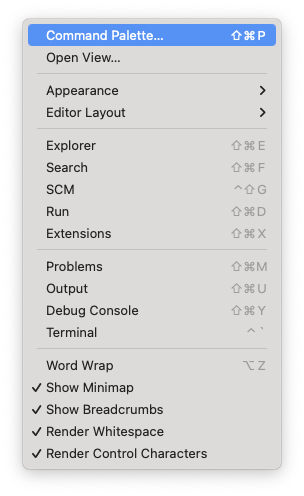
- From here, you wan to go to your “Command Palette” in vscode (Shift+Cmd+P on macOS, your key shortcut may vary, but it’s under the “View” menu).
And type ‘platform’, until you see “PlatformIO Build”, which should show you something like this: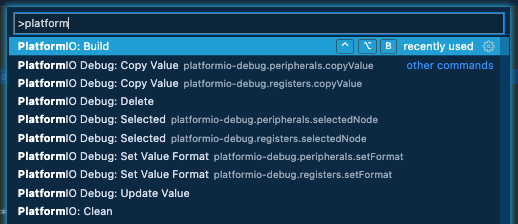
- Now choose that, and let it build to completion. It should be successful, as we haven’t changed anything at all yet. We’re just making sure the basic toolchain works as expected, unaltered.
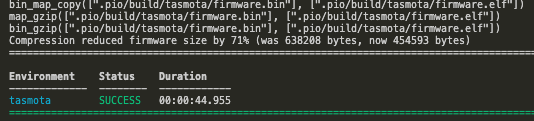
If you got this far, we’re almost done! - In the Explorer sidebar, navigate down to the
tasmotadirectory inside the project directory (soTasmota/tasmota) and inside that directory, you’ll find a file calleduser_config_override.h. Open that file in the vscode editor and scroll to the bottom. We’re going to add 1 line to this file just before the last line of the file and save it: #define USE_PROMETHEUS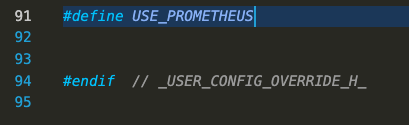
- We also need to choose which firmware we’re going to rebuild with this Prometheus support. In the case of my S31 smart plugs, that’s going to be the ‘sensors’ firmware version. That configuration is found in the file called
platformio_override.iniin the root of the Tasmota project tree. There is also a sample file there you can use for other options. Open that file in the vscode editor window and uncomment (remove the;from the line) the firmware you’re building. After the edits, that file should look like the following: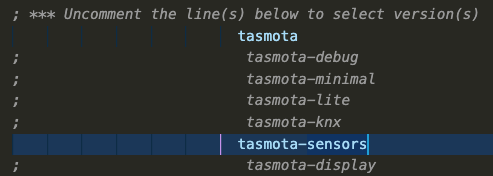
You can uncomment as many firmware types as you want, and they’ll be built simultaneously: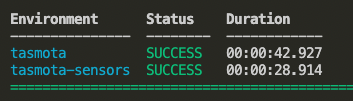
You can find the completed firmware builds in theTasmota/build_output/firmwaredirectory of the tree. - Now you can upload that firmware to your smart plug or other device, and you’ll then have a
/metricsendpoint exposed with some useful data, which you can point your Prometheus configuration at, to query that data on your interval.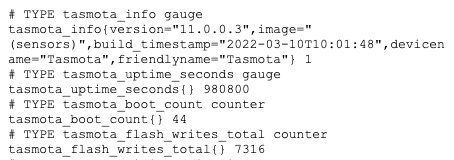
Now go have fun graphing those metrics.. I sure did! 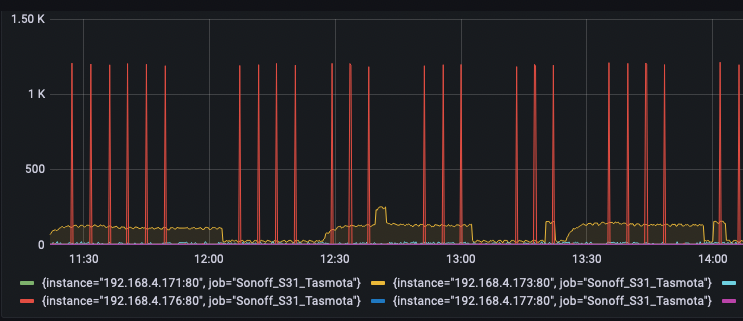
The correct way to copy LXD VMs and containers between hosts
There are quite a few posts out there describing some very odd methods to copy LXD containers from host to host, including shipping snapshots and tarballs of the container’s data directory around.
Those instructions are wrong. Don’t follow them.
The correct, and clean way to do this, is to configure your LXD hosts to talk to each other, and simply copy the containers between them. There’s a few reasons to use this approach:
- It’s more secure, using a secure transport, and proper authorization
- It doesn’t clutter up the source and destination with 2-3x the container size to create a temporary tarball which gets shipped around between hosts
- It allows you to start moving towards using LXD clusters, which is a “Good Thing(tm)”
- It relies purely on LXD concepts and built-ins, not external apps, programs or workarounds
So let’s get to it.
On LXD host_1, you can create a container or VM, as follows:
lxc launch ubuntu:20.04 --vm vm1 # virtual machine 1
lxc launch ubuntu:20.04 c1       # container 1
Wait for those to spin up and get an IP from your network.
lxc list
+------------------------------+---------+-------------------------+------+-----------------+-----------+
|             NAME             |  STATE  |          IPV4           | IPV6 |      TYPE       | SNAPSHOTS |
+------------------------------+---------+-------------------------+------+-----------------+-----------+
| c1                           | RUNNING | 192.168.101.57 (eth0)   |      | CONTAINER       | 0         |
+------------------------------+---------+-------------------------+------+-----------------+-----------+
| vm1                          | RUNNING | 192.168.101.56 (enp5s0) |      | VIRTUAL-MACHINE | 0         |
+------------------------------+---------+-------------------------+------+-----------------+-----------+
On this same LXD host, we can now configure a “remote” LXD host for it to speak to:
lxc remote add host_2You will be prompted to accept the host’s fingerprint, and alternately a connection password to authorize the addition. Once added, you can verify it with:
lxc remote list
+-----------------+------------------------------------------+---------------+-------------+--------+--------+--------+
|      NAME       |                   URL                    |   PROTOCOL    |  AUTH TYPE  | PUBLIC | STATIC | GLOBAL |
+-----------------+------------------------------------------+---------------+-------------+--------+--------+--------+
| host_2          | https://host_2:8443                      | lxd           | tls         | NO     | NO     | NO     |
+-----------------+------------------------------------------+---------------+-------------+--------+--------+--------+
| images          | https://images.linuxcontainers.org       | simplestreams | none        | YES    | NO     | NO     |
+-----------------+------------------------------------------+---------------+-------------+--------+--------+--------+
| local (current) | unix://                                  | lxd           | file access | NO     | YES    | NO     |
+-----------------+------------------------------------------+---------------+-------------+--------+--------+--------+
| ubuntu          | https://cloud-images.ubuntu.com/releases | simplestreams | none        | YES    | YES    | NO     |
+-----------------+------------------------------------------+---------------+-------------+--------+--------+--------+
| ubuntu-daily    | https://cloud-images.ubuntu.com/daily    | simplestreams | none        | YES    | YES    | NO     |
+-----------------+------------------------------------------+---------------+-------------+--------+--------+--------+
Before we do anything to the running VM (vm1) and container (c1), we want to take a snapshot to ensure that any trouble we have, can be restored safely from that snapshot.
lxc stop vm1
lxc stop c1
lxc snapshot vm1 2022-03-12-snapshot # any name will do
lxc snapshot c1 2022-03-12-snapshot
We always confirm our changes, especially where it relates to data preservation:
lxc info vm1
Name: vm1
Status: STOPPED
Type: virtual-machine
Architecture: x86_64
Created: 2022/03/12 19:35 EST
Last Used: 2022/03/12 19:36 EST

Snapshots:
+---------------------+----------------------+------------+----------+
|        NAME         |       TAKEN AT       | EXPIRES AT | STATEFUL |
+---------------------+----------------------+------------+----------+
| 2022-03-12-snapshot | 2022/03/12 19:44 EST |            | NO       |
+---------------------+----------------------+------------+----------+
Now we can start those back up:
lxc start vm1 c1 From here, we can now copy the snapshots we just made on LXD host_1 to LXD host_2:
lxc copy vm1/2022-03-12-snapshot host_2:vm1 --verbose
Transferring instance: vm1: 938.46MB (117.30MB/s)
On host_2, you can see that the vm1 we created on host_1, is now copied to host_2, and remains in a ‘STOPPED‘ state:
lxc list
+------------------------------+---------+-----------------------+------+-----------------+-----------+
|             NAME             |  STATE  |         IPV4          | IPV6 |      TYPE       | SNAPSHOTS |
+------------------------------+---------+-----------------------+------+-----------------+-----------+
| vm1                          | STOPPED |                       |      | VIRTUAL-MACHINE | 0         |
+------------------------------+---------+-----------------------+------+-----------------+-----------+
You can now start that VM, and have it running there, on host_2:
lxc start vm1Note: host_2 may have live on the same subnet as host_1, which means it may need a new IP address, if the original container is still running on host_1.
You will need to stop the container on host_1 and either give host_1 a new IP address, or start up host_2, and give it a new IP address. The two containers on the same L2 network will conflict, and your DHCP server will refuse to hand out a lease to the second one requesting it.
There are a couple of ways to do this:
- Give the container a static IP address. When you copy it to the second host, give it a different static IP address there, or
- If these containers will request a DHCP lease, you can remove /etc/machine-id and generate a new one by running
systemd-machine-id-setup. With a new machine-id, the container will appear to be a new machine to your DHCP server, and it will hand out a second lease to the second container.
With the container(s) copied from host to host, and their networking reconfigured to fit your LAN/network topology, you should have them running.
This is a stopgap though, as this isn’t an HA setup. If you truly want to have resilience, you should set up a LXD cluster between both LXD hosts, and then you can see/create/move/migrate containers between the hosts on-demand, seamlessly. When you configure those LXD servers to use shared storage (common to both LXD hosts in this case), the containers will survive a full outage of one or the other LXD host.
Good luck!
HOWTO: Roll back Ubuntu to a Previous Release
Note: I work for Canonical, we make Ubuntu (among dozens of other products)
In many cases, you want to be able to upgrade your Ubuntu release between different versions over time. There are many tools that allow you to do this seamlessly and without loss of function or data. One such tool is called do-release-upgrade, found in the ubuntu-release-upgrader-core package. You can move between supported LTS releases, as well as development releases.
What’s missing, is the ability to roll back from a release, for example when an application or library you rely on, has no support for the newer version of the OS release. With ZFS root on Ubuntu, you can create a snapshot before upgrading and roll back that snapshot when things do not go to plan. With VMs and containers, taking snapshots and reverting those becomes even easier.
But let’s stick with standard tools and supported mechanisms for the moment. I just did this minutes before writing this blog post, and have done this dozens of times in the past.
I have a working, Ubuntu Focal Fossa (20.04) baremetal machine I use as a reproducer for tricky customer issues using MAAS (Canonical’s baremetal provisioning product). In some cases, I need to move between MAAS versions to execute those tests, and they have to be done on baremetal, because VMs and containers can’t model the same topology.
MAAS has matured in its version support and newer versions of MAAS no longer support older versions of Ubuntu. For example, Ubuntu Bionic Beaver (18.04) supports MAAS versions up to version 2.8, but to consume a newer version of MAAS (2.9, 3.0, 3.1), you have to upgrade to Focal (20.04). Once the machine has been upgraded and running MAAS 3.1 on 20.04, you can’t test issues reported against 2.8 or Bionic. Rolling back becomes important.
So let’s do that!
First and most-important, is to make sure you have no broken packages, half-installed .deb packages or weird/custom PPAs. You can use ppa-purge to get rid of those third-party PPAs (you can put them back later), but for now, let’s just move them out of the way:
rename.ul list orig /etc/apt/sources.list.d/*.listNote: rename.ul comes from the util-linux package on most Linux distributions.
Now we can wipe out the cached package lists for the current Ubuntu release:
rm /var/lib/apt/lists/*We also need to transform our sources.list file in /etc/apt/ to point to the previous Ubuntu release. We can either edit the file directly, or make a copy for each release, and refer to them individually. Since I roll forward and back very often, I keep copies of both, and use a symlink to flip between them. That looks like this:
-rw-r--r-- 1 root root 3060 Mar 12 11:12 sources.list-bionic
-rw-r--r-- 1 root root 3035 Mar 12 11:12 sources.list-focal
lrwxrwxrwx 1 root root 19 Mar 12 11:12 sources.list -> sources.list-bionic
When I want to move between releases, I just remake that symlink:
ln -sf /etc/apt/sources.list-focal /etc/apt/sources.listNote: The extension of the original file cannot include the .list extension, or it will be parsed by apt/apt-get. They have to be a different extension, as .list is significant.
For now, I’m rolling back from Focal to Bionic, so this is the correct link.
We also need to make sure we define a preference to permit us to roll back. We do this with setting the package priority in a file that lives in the /etc/apt/preferences.d directory:
Create a file in there called rollback.pref with the following contents. You can use the same logic as I did with the sources.list symlink above.
Note: The extension of the original file cannot include the .pref extension, or it will be parsed by apt, and that’s not what you want.
Package: *
Pin: release a=Bionic
Pin-Priority: 1001
This indicates that the package priority for the packages with the series ‘Bionic’ have a higher priority than the currently installed versions of those same/similar packages.
Now we can update those package lists with apt update or apt-get update as you prefer. Once the package lists have been updated, hopefully without any errors, we can execute the following to downgrade all of them to the versions we need:
apt-get -fyu upgrade --allow-downgradesNote, this may not be foolproof, depending on what’s running on your system and how you used those packages. You may need to make note of some conflicts and do some removal/reinstall of those conflicting package to work around some up/down dependency issues, but that should be minimal. Here’s one example:
# apt-get -fyu dist-upgrade --allow-downgrades
Reading package lists... Done
Building dependency tree
Reading state information... Done
Calculating upgrade... Done
Hmm, seems like the AutoRemover destroyed something which really
shouldn't happen. Please file a bug report against apt.

The following information may help to resolve the situation:

The following packages have unmet dependencies:
 f2fs-tools : Depends: libf2fs0 (= 1.10.0-1) but it is not going to be installed
E: Internal Error, AutoRemover broke stuff
To resolve this, I can do something like the following:
# apt-get --reinstall install f2fs-tools
Reading package lists... Done
Building dependency tree
Reading state information... Done
The following packages were automatically installed and are no longer required:
  libf2fs-format4 libf2fs5
Use 'apt autoremove' to remove them.
The following additional packages will be installed:
  libf2fs0
The following NEW packages will be installed:
  libf2fs0
The following packages will be DOWNGRADED:
  f2fs-tools
0 upgraded, 1 newly installed, 1 downgraded, 0 to remove and 237 not upgraded.
Need to get 127 kB of archives.
After this operation, 99.3 kB disk space will be freed.
Do you want to continue? [Y/n]
Answering ‘Yes’ will resolve that conflict for me:
Do you want to continue? [Y/n] y
Get:1 http://us.archive.ubuntu.com/ubuntu bionic/universe amd64 libf2fs0 amd64 1.10.0-1 [24.6 kB]
Get:2 http://us.archive.ubuntu.com/ubuntu bionic/universe amd64 f2fs-tools amd64 1.10.0-1 [102 kB]
Fetched 127 kB in 0s (1,111 kB/s)
Selecting previously unselected package libf2fs0:amd64.
(Reading database ... 78864 files and directories currently installed.)
Preparing to unpack .../libf2fs0_1.10.0-1_amd64.deb ...
Unpacking libf2fs0:amd64 (1.10.0-1) ...
dpkg: warning: downgrading f2fs-tools from 1.11.0-1.1ubuntu1 to 1.10.0-1
Preparing to unpack .../f2fs-tools_1.10.0-1_amd64.deb ...
Unpacking f2fs-tools (1.10.0-1) over (1.11.0-1.1ubuntu1) ...
If you want to be pedantic and ensure your system will definitely boot, you can do two more things before that final reboot.
sudo update-initramfs -uk all
sudo update-grub
And that’s it! Once the packages are cleanly downgraded, you should be able to reboot the machine back into the previous Ubuntu OS release.
Update: I just noticed that immediately after my first reboot, there were more packages that needed to be downgraded. I simply re-ran the downgrade again, and these were updated to the previous versions:
apt-get -fyu dist-upgrade --allow-downgradesI also ran the following, to remove unneeded packages after that last, clean downgrade step:
apt-get -y autoremoveHOWTO: Using your GoPro Hero8, 9 and 10 as a webcam on Linux over USB-C WITHOUT the Media Mod. Now you can!
This was a challenge/goal of mine and true to form, I rarely give up until I’ve figured something out, or coded a workaround. As Mark Rober so eloquently said, 2m10s into this video about the NICEST Car Horn Ever:
“The good news is that as an engineer, if something isn’t exactly how you want it… you just make it exactly how you want it.”
Some points straight from the start:
- The GoPro does not support connecting TO WiFi networks. Full stop. Period. It can’t be a wireless client, only an AP.
- The hardware is fully capable of connecting to existing WiFi networks but GoPro restricts this, and there’s no foreseeable way around it without hacking into the firmware and reflashing it with a replacement.
- You can connect TO the GoPro as it presents its own WiFi network, but you cannot connect your GoPro to any existing WiFi network in range.
- A $12 smart plug can connect to an existing WiFi network, but a $400 action cam from GoPro cannot. #facepalm
- To connect the GoPro via HDMI directly, you need their $79 Media Mod hardware.
- It’s essentially a frame that wraps around the GoPro, and exposes USB-C, micro-HDMI and an audio port for the device.
- All of these are accessible via the single USB Type-C port that the Media Mod docks into. A USB Type-C to micro-HDMI adapter will not work when plugged into the bare GoPro USB Type-C port.
- I tried 3 different models, they were all rejected and ignored.
- GoPro Hero 5, 6 and 7 models supported native HDMI out. The Hero 8, 9 and 10 do not.
- You need the additional Media Mod to get native HDMI out.
- Anything greater than 1080p will require HDMI out.
So let’s dive in and get this working!
First thing you’ll need, is a USB cable. This can be a native USB Type-C to USB Type-C cable, or USB Type-C to USB Type-A, whatever your specific hardware (laptop or PC) requires.
You’ll want this cable to be relatively long, if you’re using this as a webcam, so you can position it where you need it, without being limited by cable length. There are an infinite number of choices and colors for these cables on Amazon and other retailers.
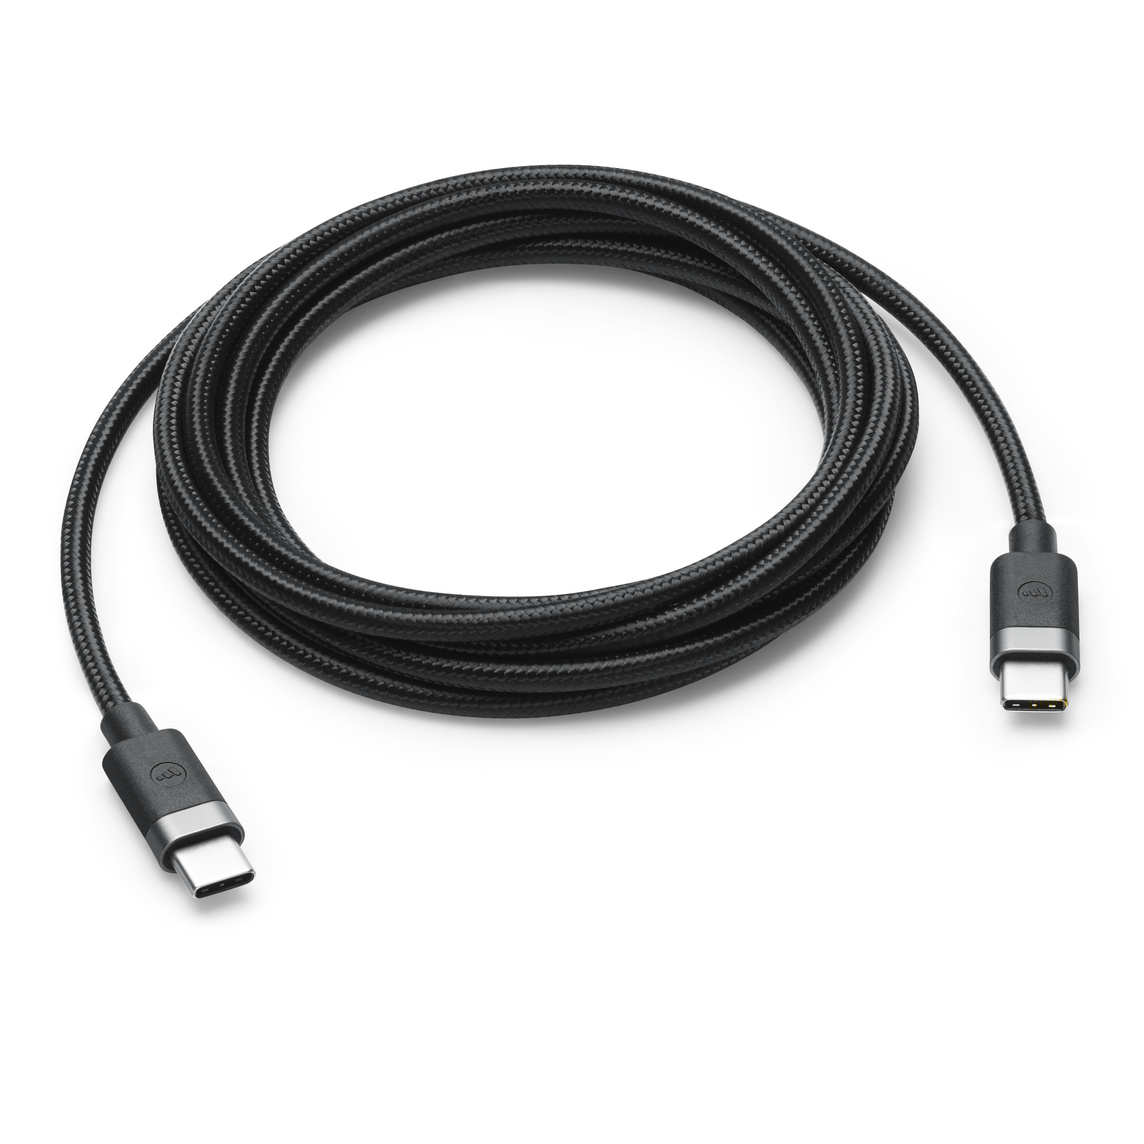
Just make sure you get a good quality, shielded cable for this purpose.
Once you have that, you’ll need to open up the battery door and pop that off, or, alternatively you can leave it ajar, with the battery inserted. I don’t like the door hanging half-off at a 45-degree angle, so I pried mine off. Since I also own the Media Mod, this was something I’ve already done 100 times.
To remove the door, you just open the door all the way until it won’t go any higher, than you give it gentle twist from front of camera to back, and it will pop off the hinge. If you’re used to how a Garmin watch band is removed from the watch face, it’s similar to that.
Next, you’ll want to go into the GoPro settings, and make sure the connection type is not “MTP” (used when mounting your GoPro as a “storage” device to retrieve photos, videos from your device. We’re not doing that here, so go the menus and swipe up, go to Settings ? Connections ? USB Connection ? GoPro Connect.
Now let’s make a quick change to your host’s networking to support giving this device a DHCP address when you connect it to your machine. To do that, you’ll use one of the following constructs:
If using netplan,. your configuration should look something like this, in a new file called /etc/netplan/02-gopro.yaml:
network:
  version: 2
  renderer: networkd
  ethernets:
    usb0:
      dhcp4: yes
If you’re using the legacy ifupdown style configuration, you’ll want to add the following to /etc/network/interfaces (or /etc/sysconfig/network for RPM-based distributions):
auto usb0
iface usb0 inet dhcp
To activate that, you can do a sudo netplan apply and it will render that configuration and restart systemd-networkd for you to acquire a DHCP lease when the camera is plugged in via USB. For legacy ifupdown, you’ll want to just restart your networking service with systemctl or service.
When you do plug your camera in, you should see something like the following in dmesg:
[20434.698644] usb 1-1.4.2: new high-speed USB device number 24 using xhci_hcd
[20434.804279] usb 1-1.4.2: New USB device found, idVendor=2672, idProduct=0052, bcdDevice= 4.04
[20434.804283] usb 1-1.4.2: New USB device strings: Mfr=1, Product=2, SerialNumber=3
[20434.804284] usb 1-1.4.2: Product: HERO9
[20434.804285] usb 1-1.4.2: Manufacturer: GoPro
[20434.804285] usb 1-1.4.2: SerialNumber: Cxxxxxxxxxx123
[20434.811891] cdc_ether 1-1.4.2:1.0 usb0: register 'cdc_ether' at usb-0000:00:14.0-1.4.2, CDC Ethernet Device, 22:68:e2:ca:88:37
If you plugged in your camera and netplan/ifupdown assigned it a DHCP lease, you should now see something like:
15: usb0: <BROADCAST,MULTICAST,UP,LOWER_UP> mtu 1500 qdisc fq state UP group default qlen 1000
    link/ether aa:80:23:e6:6d:9a brd ff:ff:ff:ff:ff:ff
    inet 172.23.141.54/24 brd 172.23.141.255 scope global dynamic usb0
       valid_lft 864000sec preferred_lft 864000sec
    inet6 fe80::a880:23ff:fee6:6d9a/64 scope link
       valid_lft forever preferred_lft forever
You’re almost there!
Now we need to check out an upstream Github repository that includes some helper scripts/code to bring this camera online, attach a running ffmpeg process to it, and begin streaming it to a device in /dev/.
Clone the gopro_as_webcam_on_linux repository somewhere on your machine that will persist (not in /tmp which gets purged at each new boot).
$ git clone https://github.com/jschmid1/gopro_as_webcam_on_linux
Cloning into 'gopro_as_webcam_on_linux'...
remote: Enumerating objects: 78, done.
remote: Counting objects: 100% (78/78), done.
remote: Compressing objects: 100% (57/57), done.
remote: Total 78 (delta 34), reused 46 (delta 17), pack-reused 0
Unpacking objects: 100% (78/78), 32.04 KiB | 1.69 MiB/s, done.
If you go into that newly cloned repository and run the following command, you should see a new device get created that you can talk to. Make sure to change the IP to the one you observed when running the ip a s usb0 command above (bolded above and below for emphasis).
$ sudo ./gopro webcam -i 172.23.141.54 -a -n
Running GoPro Webcam Util for Linux [0.0.3]

       Launch Options
==========================
 * Non-interactive:  1
 * Autostart:        1
 * Preview:          0
 * Resolution:       3840p
 * FOV:              linear
 * IP Address:       172.23.141.54
==========================

v4l2loopback is loaded!
v4l2loopback was unloaded successfully.
v4l2loopback was successfully loaded.
Further down in the output, just before it begins to launch ffmpeg and start encoding the stream, you should see two lines that look like this:
[swscaler @ 0x56073e173740] deprecated pixel format used, make sure you did set range correctly
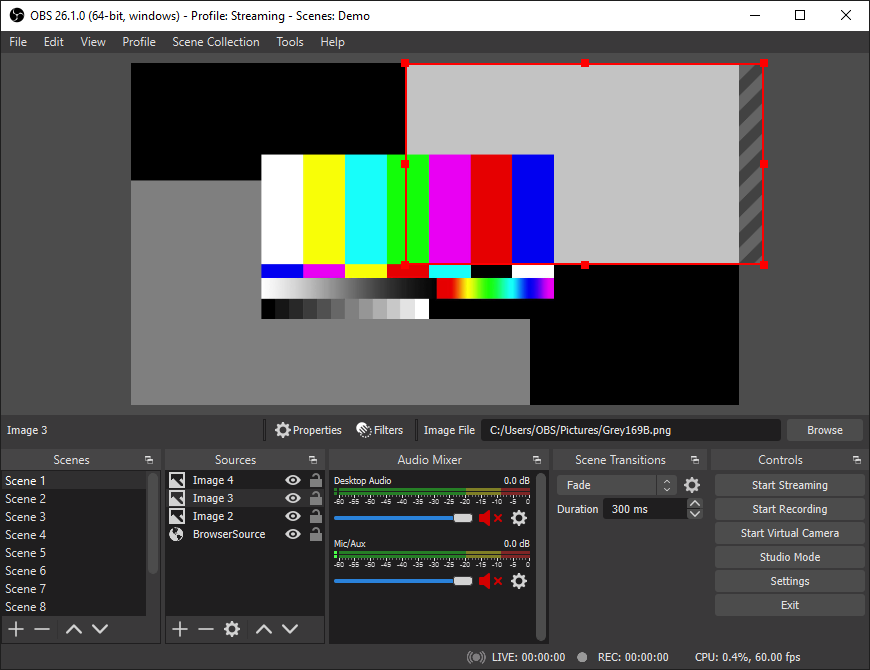
Output #0, video4linux2,v4l2, to '/dev/video42':That /dev/video42 is the important part for your streaming tools. If you use Open Broadcaster Studio (OBS), that’s the camera device you’ll want to connect to when you choose “Video Capture”, when creating a camera in your scene.
If you want to preview/play this stream that ffmpeg is creating for you, you can use mplayer to do that, as follows:
mplayer tv:// -tv driver=v4l2:device=/dev/video42 outfmt=mjpgThis will open a new, live, preview window you can use to fine-tune your scene, layout and positioning of the camera.
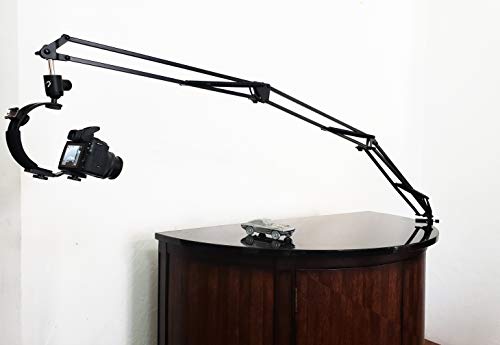
I have my camera sitting on an extremely long microphone boom arm with an extra ‘forearm’ to reach up and over my monitors from behind (many thanks go to ATARABYTE for this idea and the link to the Heron 5ft Articulating Arm Camera Mount [note: affiliate link to give her credit]).
So that’s it!
Once you have the camera on the network with an IP you can route to, you can use the gopro script from Joshua Schmid’s GH repository to create a device that can then be used by ffmpeg or OBS to stream that camera’s feed to other locations.
Keep in mind, there is a subtle 0.5s delay, but it’s not terrible. If you’re recording the stream, you can adjust the audio so it lines up in OBS with the latency/delay features. If you’re using this live, I would recommend not using this as a front-facing camera, and only use it as a secondary/backup or overhead cam (my specific use case is as an overhead cam for close-up work).
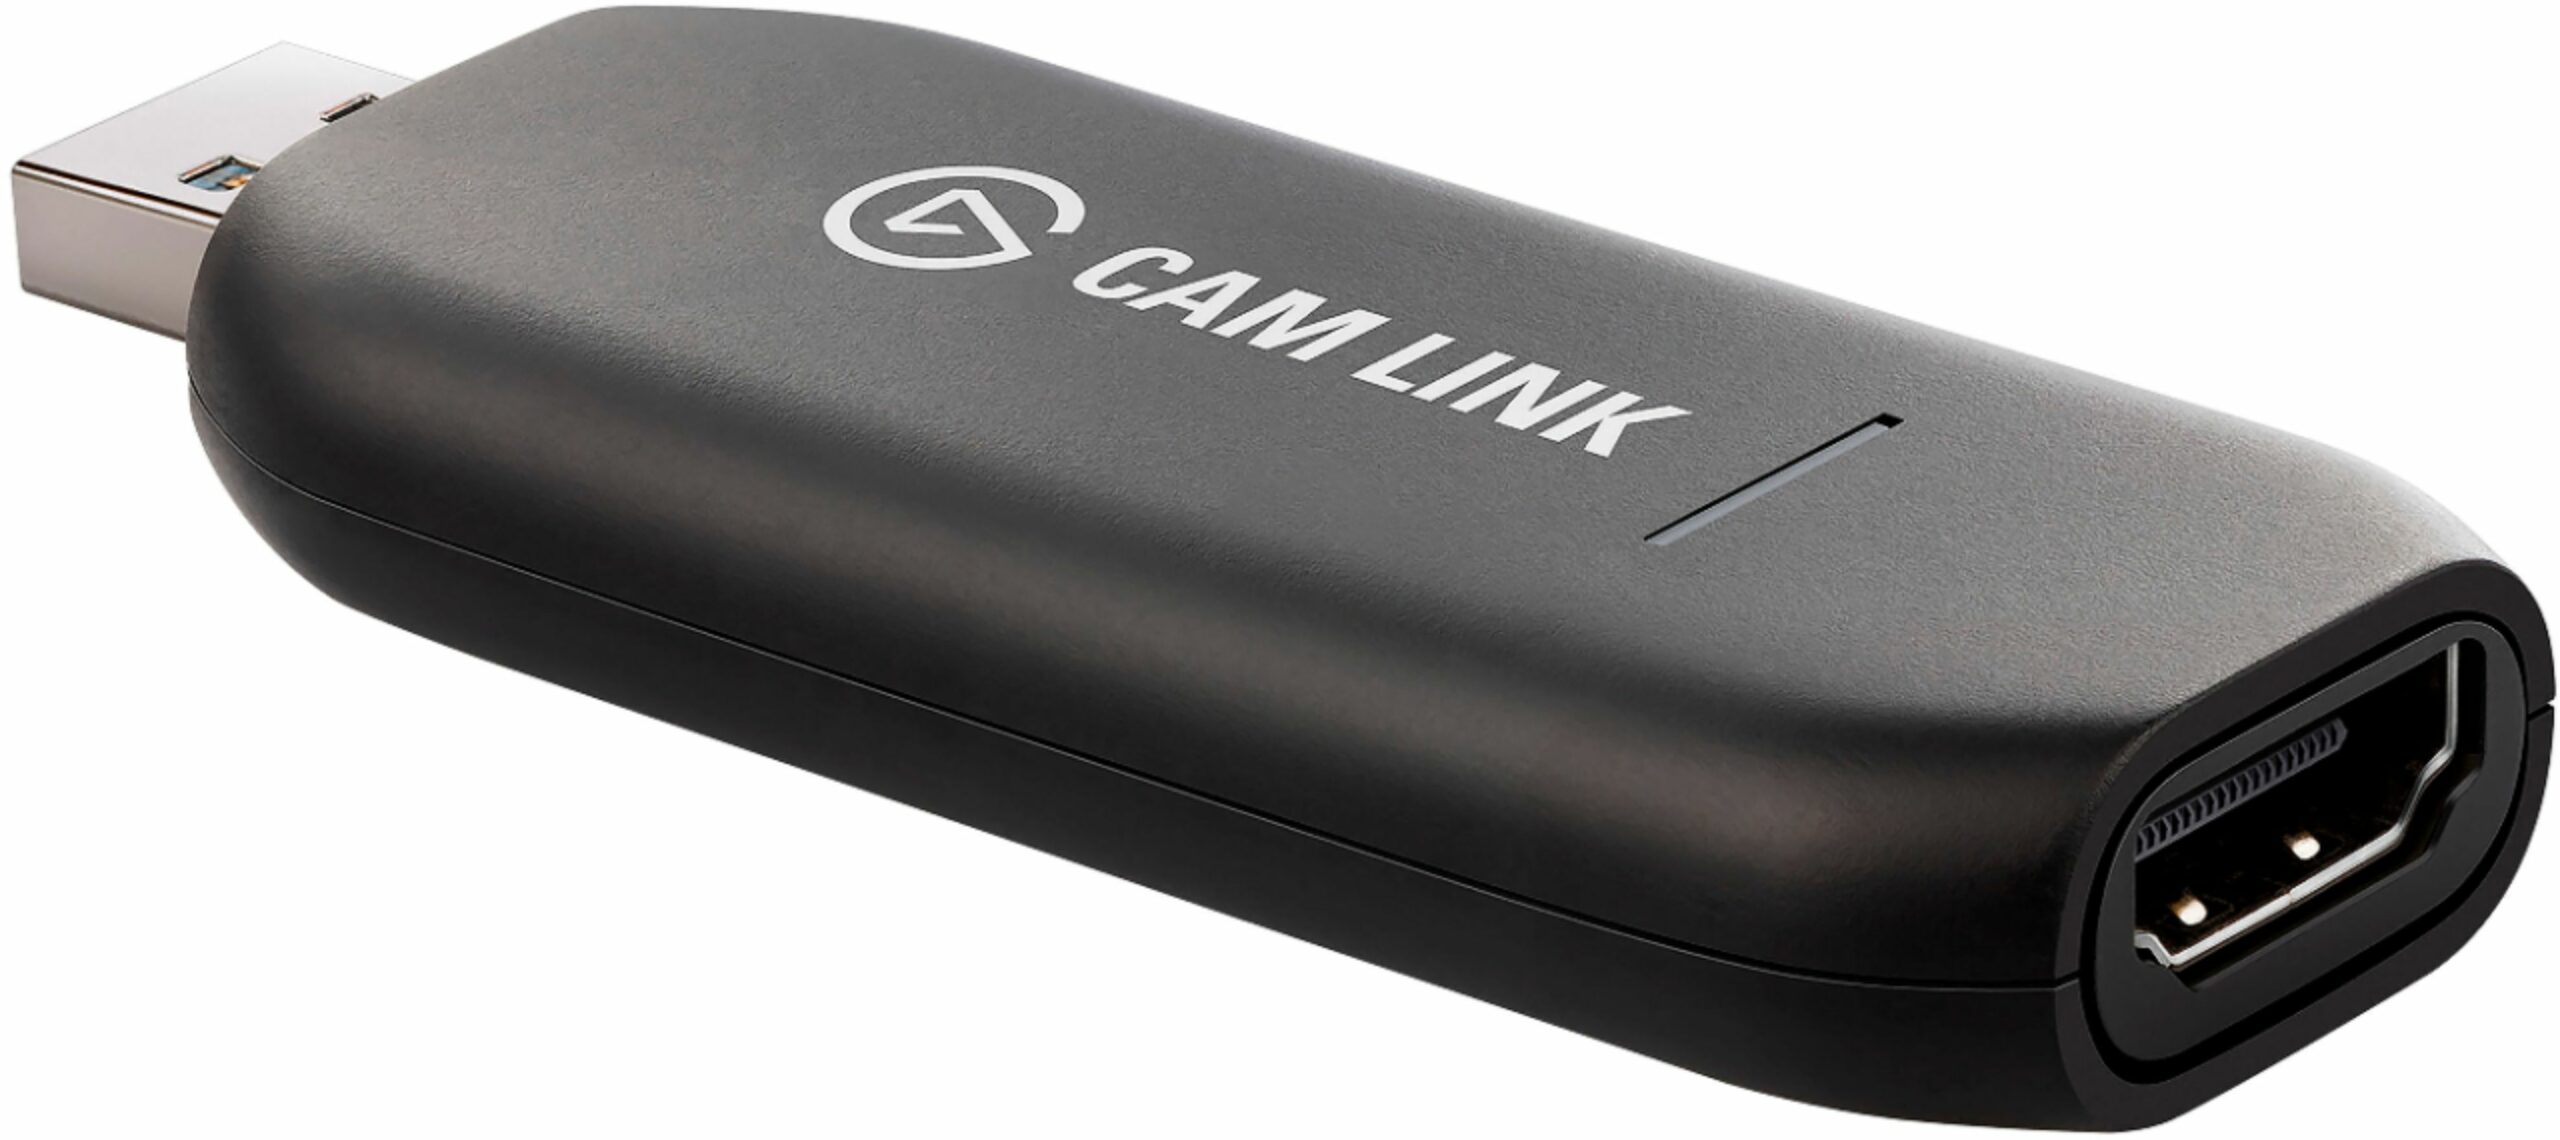
The GoPro, being an “Action Cam” also does not have autofocus, so anything closer than about 12″, will start to blur out. If you need autofocus, consider using a mirrorless DSLR camera and a decent lens. To connect that to your Linux machine, you can use an Elgato CamLink 4k device. I use this as well, with my main streaming setup, and it works fantastic on Linux, with no drivers or setup required.
HOWTO: Remove Burn-in and Ghosting on your LCD Panel
With the pandemic continuing and no real end in sight, those of us who work from home are putting in extended hours at work, and extended hours on our computers and office equipment, including our eyes and monitors.
My monitors have started to develop burn-in and ghosting on parts of the screen where I keep common apps running like my browser windows, chat apps and other services.
Modern monitors lack the “degaussing” feature that was popular years ago on older CRT monitors to help remove those ghost images.
Fear not! There’s still a way to help remove ghosting, and it doesn’t involve running a screensaver! You can run an “LCD scrub” behind your windows as you work (or in a cron job, systemd unit or other time-based scheduler). Here’s how!
First, install the xscreensaver-data-extra package from your favorite package archive. In Ubuntu, that’s a simple sudo apt install xscreensaver-data-extra command. Then, run the following one-liner to target your ‘root’ window (Desktop):
/usr/lib/xscreensaver/lcdscrub -random -noinstall -window -window-id \
   $(xwininfo -root -tree | grep Desktop | awk '{print $1}') -spread 10
This will run the lcdscrub utility in your ‘root’ display, scrubbing the screen behind all of your current windows. Of course, you can close those windows around and make it more effective.
Here’s a quick video showing how this works:
Running this on a regular basis is a good idea, so you can avoid the kind of burn-in that can prematurely age your display. Since it may be difficult (or expensive) to replace monitors with chip and electronic shortages, you’ll want to extend the life as long as you can, before inventory becomes available for replacements.
Using an Elgato Stream Deck XL for Desktop and Livestream Productivity
I recently rebooted my home office to support a lot more professional, studio-quality AV.
This included moving away from the onboard laptop webcam to a dedicated USB webcam for better quality. I chose the Logitech BRIO Ultra HD because it could do 1080p as well as 4k, if needed, and had a very wide FOV. I also moved from a USB microphone to an XLR microphone. I originally started with an Audio -Technica AT2020USB (Cardioid Condenser) USB mic, but moved over to the XLR version of the same mic, the Audio-Technica AT2041SP (Condenser) mic.
At the same time, I added an audio mixer, a Mackie ProFx6 v3. I originally bought the Focusrite Scarlett 18i8 (3rd Gen), but I could never get it to do anything at all, and even with a TRiTON FedHead attached, the audio was so low, and full of hissing background noise, it was unacceptable.
So that covered audio and video, but I needed a better way to present these into my meetings, work and personal, using Zoom, Teams, Google Meet and other tools.
Enter OBS, the Open Broadcaster Software. Since I use Linux, a lot of the free and commercial Windows alternatives were off the list, so I had to use OBS. With OBS, I can connect my cam to my Linux laptop and then create a ‘virtual’ camera that would be shared out via OBS, that I can configure in each video app I need. This allows me to add ‘scenes’ (more on this in another blog post) as well as overlays and other features to my video feed.
Currently, I have several cams set up, and can switch between them with a single keystroke, mouse click, or (as I’ll explain shortly), with a button-press on my Elgato Stream Deck XL. I have these set up with captions, an active clock (ticking each second visibly on my camera) and some other features.
I still use the Logitech Brio camera, but it’s now a secondary cam, replaced by a new primary cam, the Sony A6100.
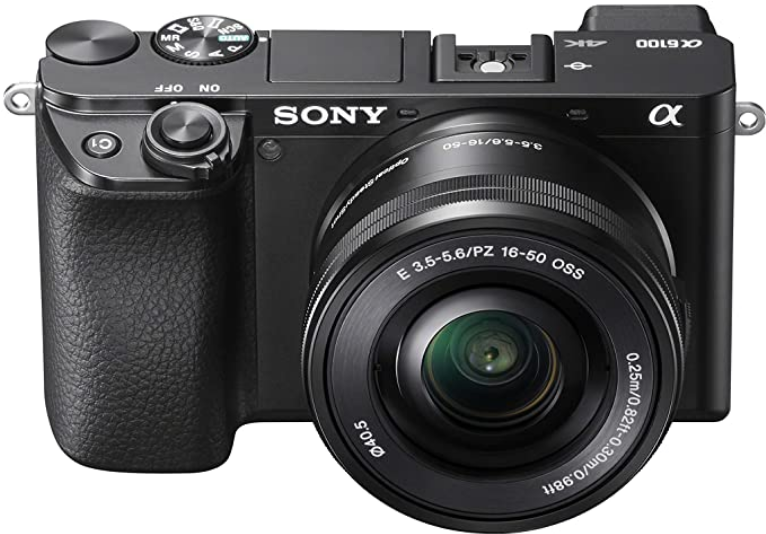
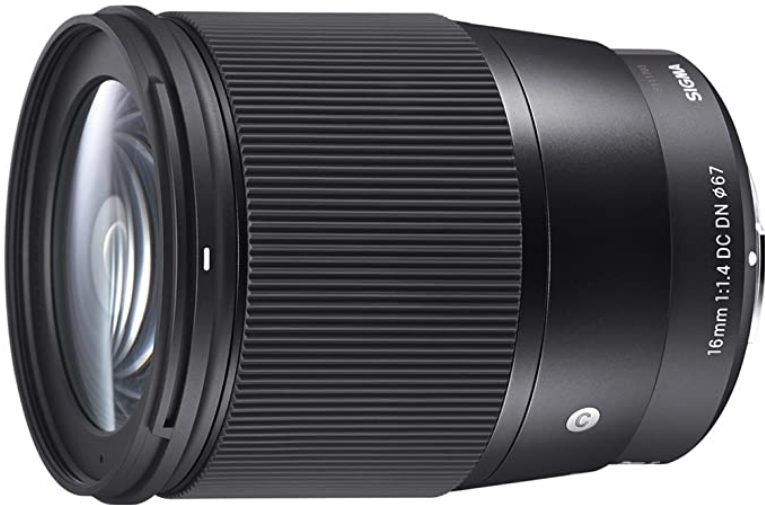
I bought this camera with the kit lens, and quickly realized I needed a better f-stop than the kit lens had. I wanted to go down to f/1.4 or f/1.2, from the f/3.5-5.6 that the kit lens had. I upgraded that lens to a Sigma 16mm f/1.4 about a week later, and I couldn’t be happier with the results. It’s shockingly crisp and the AF (AutoFocus) is the fastest I’ve seen on a lens in this class.
There’s much more to my environment I’ll talk about later, but this is the main pillars of my tools and studio.
I don’t have the mic going through OBS at the moment, but that’s coming soon. Once I do that, I can do some pre-processing of the audio and clean up background noise, increase gain and make the sound quality MUCH better.
That’s the high level change: Upgraded cams, mic, added a mixer, routed it all through OBS and manage it there. There’s so much that can be done with OBS, and I’ll do a whole series on that later.
Now let’s talk about how I’ve incorporated the Stream Deck XL into my workflow. This is normally a Windows/Mac only device, with dedicated software for those platforms. That won’t work for me, since I use Linux for everything. I found Timothy Crosley‘s project ‘streamdeck-ui‘, a Python project, does almost exactly what the Elgato native software does, with some additional features that Elgato doesn’t have. It was drop-in simple to get it up and running.
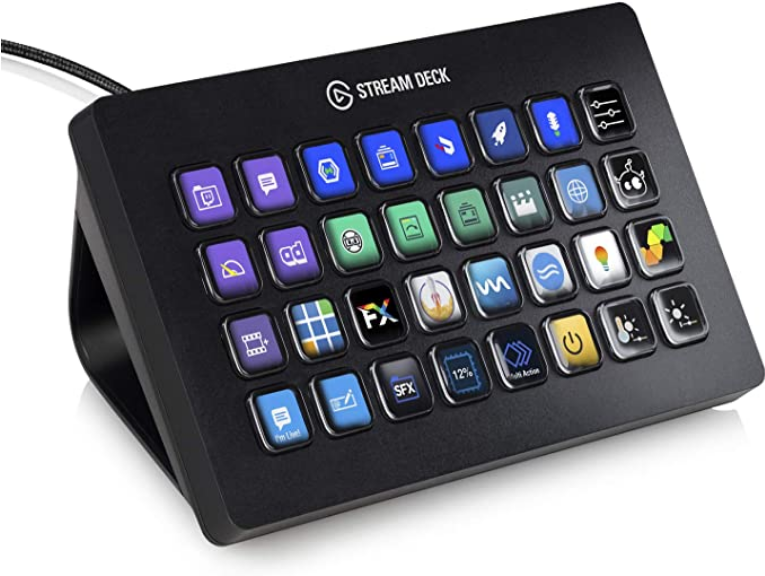
The XL has 32 buttons on its face, and with streamdeck-ui, I can have up to 10 pages of actions for those buttons, giving me a total of a whopping 320 possible buttons/actions to choose from.
I started configuring the first page for the most-used actions I would need with OBS, including:
- Launch OBS itself
- Open my normal work/desktop productivity apps, including Mattermost, Slack, Telegram, IRCCloud, Discord
- Open media apps I need; Google docs/sheets/drive, Spotify, Pandora, Dropbox and others
Then the other fun began. I wanted a way to target specific applications and stuff keystrokes into those apps. The first need was to be able to DM any of my teammates with a single button press.
I needed to find a way to “find” the Mattermost (or Slack) window on the desktop, target that window, raise it, then send keystrokes to that window, for example /msg SuperManager Good morning! I have a question...
To do this, I needed to create a shell script as a wrapper around wmctrl, xwininfo, and xdotool to do what I needed. I had to create a second script, similar to the first, to target specific public channels in Mattermost. Each of these is subtly different; one uses /msg and the other uses /join ~$channel before stuffing in keystrokes for actions.
Here’s an example:
#!/bin/bash

dm=$1
wmctrl -xa Mattermost
mm=$(xwininfo -root -tree | awk '/Mattermost/ {print $1}');
xdotool windowfocus ${mm} type "/msg $dm";
xdotool windowfocus ${mm} key KP_Enter
I can then call that from a streamdeck-ui button action with: mm-dm @SuperManager and it will find and open Mattermost, target that private conversation window, and I can start typing away.
The next extension of this of course, was to create custom buttons on the Stream Deck itself, for each member of my team. I have a separate page (32 buttons) with photos from our internal corporate directory, one photo per-button, for each member of my team, cross-teams, management and so on. A single press on their photo, will find Mattermost, target that window, and begin a DM with them.
It’s the Stream Deck equivalent of a visual phone directory.
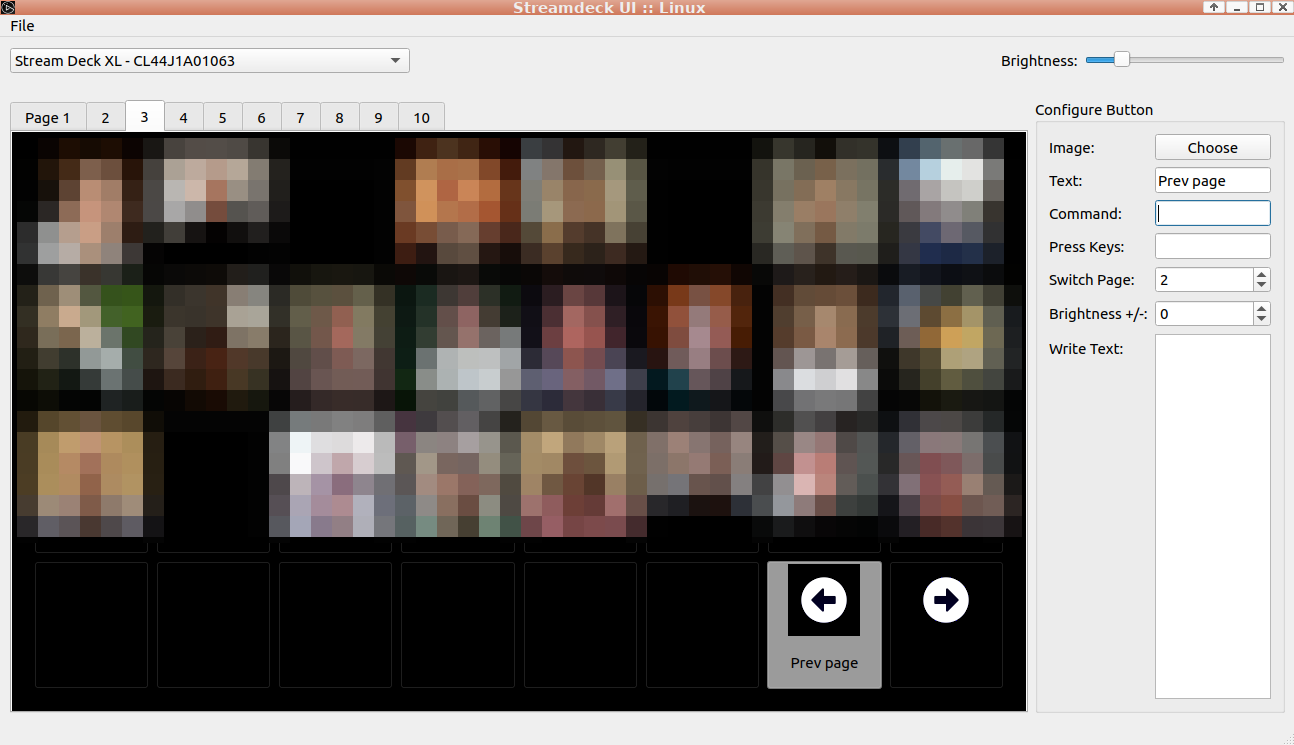
I also created forward/back buttons for switching between pages on the XL, which you can see here in the screenshot below. I have the ‘Switch Page’ action configured to switch to the previous or next pages, as needed. On Page 1, there’s only one button there, ‘Next Page’, which switches to Page 2. On all other pages, it goes forward or back, and page 10 wraps back to Page 1.
I also have the XL set up for my streaming environment, Govee Lyra and Govee Aura lights that live behind me on camera, uxplay for using my iPad Mini as a ‘lightboard’ during meetings. Here’s an example of how this looks with an actual glass lightboard.
I figured out how to do this without any of the complexities of actual glass, markers or extra hardware. Just Linux, OBS, my iPad, Stream Deck and uxplay. Works fantastic! I’ll do a whole post on that later.
The most-recent addition I figured out, literally this afternoon after fumbling to find my active Meet window and mute my mic, was how to use a single button on the Stream Deck XL, to mute and unmute my Google Meet calls. It’s similar to the way I’m targeting my Mattermost (Slack, Telegram, IRCCloud, etc.) windows, but instead, I’m targeting the top-most Google Chrome window that has Meet running in it. The script, tied to a ‘mute/unmute’ button, looks like this:
wmctrl -xa Chrome
chrome=$(xwininfo -root -tree | awk '/Meet .* Google Chrome/ {print $1}')
xdotool windowfocus ${chrome} key "ctrl+d";
That’s it. I configured streamdeck-ui with a single button press to toggle that on and off.
So that’s it for now, some great ideas to use a Stream Deck XL along with your regular desktop apps and productivity tools, to enhance even more productivity out of your environment.