HOWTO: Fully automated Zwift login on Mac OS X
 Quite a few riders on the Facebook Zwift Riders group have expressed an interest in this, so I decided to take a couple of hours, learn AppleScript and knock this out. Done! (if you’re on Windows, you want this other HOWTO instead)
What this code does, is allows you to create a single icon that will log you into Zwift, with no human interaction needed. It will put in your email, password, click the “Start Ride” button and away you go!
This also leverages the OS X Keychain to store your Zwift email address and password, so it’s secure, not leaked into the filesystem and is able to be called on by any other apps that might need it (ahem, like… Zwift itself!) :D
So here’s how to get it working…
First, we need to create a separate keychain to store the Zwift credentials. You could store them in the main keychain, but I’m a fan of credential separation, so let’s use that.
Launch Keychain Access on your Mac (cmd + spacebar, type in “Keychain”).
You’ll see a number of keychains listed there in the upper-left of Keychain Access. We’re going to create a new one, so go to File -> New Keychain and call it whatever you want.
I called mine “Zwift” so I can remember it when I see it on the filesystem or in the app later. It should default to save in ~/Library/Keychains/. Don’t change this path for now.
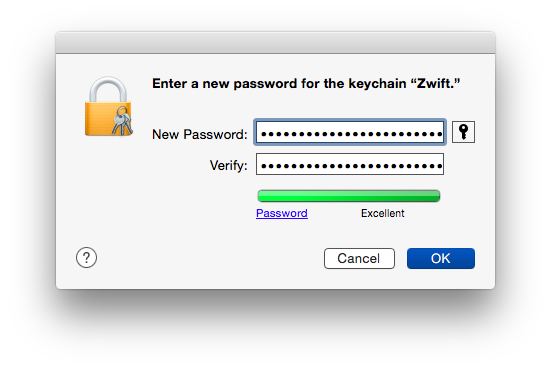
When you click “Create”, you’ll be prompted for a password to secure that keychain. Make it something relatively strong if you want to protect your credentials. If you don’t care, make it weak. Click on “Ok” and it will be created and saved.
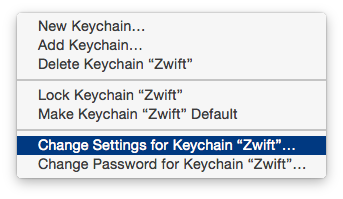
Now right-click on the new keychain you just created in the list and select “Change Settings for Keychain Zwift”. We’re going to adjust the timeout when you have to re-enter your password to unlock this keychain.
If you want a fully automated login, where you never have to enter a password or interact with this at all, uncheck both boxes, so it doesn’t lock after inactivity or when your computer goes to sleep.
If you prefer a bit more control/security, change the settings as you see fit.
Mine looks like this:
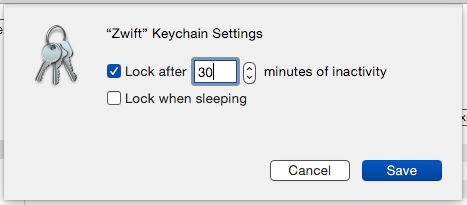
Click on “Save” to save those settings.
Next, we need to add an account to the keychain. This will be your Zwift account, the same one you use to log into Zwift itself in the app and on the website. Click the little [+] at the bottom of the Keychain Access window to create a new entry. Here’s what it should look like when you’ve got it filled out correctly:
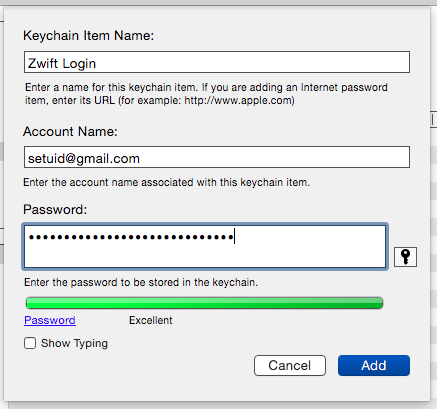
Click on “Add” to add this entry to the keychain. Now you’ll see one entry in your list.
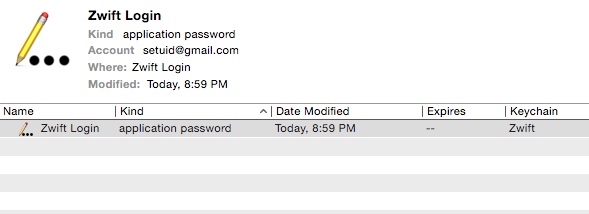
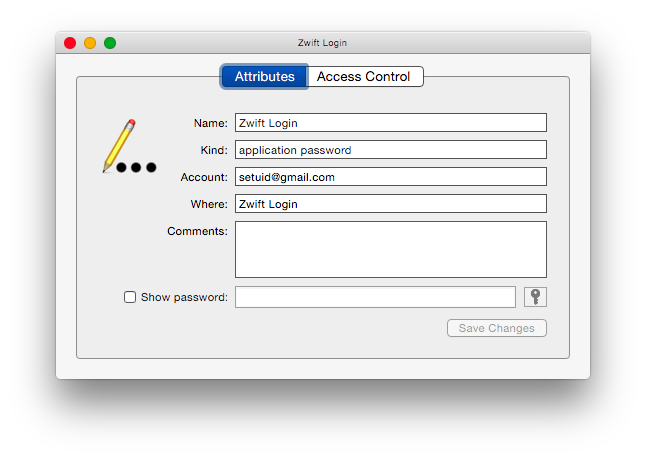
If you right-click on the entry, you can add some more details to it, but you don’t need to. I left it at the defaults.
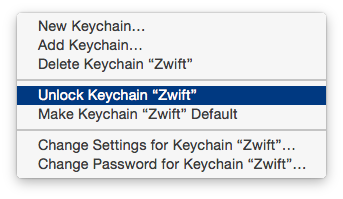
Now let’s test that it locks and unlocks properly. Right-click on the keychain in the list on the left side and choose “Lock Keychain Zwift” (do not accidentally choose “Make Keychain Zwift Default”, or you’ll have a bad time)
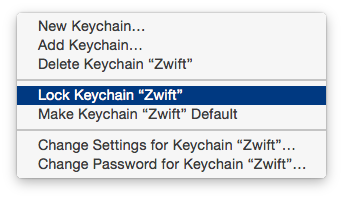
Once locked, you’ll see the litte padlock icon next to it show “closed”. Right-click again and select “Unlock Keychain Zwift”, put in your password and see that it cleanly unlocks and that the padlock shows “open” next to the name:
That’s just about the hardest part of this process. Now on to the code!
I’ve never written a single byte of AppleScript until today, so I decided to give it a shot, learn the language, tried a few early attempts at this storing passwords in the code, then in files I’d read from disk, then encrypted files I’d decrypt, but that was messy. Why reinvent the wheel when OS X already has an encrypted keystore I can use? So I did.
Launch “Automator” (cmd + spacebar) and when prompted, select “Application” and click “Choose” to create one.

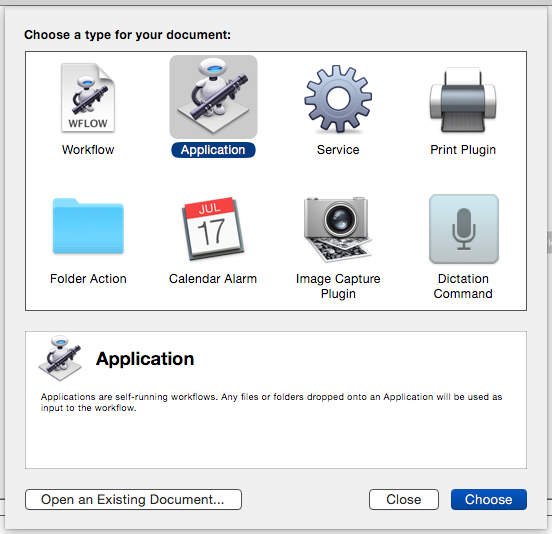
You’ll see a blank screen on the right and some macros and variables on the left. Don’t be scared, this is going to be EASY!
In the search dialog in the upper-left area, start typing “AppleScript”. You should see the list of items shorten to only one, as shown here:
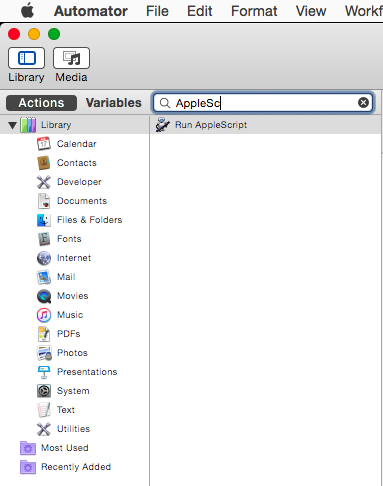
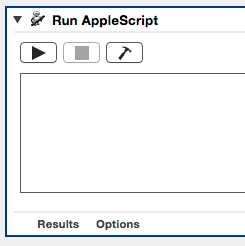
Click that one entry and drag it to the empty canvas area on the right side of the Automator screen. When you let go, you’ll see something that looks like this on the right:
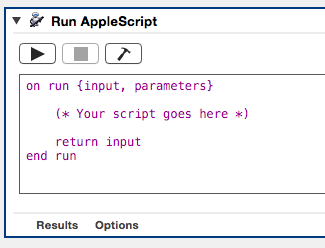
Put your cursor in that window, select all of that default boilerplate and delete it, we’re going to start with a blank script here.
I’ve already written the code for you, so all you need to do here is cut and paste it into this window. Here’s the code (also available as a downloadable file by clicking this link)
on run {input, parameters}
  set userName to long user name of (system info)                 # User's full name
  set userHome to (system attribute "HOME")                       # User's home directory
  set secBin to "/usr/bin/security"                               # Full path to 'security' binary
  set kcName to "\"Zwift Login\""                                 # Keychain Name
  set kcPath to userHome & "/Library/Keychains/Zwift.keychain"    # Path to where the Zwift keychain lives
  set mySedMess to "sed 's/.*\"acct\"<blob>=\"\\(.*\\)\"/\\1/'"   # A horrible mess of sed. Nuff sed.

  # This is ugly, but it's the only way I could find to pull the account name from the Keychain.
  # Don't forget all of those escaping backslashes! (LTS - Leaning Toothpick Syndrome)
  set zUser to do shell script (secBin & " " & "find-generic-password 2>&1 /dev/null -gs " & kcName & " " & kcPath & " | grep acct | " & mySedMess)

  set zPass to do shell script (secBin & " " & "find-generic-password -wa " & zUser & " -gs " & kcName & " " & kcPath)

  activate application "Zwift"

  tell application "System Events"
    delay 3                                              # Wait for the login dialog to show up
    set frontmost of process "Zwift" to true             # Force Zwift process to the front
    keystroke tab                                        # Put the cursor into the Email field
    keystroke zUser                                      # Send the username (from above)
    keystroke tab                                        # Jump to the Password field
    keystroke zPass                                      # Send the password
    keystroke return                                     # Press Enter to start the fun!

  end tell
  return input
end run
Cut and paste that into the script window (or use the direct link to the file).
At the very top of the file are a couple of minor tunables. Make sure those match what your system and environment are set up with. If you chose a different name for your keychain file for example, you’ll need to change that here. Likewise with the name of the account’s title within that keychain; change that here as well. If you called it “Zwift” and used “Zwift Login” as I did, you don’t need to change anything.
Also, there are some delays built into the script (search for the word ‘delay’). If your system is a bit slower, you may need to increase that delay by a few seconds.
cmd + S to save the script, which should prompt you for a name. I called this one “AutoZwift”, but you can call it whatever you like. This will become its own standalone .app file you can launch from anywhere by double-clicking on it, so feel free to put it wherever you want.
We’re not quite done! Before you close Automator, let’s make sure it works as expected. Click the little “Run” button on the far, upper-right corner of the Automator GUI to test the script. If you got everything correct, you should get no warnings, errors or popup dialog boxes.

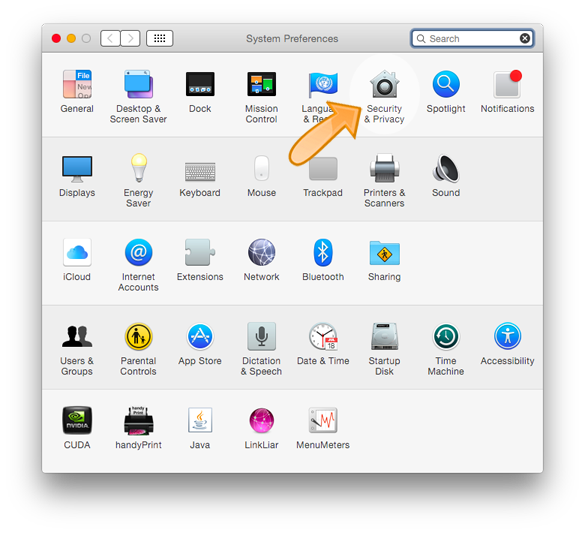
One last thing: Because you’re asking Automator to read events and pass keyboard events into windows owned by other processes, you need to grant Automator the permission and access to do so. To do that, go into your System Preferences -> Security & Privacy and make sure you enable (check the box) Automator to do so:

Now you should have a fully-automated Zwift login icon with credentials secured by your OS’ built-in encrypted keystore.
Good luck and #RideOn!
(p.s. For those run Zwift on Microsoft Windows, I’ve written a detailed HOWTO for you too! Stay tuned for more great HOWTOs for Zwift!)
