
Snapshot backups of EVERYTHING using rsync (including Windows!)
Tags: Backups, FreeBSD, linux, Perl, rsnapshot, rsync, servers, sync, Windows
 Let me just start by saying that I have a lot of data. In multiple places. Some on laptops, some on servers, some on removable drives and mirrored hard disks sitting in a bank vault (yes, really). Lots of data on lots of systems in different states and locations: client data, personal data, work data, community data and lots more.
Over the years, I’ve tried my best to unify where that data is sourced from, for example by relocating the standard “My Documents” location on all of my Windows machines (physical and virtual), to point to a Samba share that is served up by a GELI-encrypted volume on my FreeBSD or Linux servers. That part works well, so far, but that’s only a small piece of the larger puzzle.
Over the last decade, the amount of data I’m holding and responsible for managing has grown significantly, and I needed a better way to manage it all.
There are plenty of backup solutions for Linux including the popular Amanda and Bacula, but I needed something more portable, leaner and much more efficient. That quest led me to look to find Unison mostly due to it’s cross-platform support, but it was still a bit more complicated than I needed.
So I kept looking and eventually found rsnapshot, a Perl-based tool wrapped around the standard rsync utility written by Andrew Tridgell.
Since I’d already been using rsync quite a bit over the last 10 years or so to copy data around as I needed it and to perform nightly full backups of my remote servers, I decided to look into using rsync to manage a new backup solution based around incremental backups as well as full backups.
I’m already using rsync to pull a couple of terabytes of mirrored data to my servers on a nightly basis. I’m mirroring CPAN, FreeBSD, Project Gutenberg, Cygwin, Wikipedia and several other key projects, so this was a natural graft onto my existing environment.
Getting incremental snapshots working with rsnapshot on the Linux side was fairly straightforward. Since it uses SSH by default now, I can secure it to pull my remote server data over to the backup array without much hassle. Here’s what the configuration for that looks like:
# egrep -v '^(#|$)' /etc/rsnapshot-p1.conf
config_version                        1.2
snapshot_root                         /path/to/encrypted/backup/mount

# I set this, in case the mount fails, I don't want it duplicating
# the tree inside the mount point
no_create_root                        1

interval                              hourly  12
interval                              daily   7
interval                              weekly  4
interval                              monthly 6

verbose                               3
loglevel                              3

logfile                               /var/log/rsnapshot.log
lockfile                              /var/run/rsnapshot.pid

rsync_short_args                      -avSP
rsync_long_args                       --partial --inplace --delete --numeric-ids --relative --delete-excluded
du_args                               -csh

exclude                               spool/squid
exclude                               lib/schroot/mount
exclude                               chroot/debian_32bit/home
exclude                               chroot/debian_32bit/tmp

link_dest                             1

backup  snaps@layeredp1:/cvs/         layeredp1.backup
backup  snaps@layeredp1:/etc/         layeredp1.backup
backup  snaps@layeredp1:/home/        layeredp1.backup
backup  snaps@layeredp1:/subversion/  layeredp1.backup
backup  snaps@layeredp1:/var/         layeredp1.backup
You can see that I’m pulling data from a few places on a server called “layeredp1” as the user “snaps”, and storing it in /path/to/encrypted/backup/mount/layeredp1.backup. The other parameters in the file should be pretty straightforward. rsnapshot comes with well-commented sample configs. I use a separate config file per-backup target. This one happens to be called /etc/rsnapshot-p1.conf, to match the server alias that it references (layeredp1).
I won’t go into the detail here about how rsnapshot works under the hood and how to configure it to manage the hourly/daily/weekly/monthly backups. That discussion is best left to the detailed rsnapshot HOWTO documentation, so read up there for those bits. What I can explain, is how I use rsnapshot to back up everything here, including my Windows machines.
The next step in this process is to make sure that cron will do its magic at each backup interval (hourly/daily/etc.). TO do that, I configured a cron job called “rsnapshot” and put it in /etc/cron.d/. It looks like this:
MAILTO="desrod@gnu-designs.com"
0 */4   * * *           root    /usr/bin/rsnapshot hourly
0 */4   * * *           root    /usr/bin/rsnapshot -c /etc/rsnapshot-p1.conf hourly

30 3    * * *           root    /usr/bin/rsnapshot daily
30 3    * * *           root    /usr/bin/rsnapshot -c /etc/rsnapshot.win.conf daily
30 3    * * *           root    /usr/bin/rsnapshot -c /etc/rsnapshot-t2.conf daily

0  3    * * 1           root    /usr/bin/rsnapshot weekly
0  3    * * 1           root    /usr/bin/rsnapshot -c /etc/rsnapshot.win.conf weekly
0  3    * * 1           root    /usr/bin/rsnapshot -c /etc/rsnapshot-p1.conf weekly
0  3    * * 1           root    /usr/bin/rsnapshot -c /etc/rsnapshot-t2.conf weekly

30 2    1 * *           root    /usr/bin/rsnapshot monthly
30 2    1 * *           root    /usr/bin/rsnapshot -c /etc/rsnapshot.win.conf monthly
30 2    1 * *           root    /usr/bin/rsnapshot -c /etc/rsnapshot-p1.conf monthly
30 2    1 * *           root    /usr/bin/rsnapshot -c /etc/rsnapshot-t1.conf monthly
This calls rsnapshot, passing in the configuration file referenced (via the -c option), so it knows what to back up, from where, and at what intervals. The lines which do not have a config file passed in use the default /etc/rsnapshot.conf file.
One thing to note here, is that I’m backing up my “main” machines (defined in the global /etc/rsnapshot.conf) on an hourly, weekly and monthly basis, but two of the others, I’m not backing it up using the same intervals. If you use separate configuration files, you can make this as simple or as complex as you want.
I run Debian on the machine that runs rsnapshot, so I was initially tempted to put a separate copy of the rsnapshot script into each of the cron directories (/etc/cron.daily/, /etc/cron.monthly/ and so on), but that can get messy since I’d basically have a mostly-duplicate cron job in each of the hourly/daily/monthly directories. That’s sloppier than I’d like, so I went with the single job in /etc/cron.d instead.
That solved the Linux side. Now onto the Windows side where it gets a bit more complicated.
I did some Google’ing and found one solution using cwRsync, but it was a bit problematic, since it directly breaks a working Cygwin install.
That wasn’t an option for me, because I use Cygwin quite a lot. I needed something better and smarter than that, so I decided to install the rsyncd that comes with Cygwin, within Cygwin itself, as a native Windows service.
First, you’ll need to install Cygwin onto your Windows machine. To do that, just go to the main Cygwin site and download their latest installer. Once you’ve downloaded that, just run it and follow the defaults all the way to the end. The only important part you have to remember here is to make sure you expand the [+] next to the Admin section and check that you have selected the rsync server to be installed, as shown here:

I happen to run a Cygwin mirror here so I just pointed the installer there, and it pulled everything from the local LAN instead of downloading everything for each machine I wanted to install this on remotely over the Web each time. This makes things much faster and more accessible for simultaneous, multiple installs. The downside is that the full Cygwin mirror is ~9.5G in size. If you’ve got the space, I highly recommend creating (and sharing!) a Cygwin mirror.
Once you have Cygwin installed, you’ll need to register the Rsync service you’ve installed in the Services applet with Windows, so it starts up when your Windows machine starts up. To do that, you’ll need to run the following [all on the same line], from a command prompt or your Cygwin terminal (Start -> Run -> cmd.exe):
cygrunsrv.exe -I "rsync" -p /cygdrive/c/cygwin/bin/rsync.exe -a "--config=/cygdrive/c/cygwin/etc/rsyncd.conf \

--daemon --no-detach" -f "rsync server service"
If you’re running Windows 2003 or later, you’ll need to pass the username and password to the command above, as follows:
cygrunsrv.exe -I "rsync" -p /cygdrive/c/cygwin/bin/rsync.exe -a "--config=/cygdrive/c/cygwin/etc/rsyncd.conf \

--daemon --no-detach" -f "rsync server service" -u Administrator -w AdminPassword
If you’re running Windows 7, you’ll want to right-click on your Cygwin icon on the desktop, and select “Run as Administrator”, and then run either of the commands above in the shell. If you don’t do it right, you may see this error:
cygrunsrv: Error installing a service OpenSCManager: Win32 error 5:
Access is denied
If you’re using the 64-bit version of Cygwin, your path will be different (changes bolded below):
cygrunsrv.exe -I "rsync" -p /cygdrive/c/cygwin64/bin/rsync.exe -a "--config=/cygdrive/c/cygwin64/etc/rsyncd.conf \

--daemon --no-detach" -f "rsync server service"
If you go to your Services applet, you should now see the new “rsync” service is listed there. Before you can start the rsyncd service on your Windows machine, you need to configure the service using the /etc/rsyncd.conf file. Mine looks like this:
$ cat /etc/rsyncd.conf
motd file                       = /etc/issue.rsyncd
log file                        = /var/log/rsyncd
pid file                        = /var/run/rsyncd.pid
syslog facility                 = daemon

[home]
        comment                 = Home Directories
        path                    = /cygdrive/c/Documents and Settings/
        use chroot              = yes
        lock file               = /var/lock/rsyncd
        read only               = yes
        list                    = no
        strict modes            = yes
        ignore errors        = yes
       ignore nonreadable   = yes
        transfer logging        = yes
        timeout                 = 600
        secrets file         = /etc/rsyncd.secrets
        dont compress           = *.gz *.tgz *.zip *.z *.rpm *.deb *.iso *.bz2 *.tbz

[temp]
        comment                 = Temporary Storage
        path                    = /cygdrive/c/temp/
        use chroot              = yes
        lock file               = /var/lock/rsyncd
        read only               = yes
        list                    = no
        strict modes            = yes
        ignore errors        = yes
       ignore nonreadable   = yes
        transfer logging        = yes
        timeout                 = 600
        secrets file         = /etc/rsyncd.secrets
        dont compress           = *.gz *.tgz *.zip *.z *.rpm *.deb *.iso *.bz2 *.tbz
A few key options are bolded above. In my case, I want to ignore any files which are locked by Windows itself, and continue past them (ignore errors and ignore non-readable handles these). You’ll also notice that I’m passing a “secrets file” to the service in each instance.
Obviously I don’t want my personal data to be readable by anyone who happens to come by the rsync port on these Windows machines, so they are protected by a known username and account in the secrets file. In a later blog post, I’ll show how to further secure this behind sshd running on the Windows side as well.
There’s one last minor thing to note: In your Windows-specific rsnapshot configuration file, you’ll need to add the “--password-file=/etc/rsyncd.secrets” option to the end of the “rsync_long_args” line. Mine looks like this:
rsync_long_args         --partial --inplace --delete --numeric-ids --relative --delete-excluded \

--password-file=/etc/rsyncd.secrets
There are a couple of trickly points to remember when using the secrets file on the Windows side:
- Each line in the secrets file MUST have a carriage return at the end of it, even if there is only 1 line in the file.
- The username that you put into the secrets file does not have to be a valid username on the Windows machine itself
To start the rsync service, issue the following at the command prompt (cmd.exe)
net start rsync
What you’re doing is basically starting up rsyncd on your Windows machine, where it will sit and wait for incoming client connections to send the data to.
To test that, issue the following, from another machine on your network segment (where “10.0.1.75” is the IP of the Windows machine you’re trying to verify):
rsync -av 10.0.1.75::
If you’ve got everything configured correctly, you should see the following output:
$ rsync -avSP 10.0.1.75::
      ____________________,             ______________________________________
   .QQQQQQQQQQQQQQQQQQQQQQQQL_         |                                      |
 .gQQQQQQQQQQQQQQQQQQQQQQQQQQQQQQQ__   |                                      |
 gQQQQQQQQQQQQQQQQQQQQQQQQQQQQQQQQ==   |                    _.---.)           |
 QQQQQQQQQQQQQQQQQQQQQQQQQQQF=         |          (^--^)_.-"      `;          |
 QQQQQQQQQ================!            |          ) ee (           |          |
 QQQQQQQQ                              |         (_.__._)         /           |
 QQQQQQQQ                              |           `--',        ,'            |
 QQQQQQQQ     ~"jjj__,                 |            jgs )_|--')_|             |
 QQQQQQQQ       "jjjjjjjjjj___         |                ""'   ""'             |
 QQQQQQQQ        ~jjjjjjjjjjjjjjjjj__  |                                      |
 QQQQQQQQ        _jjjjjjjjjjjjjj/~~~~  |      The Hippo says: Welcome to      |
 QQQQQQQQ      .{jjjjjjj/~~~~~         |                             _        |
 QQQQQQQQ     .{/~~~~`                 |  ____  _   _   ____  _ _ _ (_) ____  |
 QQQQQQQQ                              | / ___)| | | | / _  || | | || ||  _ \ |
 QQQQQQQQ                              |( (___ | |_| |( (_| || | | || || | | ||
 QQQQQQQQQL_______________,            | \____) \__  | \___ | \___/ |_||_| |_||
 QQQQQQQQQQQQQQQQQQQQQQQQQQQL___       |        (___/  (____|                 |
 4QQQQQQQQQQQQQQQQQQQQQQQQQQQQQQQQ___  |                                      |
 (=QQQQQQQQQQQQQQQQQQQQQQQQQQQQQ====   |       -.-. -.-- --. .-- .. -.        |
   (QQQQQQQQQQQQQQQQQQQQQQQQF=         |______________________________________|
That means the service is configured, started and listening for connections. Great!
To make this easier and work with the hostnames defined in your /etc/rsnapshot.conf file, add the hosts to your /etc/hosts file on the Linux side. You can then verify that with a simple ping. If you’d prefer not having to do that, just define the machines directly using IP addresses in /etc/rsnapshot.confon the Linux machine.
If you changed the “list = no” to “list = yes” in your /etc/rsyncd.conf on the Windows hosts, you would be shown the list of available “modules” to sync to. On one of my public rsync servers, that output looks like this:
$ rsync -av 10.0.1.10::
 ,-----------------------------------------------------------.
 |                                                           |
 |     _._        W E L C O M E   T O                        |
 |    /_ _`.       _____ _ __  _   _                         |
 |    (.(.)|      '  _  | '_ \| | | |  pilot-link.org        |
 |    |\_/'|      | |_| | | | | |_| |  gnu-designs.com       |
 |    )____`\      ` _, |_| |_|\__'_|  sourcefubar.net       |
 |   //_V _\ \        | |                                    |
 |  ((  |  `(_)     __| | a free, open public server for     |
 | / \> '   / \    |____' developers of Open Source Software |
 | \  \.__./  /                                              |
 |  `-'    `-'     Management: desrod at gnu-designs.com     |
 |                                                           |
 | C V S  -  I R C  -  N E W S  -  M A I L  -  C O M P I L E |
 |                                                           |
 | The services here are given gratis to help developers of  |
 | Free Software and Open Source projects a place to meet,   |
 | share ideas, and freely collaborate on projects.          |
 |                                                           |
 `-----------------------------------------------------------'

    Contact: desrod at gnu-designs.com with problems/questions

      If you want your content mirrored here, just ask!

    Note: --checksum (-c) has been disabled on this server


Cygwin          Cygwin East Coast Mirror
CPAN            Comprehensive Perl Archive Network
Gutenberg       Project Gutenberg East Coast Mirror
LDP             Linux Documentation Project Mirror
But you don’t want to openly advertise those modules to anyone anonymously, so keep them locked down from being shown by putting the “list = no” in your /etc/rsyncd.conf on the Windows side.
The default Cygwin banner that you saw when you connected can be changed to anything you want, by modifying the /etc/issue.rsyncd defined in “motd file” in /etc/rsyncd.conf on the Windows side.
That’s it.. you’re done.
Now all you need to do is tweak the configuration on the Windows side to back up whatever you need, restart cron on the Linux side (the machine that will be running rsnapshot for you, i.e. the one with the storage attached to it).
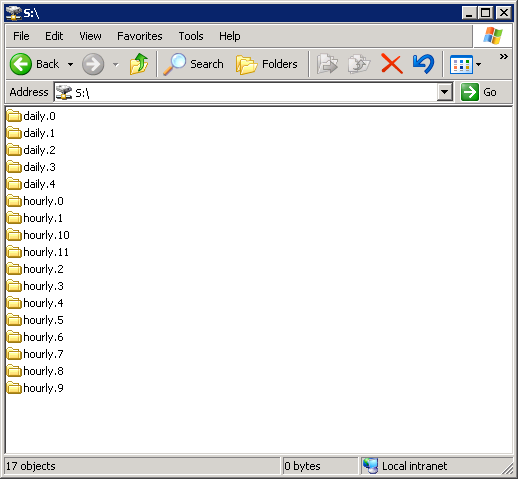
I added one small tweak to the configuration on the Linux side to make it easier for Windows clients to access their snapshot data. I create a Samba share on the Linux side (the host that runs the rsnapshot process and maintains the rsnapshot cron job), to allow the Windows machines to mount their snapshots as a normal drive.
Now users from any Windows machine can see and browse their snapshots and retrieve whatever bits and pieces they might want from their own directory, at whatever interval they see fit. The configuration to enable that looks like this, in my /etc/samba/smb.conf file:
[Snapshots]
        comment         = Temporary Storage
        path            = /path/to/encrypted/backup/mount/Windows Snapshots/
        writeable       = No
        guest ok        = No
        browseable      = Yes
        locking         = No
Pretty simple and very elegant!
SOLVED: Sharing TweetDeck settings across multiple Windows and Linux machines | random neuron misfires said on December 15th, 2010 at 12:40 am quote
[…] metal Windows machines, and back up the data outside of the guests themselves. Since I’m using rsnapshot to back up all of my Windows and Linux machines, I can do this without negatively impacting the running Windows […]