
Archive for the 'Encryption' Category
HOWTO: Quick 7-Zip Trick to Encrypt Your Files with Non-Interactive Mode
I have a lot of data that I archive away on a regular basis, both on my “PC” machines and my mobile devices OTA. I needed a secure, reproducible way to secure those data with a very strong, complex password using extremely tight compression.
Unfortunately, p7zip on Linux and 7-Zip for Windows don’t permit a non-interactive way to pass in a password. So I came up with a quick-and-dirty workaround!
- First, generate a complex password and put this in a file with one line. Make sure there are no leading or trailing characters in this file, including a trailing newline. There should be one and only one line in this file. Here’s are some examples of a password generated with the level of complexity you’ll want for secured archives (42 characters in length, 15 minutes of generated entropy from a hardware dongle):
{Kt8}m.Gs7:g}=%-nfX[F_E(tKs[X,}GrN$mz^?m7^ +S/>>@7DzKafmLkSkS:-"4-*@k)#u@mQ>"=7j_vvu,! <prX9WG#h,t-Ka`poA9rhJWc]H9M}`NA(8_93tD\hR - Now with that password in a file, run the following loop to compress the data and pass in the password inline.
You’ll notice that on Windows, I use Cygwin here, because I can create scripts and retain previous commandline history to reproduce this on a regular basis.
I’m also using lzma2 here because it gives me slightly tighter compression for minimally more CPU time to generate the archives.
On Linux
cat your-pw-file | for i in *.xml; do 7z u -t7z -m0=lzma2 -mx=9 -mfb=64 -md=64m -ms=on $i.7z $i -p --; done;
On Windows (using Cygwin)
cat your-pw-file | for i in *.xml; do do /cygdrive/c/Program\ Files/7-Zip/7z.exe u -t7z -m0=lzma2 -mx=9 -mfb=64 -md=64m -ms=on $i.7z $i -p --; done;
- To verify that the files are properly encrypted and the right password works as expected, test as follows:
On Linux
cat your-pw-file | for i in *.7z; do 7z t $i -p --; done;
On Windows (using Cygwin)
cat your-pw-file | for i in *.7z; do do /cygdrive/c/Program\ Files/7-Zip/7z.exe t $i -p --; done;
- Now you can delete that password file from disk. I can’t stress this enough. Once you’ve used the password, and secured it in a managed password container, you’ll want to delete all traces of it that you do not need in plain sight on disk.
That’s it. Now when you want to decompress those archives, you’ll need to supply the password you generated before. Make sure you keep this password secured in a managed location. A password is only as secure as your ability to manage it.
Good luck!
HOWTO: How to Fix a Forgotten Windows Administrator or User Password with Sticky Keys
I pulled some of my very old Windows VMs out of my backup NAS recently with the intent to pull them into ESXi 5.0.1, and manage them there.
But they hadn’t been booted or updated in 4+ years. I thought I remembered the password for the users of these VMs, but none of my obvious choices worked.
I tried getting into it by booting an ISO loaded with chntpw to blank the Administrator password, but that didn’t work. I tried enabling the Guest account and setting a password there (also with chntpw), but that failed as well.
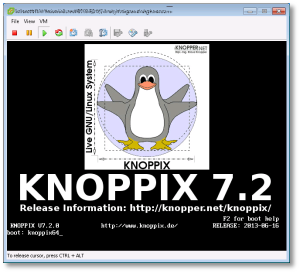
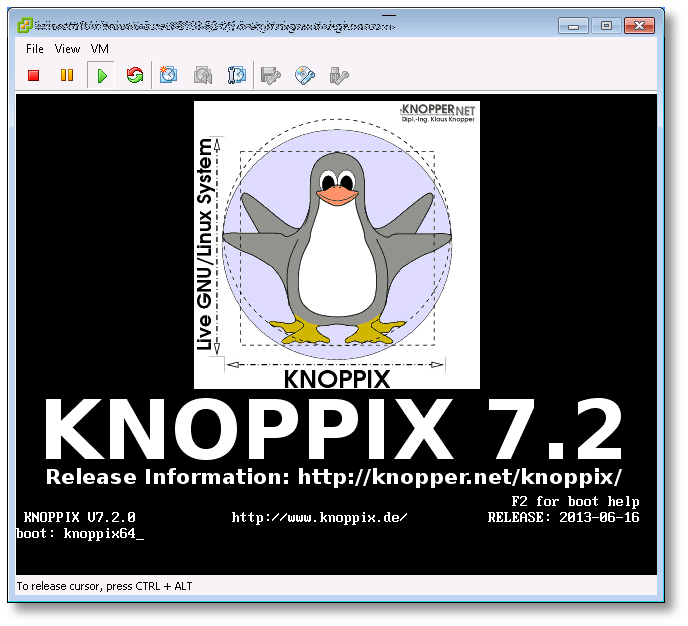
So the next option was to boot up a KNOPPIX DVD in my VM, and follow these steps to reset the password using the “Sticky Keys” trick:
Click image to open full size
- Boot from the KNOPPIX DVD (or Windows PE, Windows RE) in your Windows machine or VM. When you get to the boot prompt, type the following to get a 64-bit environment:
- Let the OS load (graphical or otherwise) and open a shell session (Linux “command prompt”). You’re going to manually mount the Windows drive here, and copy some files around.

- sudo to root
$ sudo su -
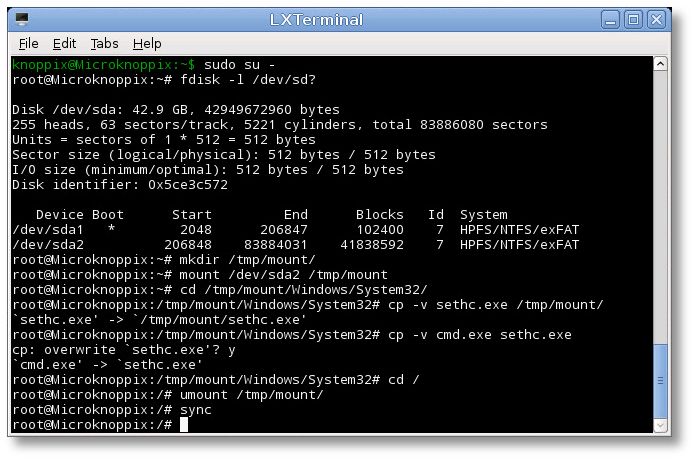
- At the shell, find your Windows drive. It will typically be something like /dev/sda1, as seen from KNOPPIX. The following fdisk(1) command will help you find it:
# fdisk -l /dev/sd?
- Now you’ll need to mount that drive to access it:
# mkdir /tmp/mount
# mount /dev/sda1 /tmp/mount
# cd /tmp/mount
- Change to the System32 directory under the Windows directory in your temporary mountpoint. Note that depending on your OS version, this may have a different case sensitivity. It may be “Windows”, “WINDOWS”, or “WinNT”.
# cd /tmp/mount/WINDOWS/System32
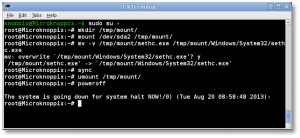
- Now we can preserve and copy files that will help us get into the machine. In this next step, we’re going to back up a copy of “sethc.exe” to the root of the C:\ drive. This is a backup copy we’ll use to restore later, once we’re able to log into the machine.
# cp -v sethc.exe /tmp/mount/
# cp -v cmd.exe sethc.exe
- Now you can unmount the drive, shut down your machine, disconnect the KNOPPIX DVD and boot back up to the drive natively, back to the point where you forgot the Administrator or user’s password.
# cd /
# umount /tmp/mount/
# sync
# poweroff
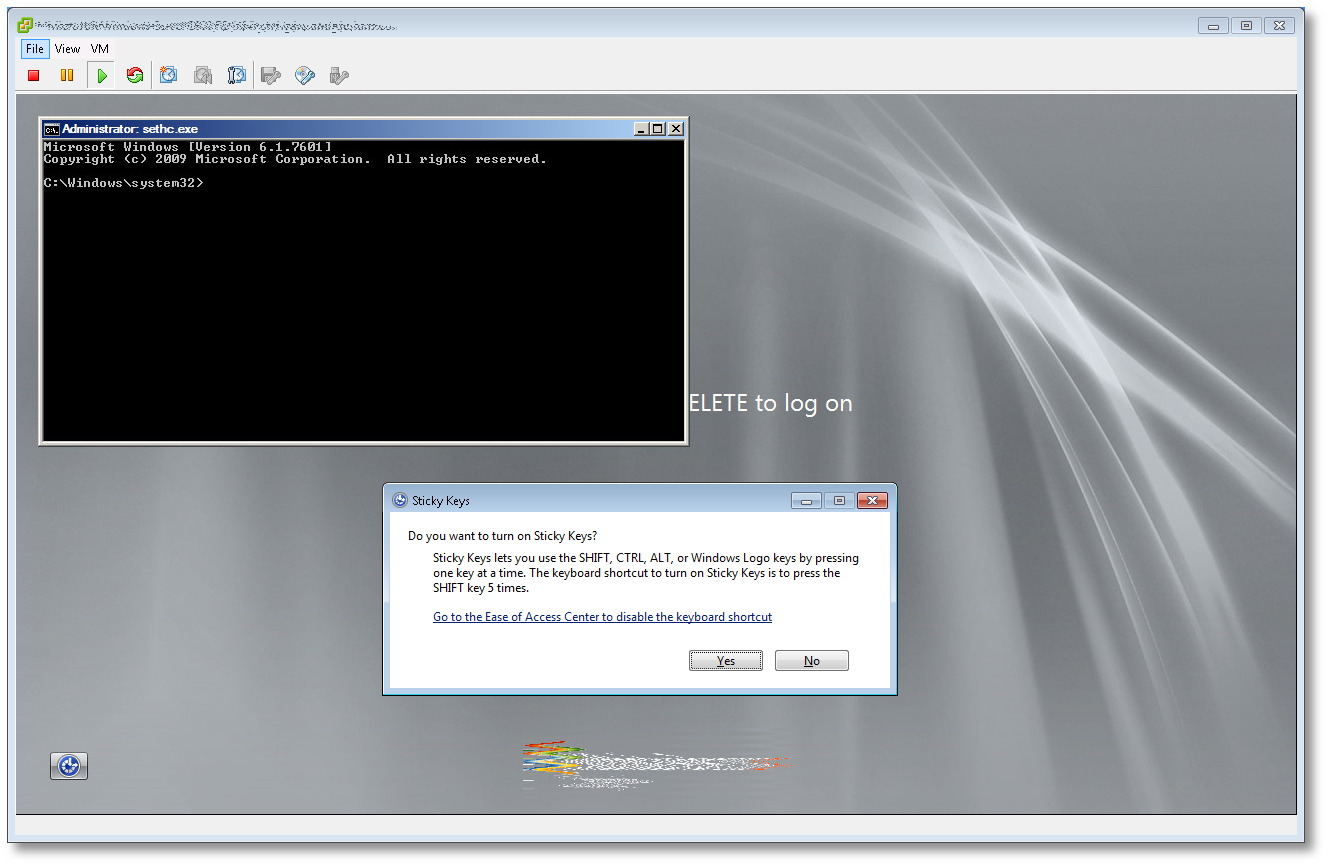
- Once your machine has fully booted, after you see the logon screen, press the SHIFT key five times. Do not hit Ctrl-Alt-Del here, just hit [shift] 5 times in a row. If you’ve done it right, you should see a Windows command prompt where you can enter the following command to reset the Windows password.


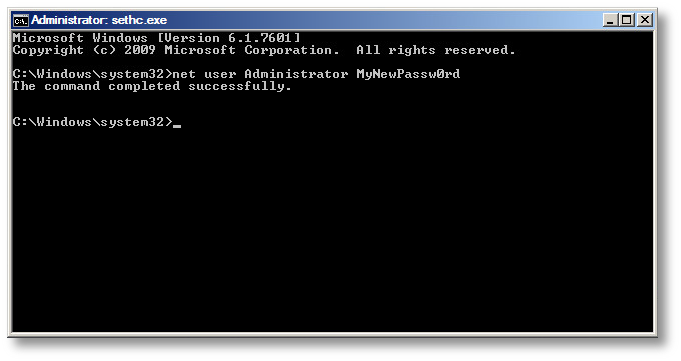
C:\Windows\System32\net user Administrator MyNewPassw0rd
Or if you need to just reset a non-Administrator account password, replace ‘Administrator’ in the above command with the appropriate username. If you don’t know your user name, just type the following to get list the available user names:
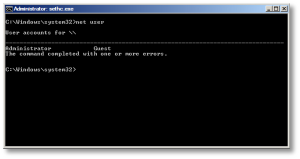
C:\Windows\System32\net user
- You should now be able to log on with the new password you just created.
- Don’t forget to restore C:\seth.exe to C:\Windows\System32\seth.exe, or anyone with access to your machine will be able to use the same trick to reset your password and breach your account! To do that, follow the same steps above (boot to KNOPPIX, mount drive, copy files) to replace the backed-up copy of the original file. You won’t be able to do this while the machine is booted, as those files are locked and will not be replaceable.


That’s it! Now you’ve got your password recovered, and you can log in without issues.
Note: If you want to prevent someone from using this same trick, or using Kon-Boot against your server, you need to install and configure full-disk encryption with a tool like TrueCrypt. Do not use Microsoft’s “Bitlocker” product, as it is easily cracked.
HOWTO: Configure XChat Azure on OS X to connect to Freenode using SASL + Tor
Tags: Apple, Encryption, irc, Open Source, OSX, TorWith all the recent news about the NSA, Prism Surveillance Program and the US Federal Government actively spying on its citizens without cause, I decided to update the detailed HOWTO I posted in early 2011 describing how to connect to Freenode using Xchat (on Linux/FreeBSD) using SASL + Tor. The process is relatively simple, but there is a simplified version now, and it works seamlessly with XChat Azure on OS X, as well as Linux, without having to compile any plugins using GCC.
A win, win, all around! Let’s get started! (click the images below to zoom to full size)
Installing Tor on Your OS X Machine
Configuring Browsers to use Tor (to validate Tor functionality)
Configuring XChat Azure to Speak Through the Tor Proxy
Adding a Freenode Tor Network Server to XChat Azure
Installing the SASL Perl Script to Manage SASL Connections
Connecting to Freenode using SASL + Tor
Installing Tor on Your OS X Machine
To get Tor running on your OS X machine, you’ll need to install it. There are several ways to do this, but the easiest is to use the TorBrowser Bundle, package for OS X.
It’s straightforward to install that, just download and install it as you would any other OS X software. Once you’ve got it installed, you’ll see the main Control Panel, shown here:
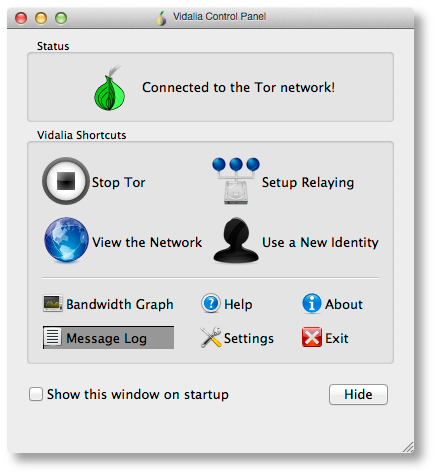
If you see the green “onion” icon in your Finder menubar at the top of your screen, you’re up and running and connected to the Tor network. You can check this further by looking at the “Bandwidth Graph” to see if bytes are actually flowing across your connection.
Configuring Browsers to use Tor (to validate Tor functionality)
Now you’ve got Tor running, you’ll need to verify that it actually works and that you can send and receive traffic over it.
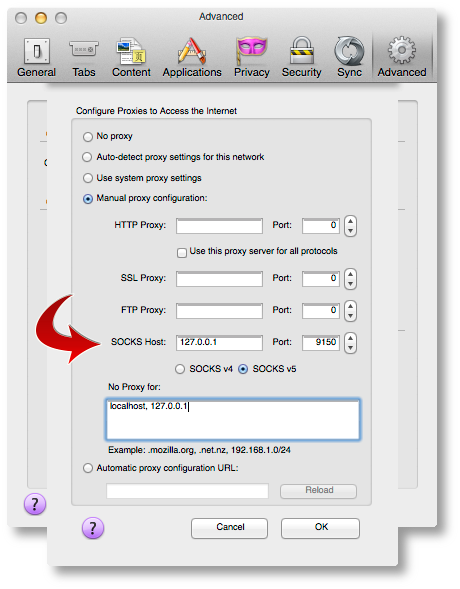
Open your browser of choice (I use Firefox but any browser will work) and find the configuration option in your browser’s Preferences pane for setting a “Proxy Server”. You’ll want to point it to a proxy server address of 127.0.0.1, port 9150, as shown below.
The reason this isn’t the “standard” Tor port of 9050, is because the Tor Browser Bundle project wanted to ensure that they didn’t collide with a system-installed version of Tor, so they went with 9150 instead.
Once you’ve got that configured, point your browser to the Tor Check Site. You should see output that looks like this:
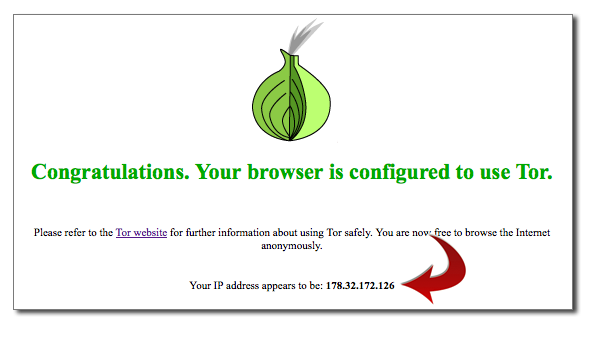
If you’ve gotten this far, you’re almost there! If you see an error message or cannot connect to the Proxy, make sure Tor Browser is running, that it’s showing ‘green’ in your menubar, and that you’re using port 9150, not 9050 in your Proxy port configuration.
Configuring XChat Azure to Speak Through the Tor Proxy
Now let’s configure XChat Azure. Open up your XChat Preferences (Command-,) and go to the “Network setup” page. Here is where you’ll configure similar parameters we just used for Firefox above to permit XChat Azure to communicate across Tor.
Configure it to look like the following values:

Now ALL of your networks will attempt to use Tor, which may not be what you want. We’ll go over that in a moment, so you can exclude (“bypass”) the proxy for public networks.
Adding a Freenode Tor Network Server to XChat Azure
To add a new Network in XChat Azure, you’ll want to go to “File => Network List”, or use Command-S. You’ll see a default network list here.
Click the [+] sign in the lower-left corner to add a new network. You’ll name this “Freenode_Tor” or something similar. Don’t put spaces in the name, this is important.
When you add this network, you’ll want to click on “Show Details” and configure it to look similar to the following two screenshots.
The first tab, you’ll want to double-click the server name line and add a server with the name:
p4fsi4ockecnea7l.onion
And the port:
6697
Make sure you also check the “SSL” box there. This is the SSL port for Freenode servers.

On the second tab, you’ll want to check the two boxes shown. If you want to reject invalid SSL certs (not a bad idea), uncheck that second box.
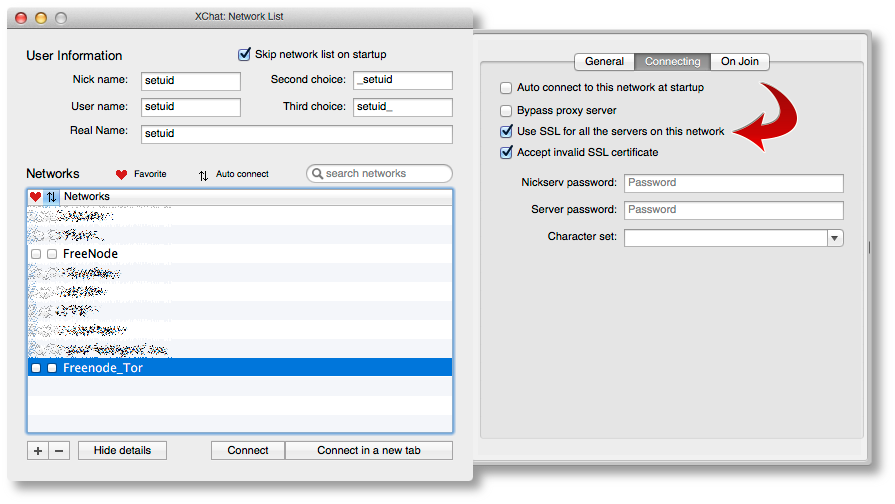
You’ll also see a checkbox that says “Bypass proxy server”. You’ll want to check that box for all other non-Tor networks, but not this one. We actually want to use the proxy server here, so leave it unchecked.
Installing the SASL Perl Script to Manage SASL Connections
Next, we need to install a small script that will be used to manage our SASL connections under XChat Azure. You can find several of those on the Freenode SASL page. I haven’t tested any of the scripts there except the Perl script, so we’re going to use that one for this HOWTO.
Download that Perl script using whatever tool you use, and put it into your $USER/.xchat2/ directory using iTerm or Finder.
Now when you start up XChat Azure, you should see something like this at the top:
[07:58]   Perl interface loaded
[07:58]   Python interface loaded
[07:58]   SASL: auth loaded from /Users/setuid/Library/Containers/org.3rddev.xchatazure/Data/Library/Application Support/XChat Azure/sasl.auth
We need to make sure we set some auth values while this script is loaded. To do that, you’ll run the following command inside the XChat Azure text box:
/sasl set Freenode_Tor <username> <password> PLAIN
/sasl save
So if your Freenode username was ‘foobar’ with a Freenode NickServ password of ‘MyS3cretPas5word’, you’d type:
/sasl set Freenode_Tor foobar MyS3cretPas5word PLAIN
/sasl save
Now your SASL authentication is saved, and you’re ready to connect!
Connecting to Freenode using SASL + Tor
Using Command-S (or File => Network List from the app menus), highlight your “Freenode_Tor” network and click the “Connect” button. It will take a few moments, but you should see something that looks like the following:
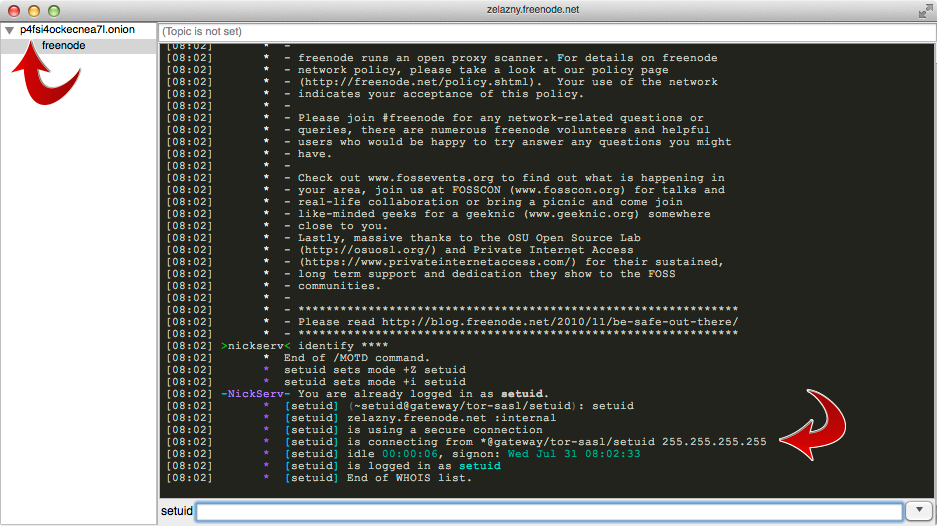
If you see that, you’re all set! Now you can join any channels you wish and be sure that your IRC communications are being anonymized behind the Tor network.
Note: Sometimes you’ll see an error that looks like the one below, when you randomly reach a Freenode server with a wildcard SSL cert.
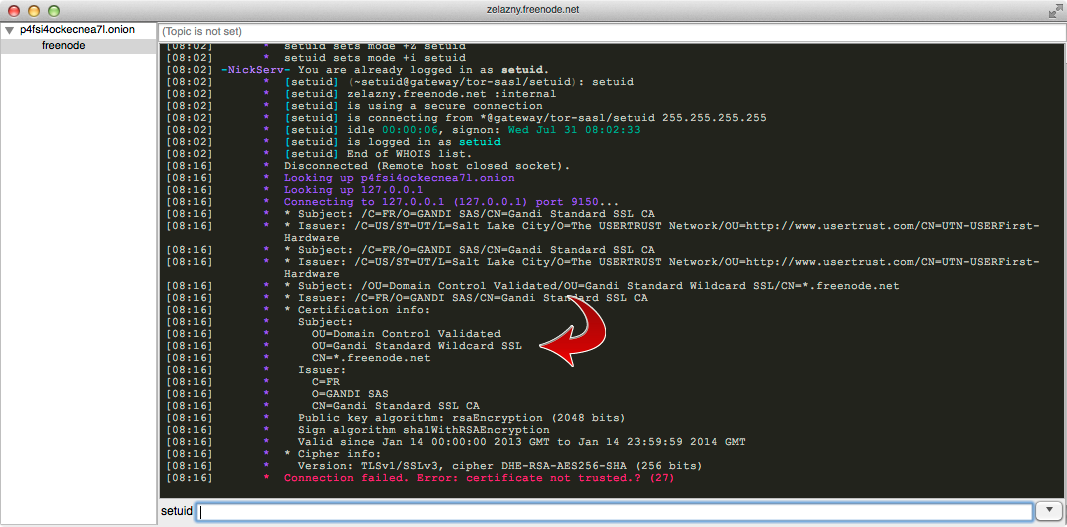
If you run into this, just close XChat down and restart, or attempt to reconnect to the “Freenode_Tor” network again until you get a proper server in the randomized list.
That’s it, good luck!