
Archive for the 'Apple' Category
Running Apache Directory Studio on Apple M1.. cleanly!
Tags: Apache, Apple, Java, LDAP, MacBookThere have been dozens and dozens of posts attempting plenty of weird, unsupportable hacks and workarounds to get ADS working under the ARM cores used by the Apple M1/M2 chipsets. You need a few dependencies installed and configured to get this working, and Rosetta2 does not work in this situation.
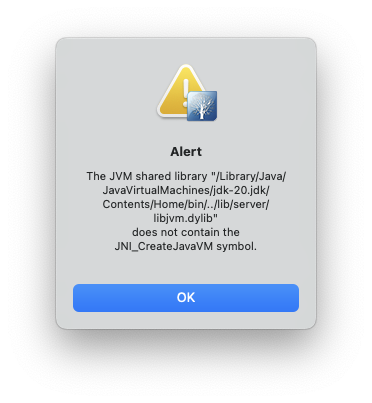
Simply installing Apache Directory Studio from their download page or brew, will result in the following error message when you try to launch it:
This is because the version of Java installed via the OS or from Oracle’s own download page, will not work when it’s the native ARM or aarch64 version.
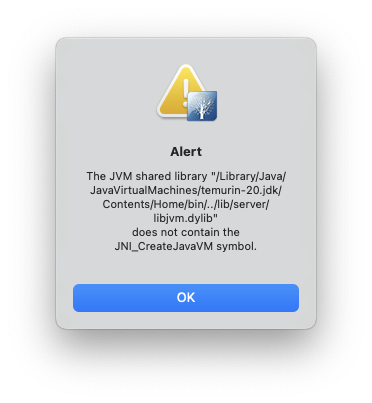
There are many posts that include installing the version of Java from temurin but that too, will give you the wrong version of the JDK to make this work.
brew install --cask temurin
You need at least Java version 11 in order to run Apache Directory Studio, but version 20 will also work, with the steps here.
Also, editing the path in the Info.plist in /Applications/ApacheDirectoryStudio.app/Contents/Info.plist to point to the temurin JDK, will also fail.
There’s an XML block at the bottom of the file that implies you can just point to a different java version you have installed and it will use that. It does, but then crashes with the following dialog, even with the temurin version installed:
<!-- to use a specific Java version (instead of the platform's default) uncomment one of the following options, or add a VM found via $/usr/libexec/java_home -V
    <string>-vm</string><string>/System/Library/Java/JavaVirtualMachines/1.6.0.jdk/Contents/Commands/java</string>
    <string>-vm</string><string>/Library/Java/JavaVirtualMachines/1.8.0.jdk/Contents/Home/bin/java</string>
-->
To see the versions of Java you may have installed, you can run:
$ /usr/libexec/java_home -V
Matching Java Virtual Machines (3):
    20 (arm64) "Oracle Corporation" - "Java SE 20" /Library/Java/JavaVirtualMachines/jdk-20.jdk/Contents/Home
    20 (x86_64) "Eclipse Adoptium" - "OpenJDK 20" /Library/Java/JavaVirtualMachines/temurin-20.jdk/Contents/Home
    17.0.6 (arm64) "Oracle Corporation" - "Java SE 17.0.6" /Library/Java/JavaVirtualMachines/jdk-17.jdk/Contents/Home
/Library/Java/JavaVirtualMachines/jdk-20.jdk/Contents/Home
Ok, enough of the context of the failures… let’s get on to fixing this. You can leave the line you edited into your Contents/Info.plist and let’s get the right version of the JDK installed. The version we install will just replace the version in that same directory, and you won’t need to change it (unless you get a different version of Java in these steps).
Even the Oracle installer refuses to continue when using the x86_64 version:
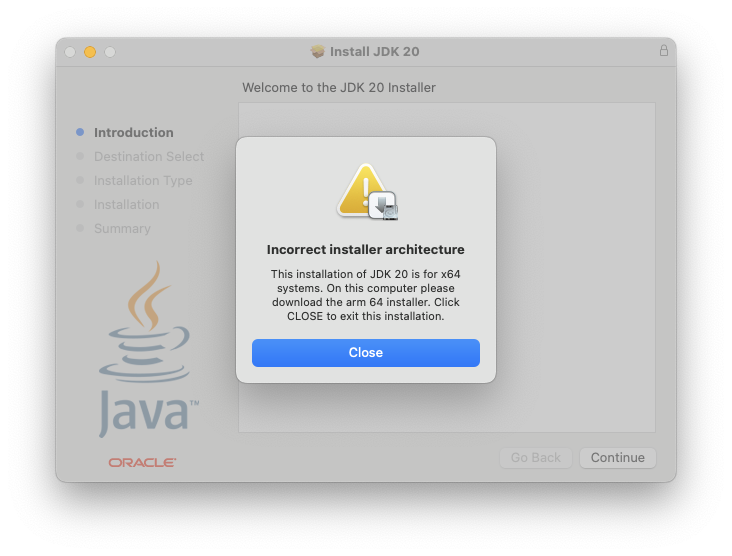
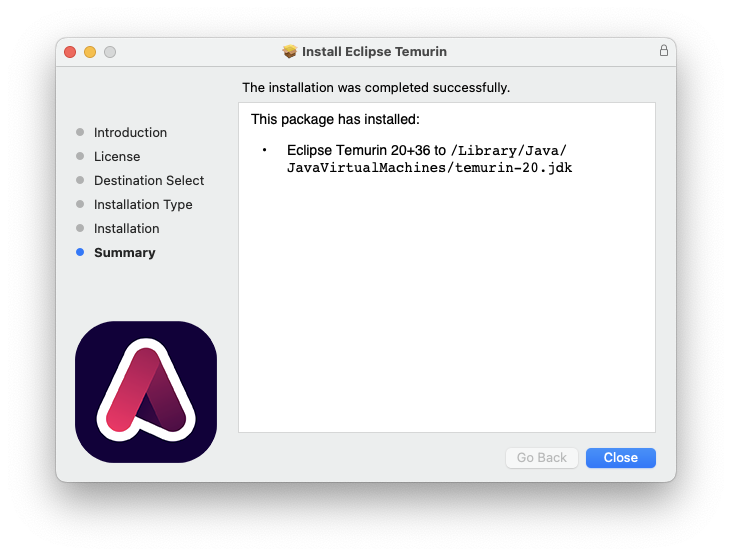
Instead of installing temurn using brew reinstall --cask temurin, you’ll want to visit the Adoptium Temurin download page and grab the version for x86_64, not aarch64, as you normally would get with brew or the Oracle downloads.
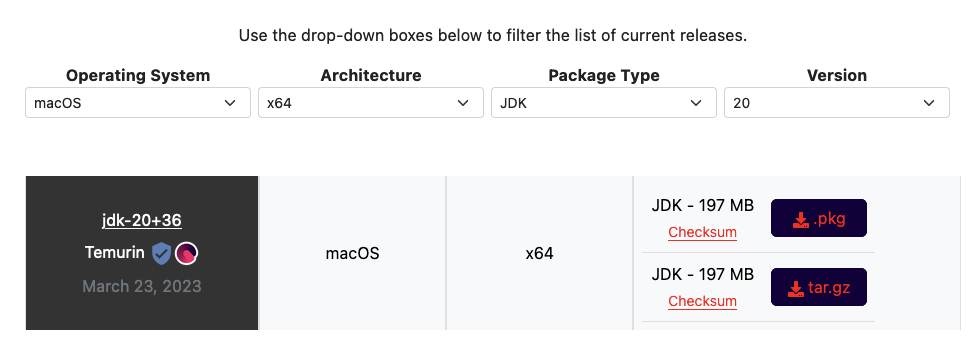
Once you download the x86_64 version of Temurin, it will install cleanly.
Now you can run ApacheDirectoryStudio directly from /Applications or your Terminal, and it will work!

HOWTO: Correct and avoid clock skew on Windows and OS X platforms
 This has come up a lot recently in the context of Zwift rides and races, becasue many rider’s PC and Mac gaming rigs are suffering clock skew. In short, it can be defined as:
“Clock skew is when the clock arrives at different points of the circuit at different times due to the distance, capacitance etc which may cause it to malfunction.”
If you want more detailed set of diagrams and explanations describing clock skew, there’s a great discussion on the StackExchange electronics forum about it.
When your machine is suffering from clock skew, you can inadvertently enter a ride or race earlier or later than you meant to do, and your overall finish time can be later than you expect. For races where the winner is separated from the other podium places by mere seconds or less, having an accurate clock matters!
Here’s how to fix it for both Microsoft Windows and Mac OS X platforms!
Read the rest of this entry »
HOWTO: Fully automated Zwift login on Mac OS X
 Quite a few riders on the Facebook Zwift Riders group have expressed an interest in this, so I decided to take a couple of hours, learn AppleScript and knock this out. Done! (if you’re on Windows, you want this other HOWTO instead)
What this code does, is allows you to create a single icon that will log you into Zwift, with no human interaction needed. It will put in your email, password, click the “Start Ride” button and away you go!
This also leverages the OS X Keychain to store your Zwift email address and password, so it’s secure, not leaked into the filesystem and is able to be called on by any other apps that might need it (ahem, like… Zwift itself!) :D
So here’s how to get it working…
First, we need to create a separate keychain to store the Zwift credentials. You could store them in the main keychain, but I’m a fan of credential separation, so let’s use that.
Read the rest of this entry »
How Many Java Versions is Enough for Mavericks, Apple?
![]() A lot of software outright fails to work on Apple OS X Mavericks.
A lot of software outright fails to work on Apple OS X Mavericks.
It’s a disaster. Almost nothing works right.
Not only is the entire OS noticeably slower, by several orders of magnitude over the previous Lion (10.7.5) was running until a few days ago on my 11″ MacBook Air, but there are dozens and dozens of glaringly-obvious bugs that make me want to go back to my Linux laptop full-time.
Here are some obvious ones:
- The trackpad randomly disables two-finger scrolling and the only way to get it back is to either log out and back in, or restart the machine entirely.
- The direction of the trackpad scrolling was reversed after the upgrade. Dragging fingers down, used to pull the page down, now it pulls the page up. You can flip the toggle to reverse it, but why was it changed at all from the default?
- The audio up/down buttons are about 1-2 seconds behind the actual button press, which is a bit disjointed when you’re trying to determine how far down or up to change the volume for a video or song.
- USB Ethernet used to work plug-and-play, but now if your OS X machine is booted and you connect a USB Ethernet dongle, it will not be recognized, until you reboot the machine with the dongle plugged in. Every time. This feels like Windows to me. I never had to do this with Lion previously.
- There’s a cut-off/echo with the voices in OS X Mavericks. When I have the clock set to announce the time every 15 minutes, instead of “It’s three-fifteen” or “It’s eleven o’clock”, I hear “…ee fifteen” or “…ven o’clock”, the first 1-2 syllables are completely missing, cut off.
There are dozens more that I’ve tripped on (and reported), but they still hamper productive use of the machine.
I also run several apps that depend on Java, including XCode, XMind, The Hit List and others. Most of these just flat-out fail to function. I was so frustrated at the amateurish quality of this major “greatest ever” OS update, that I started investigating myself.
Apple, a plea… how many Java versions, incorrect, non-current Java versions is enough? On this upgraded version of OS X (Lion -> Mavericks), I count 6+ distinct installs!
# OpenJDK Runtime Environment (build 1.7.0-internal-root_2012_07_25_17_59-b00)
./Applications/Xcode.app/Contents/Applications/Application Loader.app/Contents/MacOS/itms/java/bin/java

# Java(TM) SE Runtime Environment (build 1.7.0_45-b18)
./Library/Internet Plug-Ins/JavaAppletPlugin.plugin/Contents/Home/bin/java

# Java(TM) SE Runtime Environment (build 1.7.0_04-b21)
./Library/Java/JavaVirtualMachines/1.7.0.jdk/Contents/Home/bin/java

# Java(TM) SE Runtime Environment (build 1.7.0_04-b21)
./Library/Java/JavaVirtualMachines/1.7.0.jdk/Contents/Home/jre/bin/java

# Java(TM) SE Runtime Environment (build 1.7.0_04-b21)
./System/Library/Frameworks/JavaVM.framework/Versions/A/Commands/java

# Java(TM) SE Runtime Environment (build 1.6.0_65-b14-462-11M4609)
./System/Library/Java/JavaVirtualMachines/1.6.0.jdk/Contents/Home/bin/java

[...]
The only one that is clean and current, is the one I installed:
# "./Library/Internet Plug-Ins/JavaAppletPlugin.plugin/Contents/Home/bin/java" -version
java version "1.7.0_45"
Java(TM) SE Runtime Environment (build 1.7.0_45-b18)
Java HotSpot(TM) 64-Bit Server VM (build 24.45-b08, mixed mode)
Of course, you don’t use it anywhere, no apps are referring to it, and instead you refer to the other versions which crash, break or fail to correctly launch any applications that use these Java interpreters.
Please, don’t tout your OS as being the “greatest work ever”, while providing a slow, buggy, de-evolved experience from the previous versions.
Fix it, or allow us to roll back to the previous version of the OS, which did work.
UPDATE: After much testing, I determined that the short-term “solution” was to rm the symlink to ‘java’ in ‘/usr/bin/’ and point it to the version of Java I installed from Oracle, as follows:
$ sudo ls -l /usr/bin/java
lrwxr-xr-x  1 root  wheel  74 Oct 27 15:55 /usr/bin/java -> /System/Library/Frameworks/JavaVM.framework/Versions/Current/Commands/java
$ sudo rm /usr/bin/java
$ sudo ln -s /Library/Internet\ Plug-Ins/JavaAppletPlugin.plugin/Contents/Home/bin/java /usr/bin/java
After doing this, my Java-based OS X apps started working as expected. This is not a fix, it’s a temporary hack and workaround, but it gets me back up and running on apps that were crashing and failing before.
Apple, please fix this.
HOWTO: Configure XChat Azure on OS X to connect to Freenode using SASL + Tor
Tags: Apple, Encryption, irc, Open Source, OSX, TorWith all the recent news about the NSA, Prism Surveillance Program and the US Federal Government actively spying on its citizens without cause, I decided to update the detailed HOWTO I posted in early 2011 describing how to connect to Freenode using Xchat (on Linux/FreeBSD) using SASL + Tor. The process is relatively simple, but there is a simplified version now, and it works seamlessly with XChat Azure on OS X, as well as Linux, without having to compile any plugins using GCC.
A win, win, all around! Let’s get started! (click the images below to zoom to full size)
Installing Tor on Your OS X Machine
Configuring Browsers to use Tor (to validate Tor functionality)
Configuring XChat Azure to Speak Through the Tor Proxy
Adding a Freenode Tor Network Server to XChat Azure
Installing the SASL Perl Script to Manage SASL Connections
Connecting to Freenode using SASL + Tor
Installing Tor on Your OS X Machine
To get Tor running on your OS X machine, you’ll need to install it. There are several ways to do this, but the easiest is to use the TorBrowser Bundle, package for OS X.
It’s straightforward to install that, just download and install it as you would any other OS X software. Once you’ve got it installed, you’ll see the main Control Panel, shown here:
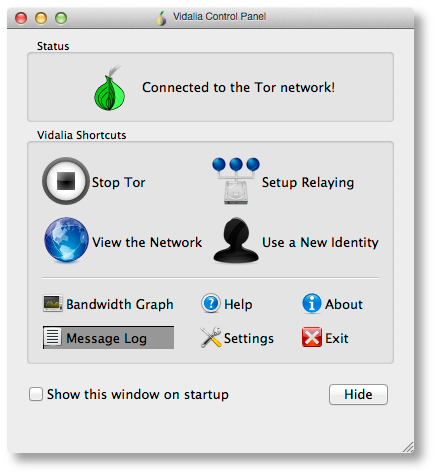
If you see the green “onion” icon in your Finder menubar at the top of your screen, you’re up and running and connected to the Tor network. You can check this further by looking at the “Bandwidth Graph” to see if bytes are actually flowing across your connection.
Configuring Browsers to use Tor (to validate Tor functionality)
Now you’ve got Tor running, you’ll need to verify that it actually works and that you can send and receive traffic over it.
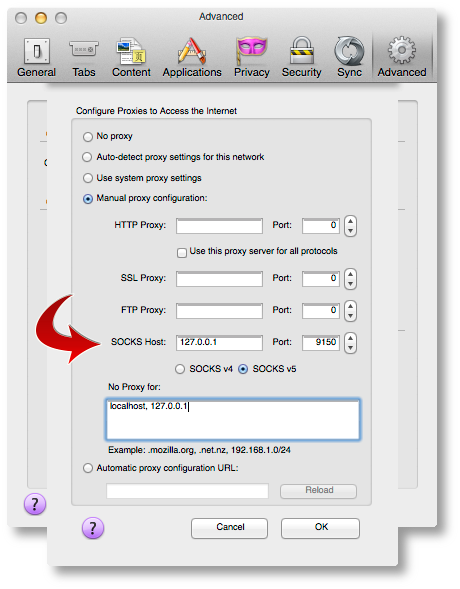
Open your browser of choice (I use Firefox but any browser will work) and find the configuration option in your browser’s Preferences pane for setting a “Proxy Server”. You’ll want to point it to a proxy server address of 127.0.0.1, port 9150, as shown below.
The reason this isn’t the “standard” Tor port of 9050, is because the Tor Browser Bundle project wanted to ensure that they didn’t collide with a system-installed version of Tor, so they went with 9150 instead.
Once you’ve got that configured, point your browser to the Tor Check Site. You should see output that looks like this:
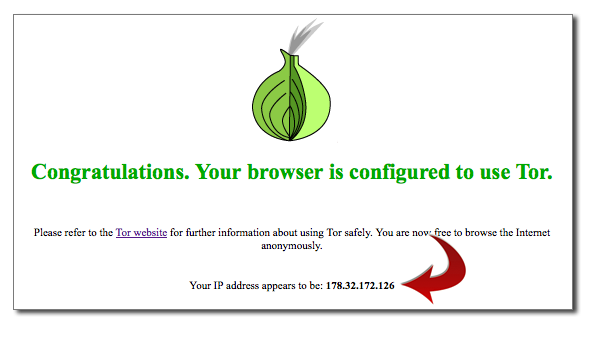
If you’ve gotten this far, you’re almost there! If you see an error message or cannot connect to the Proxy, make sure Tor Browser is running, that it’s showing ‘green’ in your menubar, and that you’re using port 9150, not 9050 in your Proxy port configuration.
Configuring XChat Azure to Speak Through the Tor Proxy
Now let’s configure XChat Azure. Open up your XChat Preferences (Command-,) and go to the “Network setup” page. Here is where you’ll configure similar parameters we just used for Firefox above to permit XChat Azure to communicate across Tor.
Configure it to look like the following values:

Now ALL of your networks will attempt to use Tor, which may not be what you want. We’ll go over that in a moment, so you can exclude (“bypass”) the proxy for public networks.
Adding a Freenode Tor Network Server to XChat Azure
To add a new Network in XChat Azure, you’ll want to go to “File => Network List”, or use Command-S. You’ll see a default network list here.
Click the [+] sign in the lower-left corner to add a new network. You’ll name this “Freenode_Tor” or something similar. Don’t put spaces in the name, this is important.
When you add this network, you’ll want to click on “Show Details” and configure it to look similar to the following two screenshots.
The first tab, you’ll want to double-click the server name line and add a server with the name:
p4fsi4ockecnea7l.onion
And the port:
6697
Make sure you also check the “SSL” box there. This is the SSL port for Freenode servers.

On the second tab, you’ll want to check the two boxes shown. If you want to reject invalid SSL certs (not a bad idea), uncheck that second box.
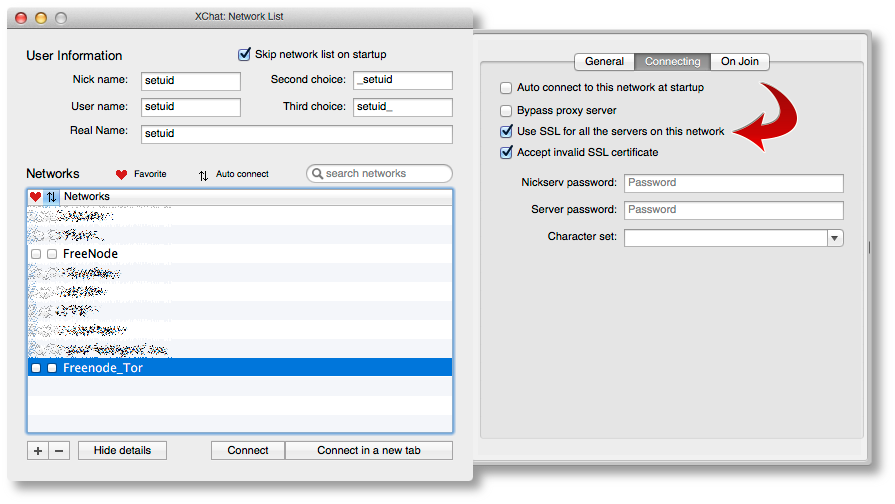
You’ll also see a checkbox that says “Bypass proxy server”. You’ll want to check that box for all other non-Tor networks, but not this one. We actually want to use the proxy server here, so leave it unchecked.
Installing the SASL Perl Script to Manage SASL Connections
Next, we need to install a small script that will be used to manage our SASL connections under XChat Azure. You can find several of those on the Freenode SASL page. I haven’t tested any of the scripts there except the Perl script, so we’re going to use that one for this HOWTO.
Download that Perl script using whatever tool you use, and put it into your $USER/.xchat2/ directory using iTerm or Finder.
Now when you start up XChat Azure, you should see something like this at the top:
[07:58]   Perl interface loaded
[07:58]   Python interface loaded
[07:58]   SASL: auth loaded from /Users/setuid/Library/Containers/org.3rddev.xchatazure/Data/Library/Application Support/XChat Azure/sasl.auth
We need to make sure we set some auth values while this script is loaded. To do that, you’ll run the following command inside the XChat Azure text box:
/sasl set Freenode_Tor <username> <password> PLAIN
/sasl save
So if your Freenode username was ‘foobar’ with a Freenode NickServ password of ‘MyS3cretPas5word’, you’d type:
/sasl set Freenode_Tor foobar MyS3cretPas5word PLAIN
/sasl save
Now your SASL authentication is saved, and you’re ready to connect!
Connecting to Freenode using SASL + Tor
Using Command-S (or File => Network List from the app menus), highlight your “Freenode_Tor” network and click the “Connect” button. It will take a few moments, but you should see something that looks like the following:
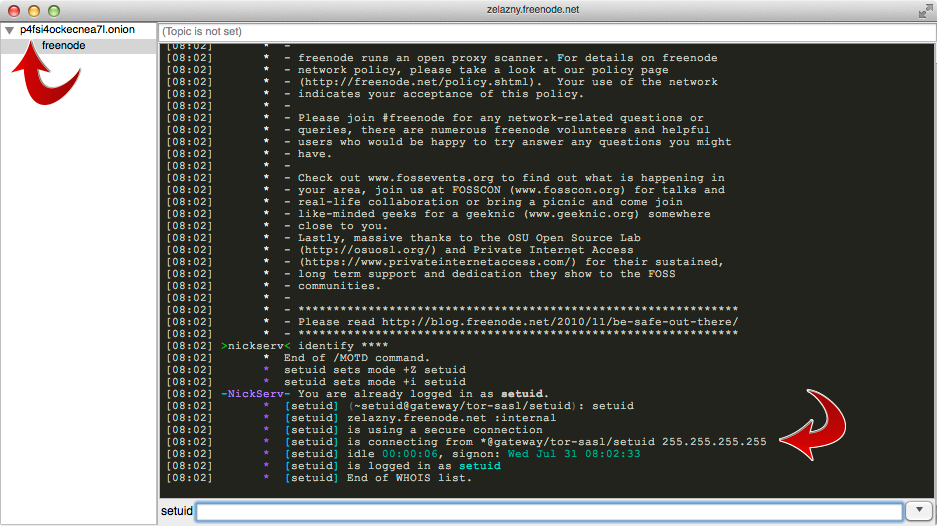
If you see that, you’re all set! Now you can join any channels you wish and be sure that your IRC communications are being anonymized behind the Tor network.
Note: Sometimes you’ll see an error that looks like the one below, when you randomly reach a Freenode server with a wildcard SSL cert.
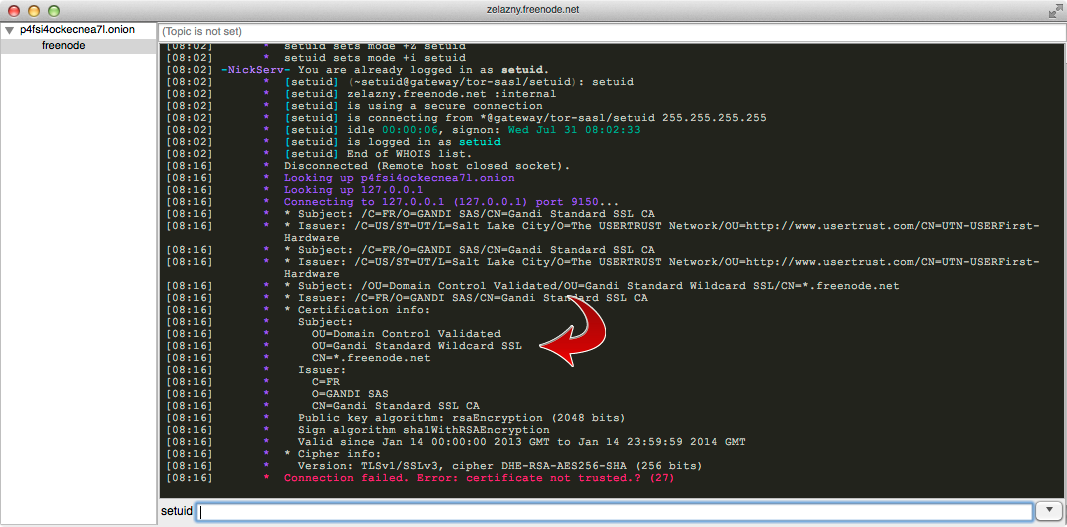
If you run into this, just close XChat down and restart, or attempt to reconnect to the “Freenode_Tor” network again until you get a proper server in the randomized list.
That’s it, good luck!