HOWTO: Rebuild Tasmota firmware with Prometheus support
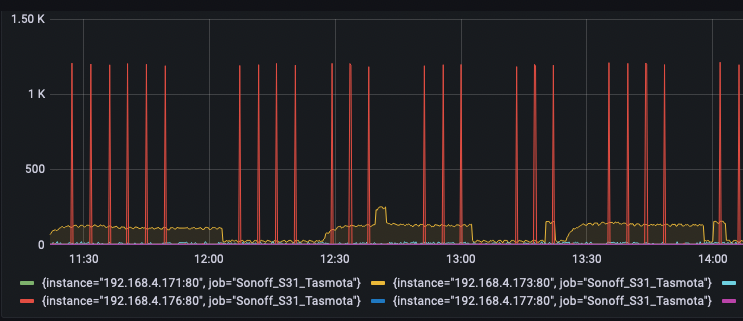
This project was a fun one. I run a lot of devices here, currently 80 according to my network reports, and many of those devices are configured to export their data, status, metrics to a /metrics endpoint that I pull with Prometheus (via prometheus-node-exporter) and then push to Grafana, so I can see fun, pretty graphs of the metrics.
These metrics range from the fan speed, thermal sensors on my laptop, to the ingress/egress packets across my network switch ports to the number of activations per-minute of my basement sump pump plugged into a smart plug, and dozens of other datpoints.
The smart plugs I’m currently using are Sonoff S31 smart plugs (specifically those in this link, because the ZigBee versions do not work with Tasmota firmware). Make sure you get the right version! You can use any plug or device that is already running the Tasmota firmware.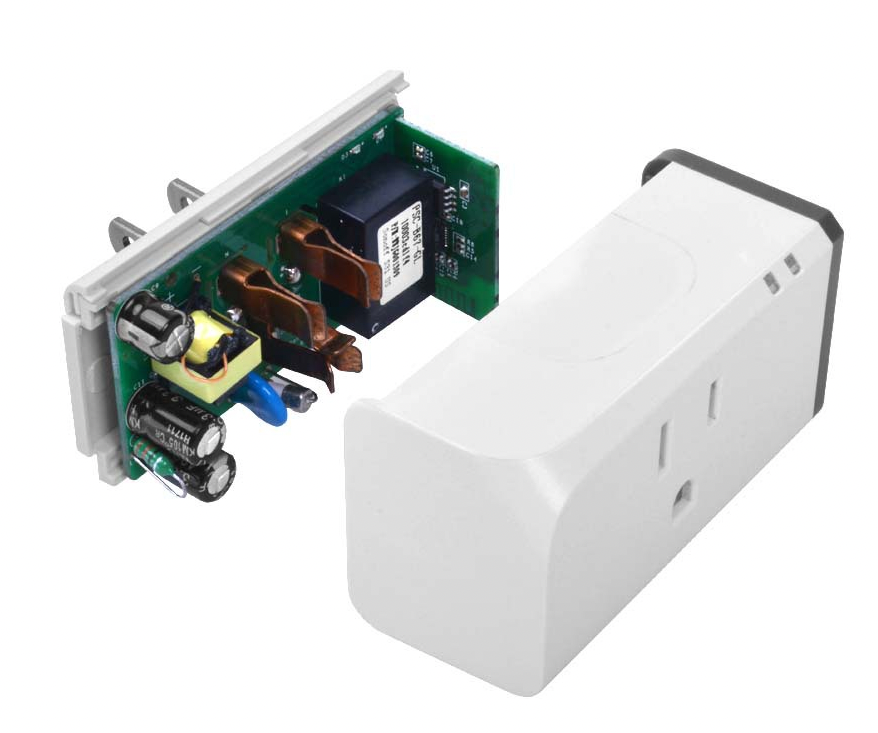
This HOWTO does not go into detail about how to dismantle your plug and reflash it with Tasmota. The S31 plugs make this trivially easy, solder-free, compared to many other plugs on the market that require much more dismantling or re-soldering pins.
These plugs by default, can measure current coming across the terminals, and give me a lot more data about what’s plugged into them. This data can be exported and made visible in Grafana, but not by default. This HOWTO will show you how to rebuild the Tasmota firmware (very easily), and add that capability.
There’s a few quick pre-requisites:
- Download Visual Studio Code. You can download the version directly from Microsoft, or you can use the VSCodium version, which is exactly the same bytes, but compiled without the “phone-home” telemetry and monitoring that Microsoft is known for building into their products. I chose the latter. Functionally, they’re identical.
- Download the Platform IO extension for VSCode. Other tutorials describe searching for this from within vscode, but that no longer works. You’ll want to go straight to the Version History tab and click the “Download” link next to the latest version on the right side.
- Download the Microsoft CPP Tools package in the same way you did for Platform IO in the previous step (choose “Version History” and click “Download” on the right side). The difference here, is you’ll need to be sure you choose the one specific to the platform you’re building Tasmota on. In my case, I’ll be building it on an Apple Silicon M1 MacBook, so I chose that version:

- Clone the Tasmota firmware repository from Github, using using
git clone https://github.com/arendst/Tasmotato some local project directory.
Once you have those 3 pieces downloaded, you can start configuring the build environment and building out Tasmota. Here’s how!
- Launch vscode (on whichever platform you’re using, it supports all of them).
- Bring up your “Extensions” side-panel. On macOS for example, this is done with Shift+Cmd+X. On other environments, the shortcut may be different.
- In the upper-right corner of the extensions side-panel, click the 3-dot menu, and choose “Install from VSIX” at the bottom, as shown here:
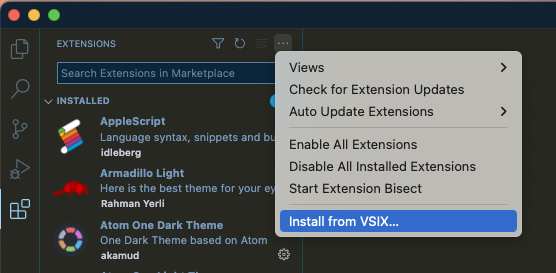
- Choose the location where you downloaded the
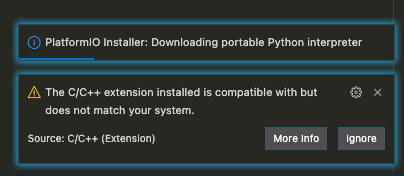
platformio.platformio-ide-2.4.3.vsixfile, and install that. Do the same for thems-vscode.cpptools-1.9.6@darwin-arm64.vsixpackage you downloaded. - After installing, you may be asked to restart vscodium. Go ahead and do that anyway, even if you’re not asked. When you do, you’ll probably notice several other, supplementary packages being installed to support this package.
When I did, I got a weird message that my chosen version of the CPP tools was not correct for my platform (it was correct), so just ignore that if you’re on Apple Silicon, and proceed anyway.
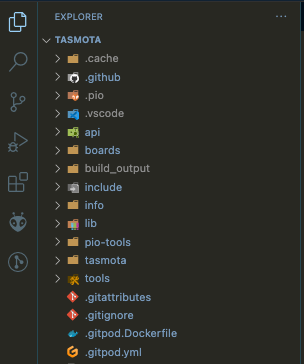
- We now need to open up the project directory of the git clone you pulled in Step 4 of the Pre-requisites section above, so it appears as your current project in the File Browser hierarchy:
- From here, you wan to go to your “Command Palette” in vscode (Shift+Cmd+P on macOS, your key shortcut may vary, but it’s under the “View” menu).
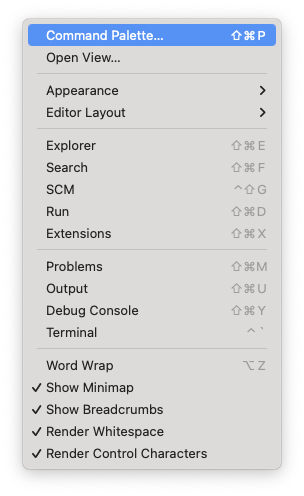
And type ‘platform’, until you see “PlatformIO Build”, which should show you something like this: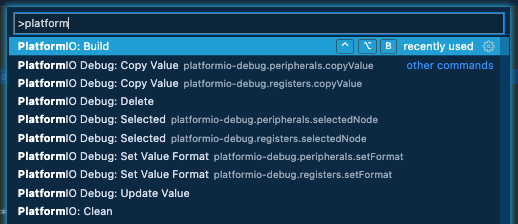
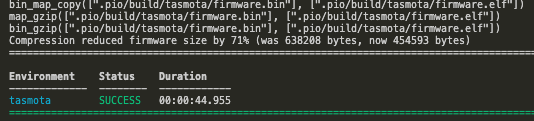
- Now choose that, and let it build to completion. It should be successful, as we haven’t changed anything at all yet. We’re just making sure the basic toolchain works as expected, unaltered.
If you got this far, we’re almost done! - In the Explorer sidebar, navigate down to the
tasmotadirectory inside the project directory (soTasmota/tasmota) and inside that directory, you’ll find a file calleduser_config_override.h. Open that file in the vscode editor and scroll to the bottom. We’re going to add 1 line to this file just before the last line of the file and save it: #define USE_PROMETHEUS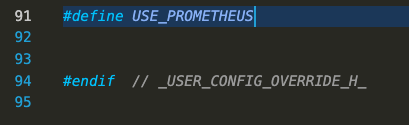
- We also need to choose which firmware we’re going to rebuild with this Prometheus support. In the case of my S31 smart plugs, that’s going to be the ‘sensors’ firmware version. That configuration is found in the file called
platformio_override.iniin the root of the Tasmota project tree. There is also a sample file there you can use for other options. Open that file in the vscode editor window and uncomment (remove the;from the line) the firmware you’re building. After the edits, that file should look like the following: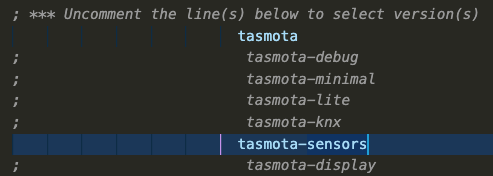
You can uncomment as many firmware types as you want, and they’ll be built simultaneously: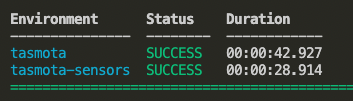
You can find the completed firmware builds in theTasmota/build_output/firmwaredirectory of the tree. - Now you can upload that firmware to your smart plug or other device, and you’ll then have a
/metricsendpoint exposed with some useful data, which you can point your Prometheus configuration at, to query that data on your interval.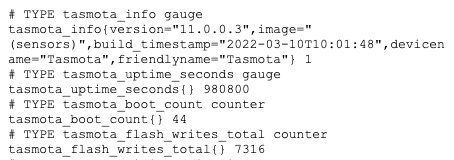
Now go have fun graphing those metrics.. I sure did!